Painter’s Tape Abstract Art

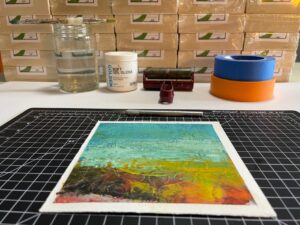
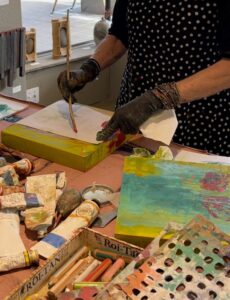
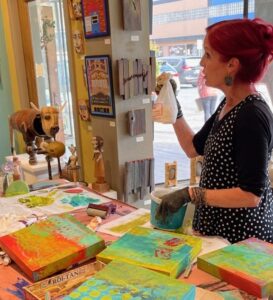
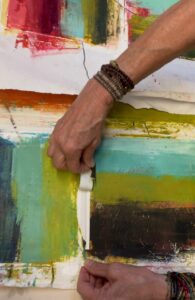
In my last post, Little Paintings, I shared how I painted small oil and cold wax paintings on Arches Oil Paper by taping small squares of the paper to a large piece of newsprint or butcher paper. I briefly mentioned how I remove the tape . . . . this post is what I do with the tape that I removed.

Removing tape from Arches Oil Paper.

Over the past couple of years, I have saved and collected all of the pieces of tape I have removed from the little taped down paintings. (Do you think I’m a bit compulsive? Or obsessive?)

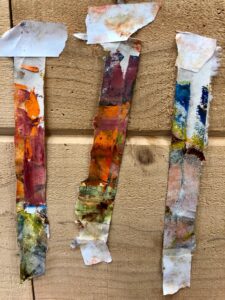
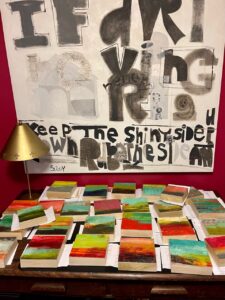
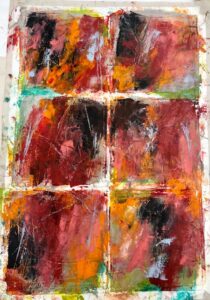
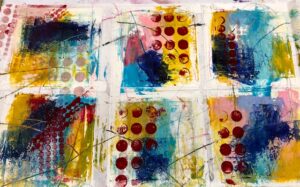
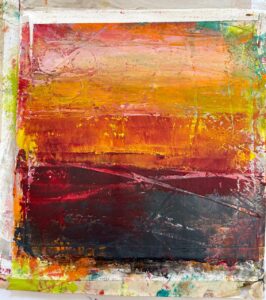
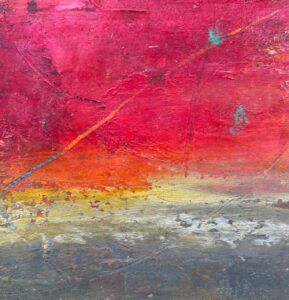
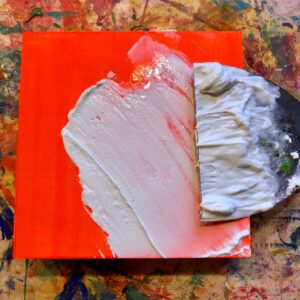
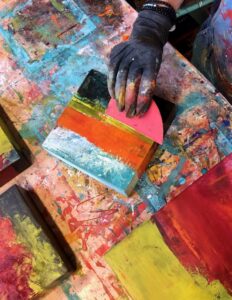
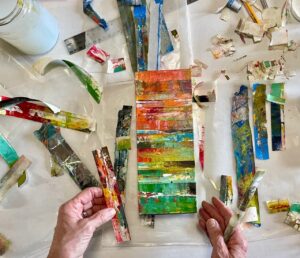
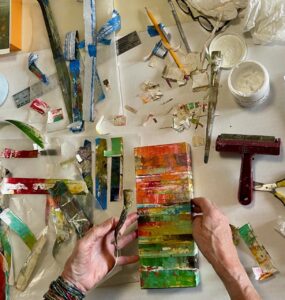
I am always amazed by the beautiful little abstract paintings on the pieces of tape, sometimes even wishing I could paint a larger painting using the pieces of tape as inspiration. . . . and then inspiration struck. What if I used the strips of tape to create an abstract painting? I like stripes, I like color, I like abstract, and I like recycling and reuse. I started auditioning the strips of tape. Before too long, I had a pleasing arrangement and composition and I started gluing down the strips.

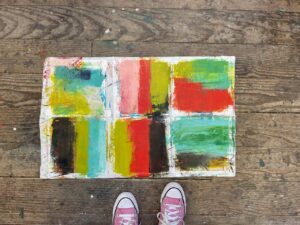
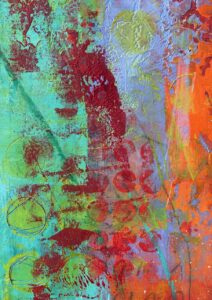
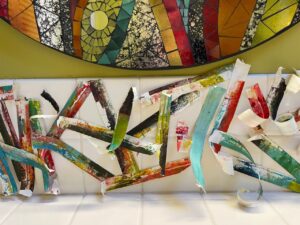
For my first piece, I mounted the tape pieces onto a 4×10 inch cradled panel.

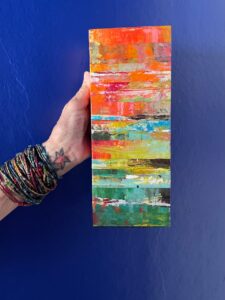
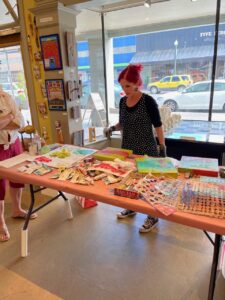
And hung it in our brightly colored kitchen at the House of Color in Astoria.

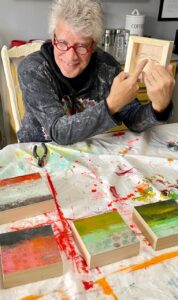
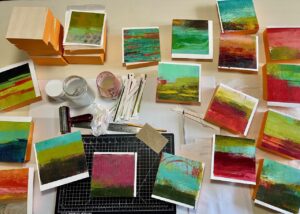
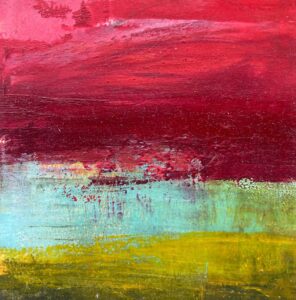
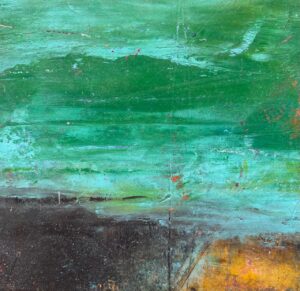
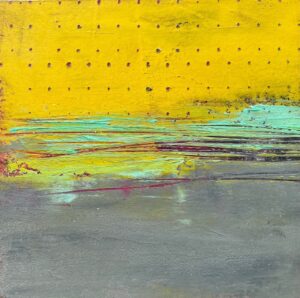
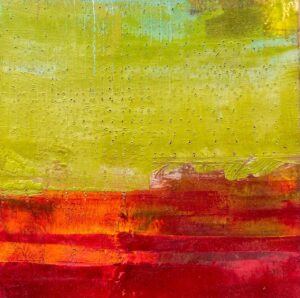
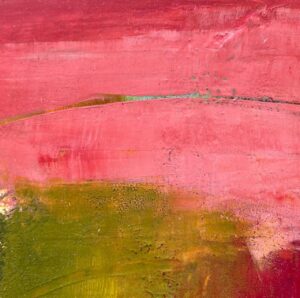
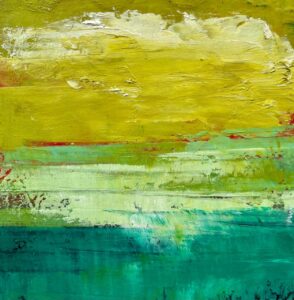
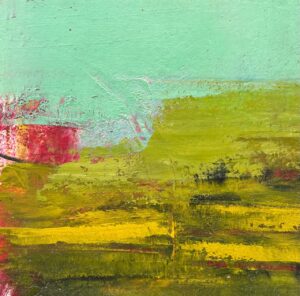
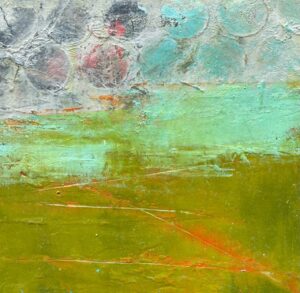
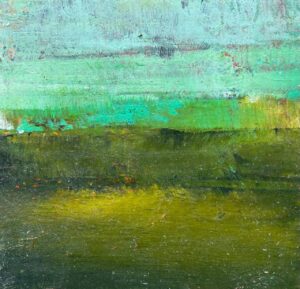
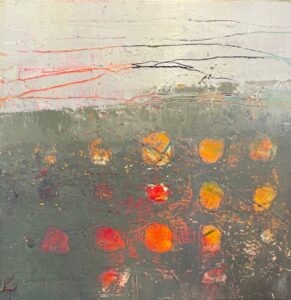
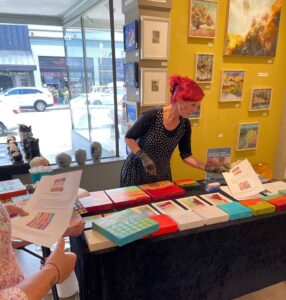
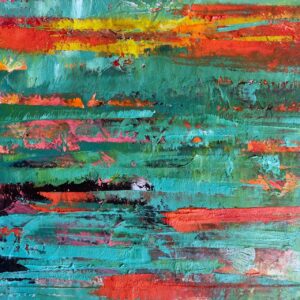
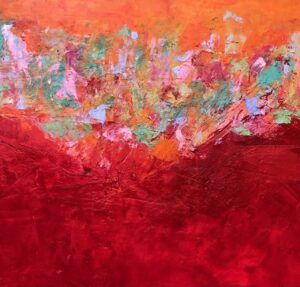
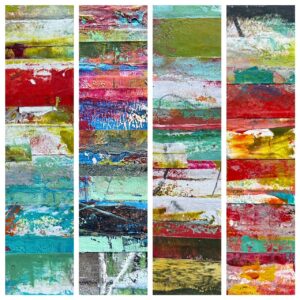
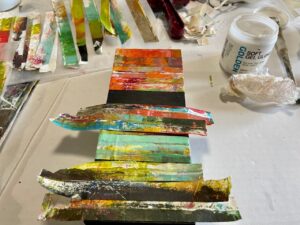
By then I was smitten so I forged ahead and taped down strips of color onto four 6×6-inch cradled panels.

“Profound Harmony,” 6×6 inches, oil and cold wax on white painter’s tape, mounted to cradled wood panel, by Dayna Collins.
“Deep Knowledge,” 6×6 inches, oil and cold wax on blue painter’s tape, mounted on cradled wood panel, by Dayna Collins.
“Changing Emotions” 6×6 inches, oil and cold wax on white painters tape, mounted on cradled wood panel, by Dayna Collins.
“Small Curiosities,” 6×6 inches, oil and cold wax on white painter’s tape, mounted on cradled wood panel, by Dayna Collins.

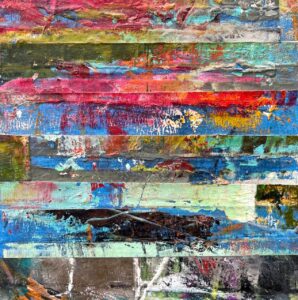
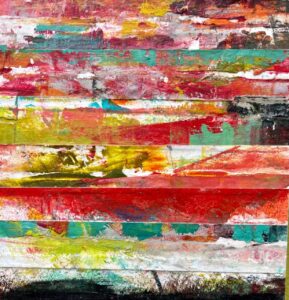
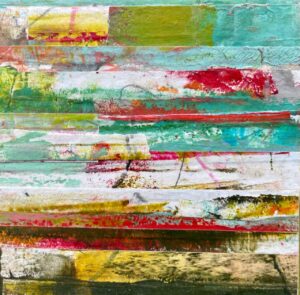
These four pieces have been added to my online shop and are $100 each (which includes shipping in the US).


Little Paintings

It’s that time of year when galleries like to offer smaller pieces of art at a price point that people can purchase original art as gifts — I have always loved this idea, whether for gifts, or for personal collections. I am excited to be sending small pieces of art to my three galleries: Guardino Gallery (in Portland), Salem on the Edge (in Salem), and RiverSea Gallery (in Astoria). I thought that rather than just sharing photos of the art that I have created for these three galleries, I would first share a bit of the background in creating these pieces.

When I teach my Oil and Cold Wax Abstracted Landscapes class at Sitka Center for Art and Ecology, we do warm ups throughout the week using Arches Oil Paper, which we tape (using painter’s tape) onto large sheets of butcher paper or newsprint. I give verbal prompts for things to do on these small squares of oil paper and while giving these prompts, I also follow along and do the prompts on my own squares of paper. By the end of the class, we all have several completed paintings as well as several fun starts for finishing in the future. Here are some examples of the taped down pieces of paper at various stages.

This year, I took several of the sheets of taped down paper pieces, and started tackling the small squares one at a time, adding layers, marks, creating compositions, and resolving issues, working on them while they were still taped down with six paintings per sheet of paper.

Once I resolved the paintings, I removed the tape (WATCH FOR MY NEXT BLOG POST WHERE I SHARE WHAT I DID WITH THE PEELED UP TAPE!), trimmed the edges of the paper where the tape had been, and then glued the painting onto a cradled wood panel. I applied a final layer of cold wax and varnished the edges. By the time I had completed this process, I had 26 paintings, six were 5×5 inches, and the rest were 6×6 inches.

Fast forward to today. All of the pieces have been waxed, buffed, varnished, wired, titled, photographed, inventoried, and boxed. Deliveries will begin happening over the next couple of weeks. Whew. Here are some of the completed pieces heading to my three galleries.

“The Blur of Memories,” 6×6 inches, oil and cold wax, on cradled panel, by Dayna Collins.
“Smoldering Silence,” 6×6 inches, oil and cold wax, on cradled panel, by Dayna Collins.
“Reflecting Sunlight,” 6×6 inches, oil and cold wax, on cradled panel, by Dayna Collins.
“Out of the Silence,” 6×6 inches, oil and cold wax, on cradled panel, by Dayna Collins.
“Happy Silence of Mind,” 6×6 inches, oil and cold wax, on cradled panel, by Dayna Collins.
“In the Silence of the Evening,” 6×6 inches, oil and cold wax, on cradled panel, by Dayna Collins.
“Fearless Love,” 6×6 inches, oil and cold wax, on cradled panel, by Dayna Collins.
“Coastal Riptides,” 6×6 inches, oil and cold wax, on cradled panel, by Dayna Collins.
“A New State of Wonder,” 6×6 inches, oil and cold wax, on cradled panel, by Dayna Collins.
“Untethered in Space,” 6×6 inches, oil and cold wax, on cradled panel, by Dayna Collins.
“Along the Tideline,” 6×6 inches, oil and cold wax, on cradled panel, by Dayna Collins.
“Stirrings of Enchantment,” 6×6 inches, oil and cold wax, on cradled panel, by Dayna Collins.

In addition to the 21 pieces headed to the galleries, priced at $100 each, I have five of the 5×5 inch pieces available on my website. The 5×5 inch pieces are $70 (and include shipping).

“Currents of Cool Wind,” 5×5 inches, oil and cold wax, on cradled panel, by Dayna Collins.
“A Place of Peace,” 5×5 inches, oil and cold wax, on cradled panel, by Dayna Collins.
“A Field of Peace,” 5×5 inches, oil and cold wax, on cradled panel, by Dayna Collins.
“A Thin Fog of Moonlight,” 5×5 inches, oil and cold wax, on cradled panel, by Dayna Collins.
“Fistfuls of Sky,” 5×5 inches, oil and cold wax, on cradled panel, by Dayna Collins


NOTE: The beautiful graphic painting at the beginning of this post, was created by Salem artist, Sloy Nichols.

Getting Messy: Oil and Cold Wax Demo at RiverSea Gallery

I love painting and I love sharing my process and I got to do both yesterday at RiverSea Gallery in Astoria, Oregon (on the northern Oregon coast). I set up my big table, unloaded way too many supplies (is it possible to have too many supplies? we know the answer is no), and by 3:00 a small group of people had gathered to watch me mix up my concoctions and begin sharing techniques on how to apply (and remove) paint.

It was a messy paint fest (messy for me, not for the watchers). I answered questions, added swaths of paint, showed techniques, and got a lot of paint spread in the span of two hours. And I got to paint next to my good friend Stephanie Brockway’s fantastic art watching over me.

I posted four videos on my Instagram feed (DaynaLovesArt) and several people asked questions about what materials I was using. So (tada) I have put together a list of some of the things I used in my demo with some links to where you can find them. It was great how interested and engaged everyone was, both those who attended my demo and my friends on Instagram.

Materials I used for my July 16 demo at RiverSea Gallery. Please note that I am sharing what I used, and there are other brands available. I am also sharing links to these products on Dick Blick, again, lots of art stores carry these products (and I buy most of my materials from our local art store, Art Department, in Salem, Oregon), but for ease of getting information, I am primarily using Dick Blick’s online store.

Gamblin Cold Wax Medium

Gamblin Galkyd (helps speed the drying time)

Fedrix Powdered Marble Dust

Stabilo Woody 3-in-1

Arches Oil Paper Pads

Squeegees from Cold Wax Press

Cold Wax Medium BOOK  (also available on Amazon)

Putty and palette knives. Putty knives from the hardware store are great, palette knives from art stores. But I will say, hardware stores are the best art stores!!

For texture making tools, I scrounge through my kitchen drawers and the garage, and also walk down the aisles of hardware stores for tools and materials that make great texture.

Oil paints. I use a variety of brands. I am partial to Gamblin because they make quality paints (are they are a local Portland company). In general, I look for colors I like, and for paint that is on sale. Some of the brands I use besides Gamblin are: M. Graham, Richeson, and Holbein.

Here are some of the starts from my demos:

And while I have your attention . . . .

If you want the full oil and cold wax experience, I will be teaching September 6-9, 2021, at Sitka Center for Art and Ecology (on the Oregon Coast). I just checked and there are still a few spots available. We will spend four days together in a beautiful studio nestled in the woods of Cascade Head spreading paint, learning techniques, laughing, talking about art, and creating colorful abstracted landscapes.

Artist in Residence At Home

I declared the past eight days an Artist in Residency, self proclaimed because my husband hopped on a jet for the east coast to visit his nieces and I had eight days to myself. I often hem and haw, do a little of this, a little of that, throw in a load of laundry, check out Instagram, read emails . . . . before heading to my studio. Last week I still did some of those things, but I made it a priority to get into my studio. It was a little easier last week not because Howard was gone, well, that was part of it, but because of the oppressive heat. My painting studio is upstairs in our 1926 house so the old furnace ducting doesn’t allow the air conditioned air to reach the second floor, making the upstairs pretty unbearable by noon.

So I made it my mission to get up there every morning and do something, anything. I had a productive week, getting a few things out of the way that I needed to do, but more than that, I painted. I painted just for the joy of painting and spreading paint.

On the first morning, I did a warm up using scraps of brown paper bags from my recent #100dayproject. It felt good to revisit being playful and loose while painting on unimportant little bits of paper.

Then I got to work. One of my projects was to simply gesso a stack of boards for a class I’m taking in July.

I spent a little time most days painting with acrylic on a repurposed canvas and recording my progress.

I prepped panels with plaster, which required multiple steps: acrylic, plaster, sanding, sealing . . . .

I wove these steps into my mornings, allowing things to dry overnight, ready to tackle the next day. One morning I did a reset in my studio, moving things around on my collection of rolling carts, causing a traffic jam at one point.

I was finally ready to pull out the oil and cold wax and start painting. Home again.  . . . the smell of the wax, the feel of the materials as I mixed and spread the buttery concoction . . . .

Many layers of oil and cold wax were applied. It was a time of experimentation, to play, to try out different ideas. I finished a few, several are still in process. Some are on boards, some are on Arches oil paper.

I recommend an Artist in Residence . . . at home.


Restorative Painting: The Architecture of Memory

I met Pat Wheeler at the Oregon College of Art and Craft (OCAC) in 2009. I had signed up for her The Architecture of Memory: Paintings and Constructions class, using plaster, acrylics, and cold wax. I was hooked. I proceeded to take Pat’s class for several years to hone my skills, but also to be in Pat’s presence and experience her energy, passion, and welcoming spirit. Pat and I became friends and I view Pat as an important mentor in my art journey.


A week ago, I received an email from Pat, asking if I could step in for her and teach both of her Pacific Northwest classes: one at OCAC and the other at Sitka. I was humbled, honored, and a bit overwhelmed. Plans were set in motion. Pat wrote a letter to her enrolled students and class descriptions were revised. Pat and I were in steady contact, collaborating on how I could best represent her in the classes, while bringing my own interpretation and teaching style to the classes.

I was out of town during all of this, taking a class on Whidbey Island. Throughout the week, I was furiously writing myself lists, making notes, reading Pat’s messages and her sources of inspiration. My version of the class began to take shape, starting with Pat’s process, folding in the way I have used Pat’s original process, yet made it my own. I’ve taught my own version of the plaster class myself, but somehow, stepping in for Pat, has a certain reverence to it.

If you aren’t familiar with the process, it is a wonderful experience. Here’s a snippet from the class description:

Dayna works in layers, revealing color, texture, and what came before. Using paint, plaster, charcoal, graphite, scraping, sanding, staining, writing, concealing, and revealing, Dayna will take everyone on a journey of discovery, building up a surface, then tearing a portion away, never fully revealing what came before. Look closely and you’ll see word fragments and decomposing texture. Dayna intentionally utilizes the concept of pentimento, where traces and shadows of earlier layers of paintings are revealed.

A few shots from various stages of the process.


Registration is now open at both OCAC (class runs May 30-June 3) and Sitka (class runs from June 5-June 8). If you have any questions about the classes or the process, please email me: dayna@alleyartstudio.com

I will miss seeing Pat this year, but I’m looking forward to her return to the Pacific Northwest next year.