Teaching at Sitka: Part 2

After my first oil and cold wax class at Sitka Center for Art and Ecology concluded on July 3, the staff at Sitka lugged all of my stuff from Smith Studio up to the larger Boyden Studio. I spent the evening getting set up for my second class. I love preparing the studio for teaching.

Evening of July 3: all set up for class to begin on July 5.

I spent July 4th enjoying the quiet of the Sitka campus. The office was closed, and no one was around, so I wandered, rested, and puttered in the studio. On July 5th, I was ready for the artists to arrive.

Distance view. I have three big tables to work on.
My working and demo space.

Like my last post, Teaching at Sitka – Part I, I feel that photos tell the story better than any words that I cobble together. I’ve made comments on each of the photos, so it tells a bit more about the week than just sharing the photos. But I will say, this group was hardworking, productive, energetic, talented, and supportive of each other. All the ingredients for a fantastic workshop.

Side view of my space.
So many techniques to share.
Demo using solvent to scrape off paint.
Getting paint on the boards.
Everyone deep into the process.
Tissue for blotting.
Mixing up paint.
Words matter.
A table of work in progress.
Work in progress.
From above.
Love the swaths of color, interrupted by marks.
An active scene.
A glorious pile of paint.
Work in progress.
Spreading swaths of thick, juicy paint.
Work in progress. Done? Perhaps.
Pink! Work in progress.
More pink! Yes, please.
Early layers.
Work in progress.
Hard-working class.
A lovely, abstracted landscape.
Scraping a grid composition.
Using wonky chunks of driftwood to make wonky marks.
Lunch in the courtyard.
Painting. Layering. Scraping. Contemplating.
More dots and such a great example of complementary colors.
We all thought this piece would make a fantastic album cover!
Framing discussion.
Margaret and her beautiful series using a limited palette.
I’m crazy for stripes and swaths of color – Carol nailed it.
I wanted to call this a “Carnival of Color,” but that’s just me.
More bands of color and marks.
An active workspace.
So many ways to apply paint and make marks.
Sharing work.
A thematic series of work.
Such crazy and unique marks.
Work in progress.
I love the collegial nature of a class.
Applying paint to a very textural and three-dimensional piece.
A vibrant series of work.
I’m always crazy for dots.
An excellent example of a strata composition. And then there’s the color . . .
A successful and colorful grid.
Work in progress. Done? Hope so.
An energetic work in progress.
A beautiful series of lines, marks, and colors.
Such sexy curves.
A lovely and simple abstracted landscape.
A thematic series of work.
Pulling tape and revealing nine little paintings.
I love the solitude at the end of the day.
The peace at the end of the day.
All but one in this class photo!

I have received such wonderful feedback from the artists in my class and I want to share two of the comments. Reading these inspiring and positive words make my heart swell and it is why I love teaching.

The first one from Carol:

I was so grateful to have had the opportunity to be a student in this class. It was amazing to meet Dayna in person, and to be present in her instruction. She provided a manual, many supplies, demos, readings, and many examples of her work in various stages. She was very engaged and provided such positive suggestions and constant energy. It was truly a great pleasure in an incredible setting. . . . I am still processing all that I learned and felt, and continue to feel so grateful. Thank you, Dayna.            Terri

Teaching at Sitka: Part 1

I had the privilege of teaching two classes at Sitka Center for Art and Ecology. The first, June 30-July 3, was in the smaller of the two studios at Sitka, Smith, and with ten students, it was the perfect space.

I taught two classes at Sitka, the first class was in the smaller, lower studio and the second class was in the spectacular upper studio, Boyden.

Because I was teaching two classes and they were back-to-back (I had the 4th of July off between the two classes), I got to stay at Morley House, which was a first for me. I loved this space!

This is where I got to stay for ten days: Morley House.

Now to the good stuff. The class. I could babble on about it, but instead I’m going to share photos – a fraction of the photos I took, but it gives a good look into our four days of art making. The group was talented, energetic, spirited, and hard workers — and they wanted to know if they could sign up for my 2023 class on the final day!

Brand new overalls! Soft fabric . . . and WHITE. I’m ready.
How I set up the oil paints I bring for the class to use.
A demo board.
Picking up supplies.
Pink+handmade holey paper = beauty.
Making room for a beautiful ring.
Just a beautiful blob of paint.
An old wallpaper roller I bought at a flea market in Europe years ago was a huge hit.
All the colors!
Working, working, working.
Blotting with tissue paper, lifting paint, and moving paint around.
Spreading and scraping paint.
Mixing oil paint with cold wax medium.
Such a strong use of color!
Another lover of color!
Carol experimenting with using a solvent to create drips.
A lovely example of a grid composition.
Regina and Liz confer.
Beautiful swaths of color.
Jill contemplates her next move.
My favorite stencil: circles.
Colorful, powerful, and fascinating example of a grid composition.

R&F Pigment Sticks – making a monoprint.
Selecting pigment sticks to try out.
A beautiful, finished painting. Carol started this one in a class with me a few years ago, brought it with her, and brought it to a beautiful finish.
Work in progress.
Encouraging and supporting each other.
Experimenting with drips!
I love the variety of color and marks in this series.
This is a monoprint of the original oil and cold wax painting (Marc let me have the monoprint and it is hanging in my studio).
Looking in . . . .
A beautiful series of magical marks.
Paintings drying in the courtyard,
Mini abstracts.
Ripping off tape to reveal small beauties.
Final day show and tell.

And then I rested.

Color – The Language of Dreams

Last fall, I received the email that always thrills and humbles me: I had been selected by Donna Guardino to have a show in the Main Gallery at Guardino Gallery in June of 2022. I didn’t celebrate too long, but instead studied the schematics of the gallery, the wall spaces to be filled, pulled together a batch of boards, and got to work.

The getting to work initially meant prepping the boards for painting. I knew early on that I wanted to pair art quotes with vivid colors, so right from the beginning these elements were prominent.

Moving boards, applying plaster, creating texture, sanding the plaster, writing on the plaster, sealing the plaster, writing more on the sealed plaster.

After all the boards were prepped (with massive help from my studio assistant), they were ready for paint to be applied.

Piles of oil paint mixed with cold wax.

This part of the process required many layers of oil paint mixed with cold wax. The dominant theme was layers of paint with the writing of quotes in between the layers.

Started out working on these two boards as a diptych.
Writing on all the layers.
Working on quotes.
Blotting some of the oil from R&F Pigment Sticks.
Dripping quotes.
A quote on an early layer of oil and cold wax.
Applying oil and cold wax.
Just another layer of oil and cold wax.
Getting my exercise working on big boards.
Just another day in the studio.
Applying oil and cold wax to create texture and design.
Scrapping off paint.
Work session.
Various stages.
Working on the floor on a huge board.
Contemplating my next move.

After several months of work, the pieces began to take shape. Some boards got scraped, some were finished, but then I decided they weren’t finished so more layers were applied. Writing was always present, but it was in the last six weeks of working that I began applying the words more boldly on the surface of the painted surfaces, and these turned out to be my favorite pieces.

R&F Pigment Sticks are like writing with lipstick.

“A Frenzy of Confessions,” 20×20 inches, plaster, oil, and cold wax by Dayna Collins.

And before I knew it, it was time to stop painting. The oil and cold wax needed time to dry, cure, and set before applying a final coat of cold wax. For the month of May, the paintings were in my studio, in the hallway, and in our bathroom just resting.

Part of the lineup drying.
Frida approves.
Applying final layer of cold wax.
Applying a final layer of cold wax on the finished painting.
Cold wax on a finished painting.

Today as I put together this post, all the paintings have been moved to the main floor of our house. They are being prepared to be wrapped and loaded into a van we had to rent to transport the 44 paintings (yes, 44!) to the gallery in the morning.

Finished . . . and exhausted.

The show hangs on Wednesday, May 25, and opens on Thursday, May 26, with the opening reception from 6-9 pm; the show will be up through June 26. An added bonus is you can see (and shop) all the pieces by going to Guardino Gallery’s website.


Painter’s Tape Abstract Art

In my last post, Little Paintings, I shared how I painted small oil and cold wax paintings on Arches Oil Paper by taping small squares of the paper to a large piece of newsprint or butcher paper. I briefly mentioned how I remove the tape . . . . this post is what I do with the tape that I removed.

Removing tape from Arches Oil Paper.

Over the past couple of years, I have saved and collected all of the pieces of tape I have removed from the little taped down paintings. (Do you think I’m a bit compulsive? Or obsessive?)

I am always amazed by the beautiful little abstract paintings on the pieces of tape, sometimes even wishing I could paint a larger painting using the pieces of tape as inspiration. . . . and then inspiration struck. What if I used the strips of tape to create an abstract painting? I like stripes, I like color, I like abstract, and I like recycling and reuse. I started auditioning the strips of tape. Before too long, I had a pleasing arrangement and composition and I started gluing down the strips.

For my first piece, I mounted the tape pieces onto a 4×10 inch cradled panel.

And hung it in our brightly colored kitchen at the House of Color in Astoria.

By then I was smitten so I forged ahead and taped down strips of color onto four 6×6-inch cradled panels.

“Profound Harmony,” 6×6 inches, oil and cold wax on white painter’s tape, mounted to cradled wood panel, by Dayna Collins.
“Deep Knowledge,” 6×6 inches, oil and cold wax on blue painter’s tape, mounted on cradled wood panel, by Dayna Collins.
“Changing Emotions” 6×6 inches, oil and cold wax on white painters tape, mounted on cradled wood panel, by Dayna Collins.
“Small Curiosities,” 6×6 inches, oil and cold wax on white painter’s tape, mounted on cradled wood panel, by Dayna Collins.

These four pieces have been added to my online shop and are $100 each (which includes shipping in the US).


Colorful and Dynamic Abstracted Landscapes


It felt good to be back teaching at Sitka Center for Art and Ecology. Last year my workshop was cancelled due to the pandemic and I hadn’t signed up to teach this year because of the uncertainty with Covid. As cases began falling earlier this summer, Sitka’s Program Manager, Tamara, reached out to see if I would be interested in teaching a workshop in September. I jumped at the opportunity. As the workshop date approached, I watched as Covid cases once again surged. I was a little nervous about teaching, but Sitka had worked hard to provide a safe place with lots of protocols already in place. A couple weeks before my workshop, I asked Sitka to cap the class at eight students, to ensure that there would be plenty of space between tables in the studio.

Ready for class to start on Monday morning.

I could write about the week of art-making, the learning, the techniques, the epiphanies, the experimentation, the fearlessness, the laughter, the great energy, the hard work . . . . but instead I’m going to do a photo essay, which I think captures the essence of preparation and our week together.

Howard helping clean up the studio.
The studio all set up and filled with so much promise.
Prepping for demos.
Waking up on Monday morning in my little cabin in the woods.
So good to be back.
A brand new gallon of Gamblin’s Cold Wax and a fresh pair of gloves. Yes, please.
Little scraps of paper as inspiration for colors, design, or just to jump start our imaginations.
Early morning in the studio!
The book of knowledge. haha
Tam brought me flowers to match my hair.
Warm up exercise on Arches Oil Paper.
First day demo.
Doing a demo using plaster (an added bonus).
Plaster demo was an added bonus, sharing how to seal the dried and sanded plaster.
Working, strolling, getting started for the day.
Karla creates beautiful palettes.
Working.
Loretta establishing her color palette for the day.
Loretta’s palette. I wonder why I love this so much.
It was a busy, active studio.
Margaret fell in love with this wonky old roller.
Karla at work.
Margaret’s beautiful workspace.
Heidi working fearlessly.
Tam and Louise working through ideas.
The evening glow at the end of a day of painting.
Heidi getting the hang of making beautiful marks.
A vibrant and inspiring palette!
Louise created two dynamic pieces.
Lynn sharing her work.
Tam is a “wicked” painter.
Work in progress by Loretta.
Work in progress by Karla.
Lunch table centerpiece.
Paintings drying outside in the fresh air.
So many works in progress and the beautiful hum of activity.
Early layers by Loretta. Yum.
One of Karla’s color studies.
Heidi playing with drips.
Working.
Work in progress by Lynn.
I love working in the studio after class . . . .
A working studio.
Work in progress by Louise.
Lynn experimenting with drips.
Lynn and Dayna!
Jenn working on Arches Oil Paper.
Tam playing with Transparent Orange glazes. Kapow.
Loretta spreading paint!
Louise scraping off sections of paint.
Getting ready for the day.
Doing a demo on mounting Arches Oil Paper to a cradled birch panel.
Group photo on a beautiful September afternoon.
Thank you to R&F Handmade Paints for donating pigment sticks and allowing everyone to go home with different colors.
Show and tell.
Karla discusses some of her work on our final afternoon.
Margaret discusses some of her completed work.
Lynn discusses her work on our final afternoon.
Nancy does whatever is necessary to get the good shot.
Heidi discusses her work.
Loretta discusses her work.
Tam discusses her work.
Show and tell walkabout.

Some of the work created during the week. . . . .

Art by Louise.
Work by Jenn.
Work by Heidi.
Works in progress by Louise.
Work by Karla.
Work by Margaret.
Section from larger work by Loretta.
Work by Tam.
Work by Lynn.
Work by Heidi.
Work by Louise.
Work by Margaret.
Work by Loretta.
Work by Heidi.
Work in progress by Lynn.
Work by Tam.
Work by Karla.
Work by Jenn.
Work by Lynn.
Work by Margaret.
Work by Tam.
Work by Loretta.
Work by Jenn.
Work by Karla.
Work by Louise.
Ahhhh . . . and they were delicious.

My heart is full and I am feeling grateful.


Getting Messy: Oil and Cold Wax Demo at RiverSea Gallery

I love painting and I love sharing my process and I got to do both yesterday at RiverSea Gallery in Astoria, Oregon (on the northern Oregon coast). I set up my big table, unloaded way too many supplies (is it possible to have too many supplies? we know the answer is no), and by 3:00 a small group of people had gathered to watch me mix up my concoctions and begin sharing techniques on how to apply (and remove) paint.

It was a messy paint fest (messy for me, not for the watchers). I answered questions, added swaths of paint, showed techniques, and got a lot of paint spread in the span of two hours. And I got to paint next to my good friend Stephanie Brockway’s fantastic art watching over me.

I posted four videos on my Instagram feed (DaynaLovesArt) and several people asked questions about what materials I was using. So (tada) I have put together a list of some of the things I used in my demo with some links to where you can find them. It was great how interested and engaged everyone was, both those who attended my demo and my friends on Instagram.

Materials I used for my July 16 demo at RiverSea Gallery. Please note that I am sharing what I used, and there are other brands available. I am also sharing links to these products on Dick Blick, again, lots of art stores carry these products (and I buy most of my materials from our local art store, Art Department, in Salem, Oregon), but for ease of getting information, I am primarily using Dick Blick’s online store.

Gamblin Cold Wax Medium

Gamblin Galkyd (helps speed the drying time)

Fedrix Powdered Marble Dust

Stabilo Woody 3-in-1

Arches Oil Paper Pads

Squeegees from Cold Wax Press

Cold Wax Medium BOOK  (also available on Amazon)

Putty and palette knives. Putty knives from the hardware store are great, palette knives from art stores. But I will say, hardware stores are the best art stores!!

For texture making tools, I scrounge through my kitchen drawers and the garage, and also walk down the aisles of hardware stores for tools and materials that make great texture.

Oil paints. I use a variety of brands. I am partial to Gamblin because they make quality paints (are they are a local Portland company). In general, I look for colors I like, and for paint that is on sale. Some of the brands I use besides Gamblin are: M. Graham, Richeson, and Holbein.

Here are some of the starts from my demos:

And while I have your attention . . . .

If you want the full oil and cold wax experience, I will be teaching September 6-9, 2021, at Sitka Center for Art and Ecology (on the Oregon Coast). I just checked and there are still a few spots available. We will spend four days together in a beautiful studio nestled in the woods of Cascade Head spreading paint, learning techniques, laughing, talking about art, and creating colorful abstracted landscapes.

Artist in Residence At Home

I declared the past eight days an Artist in Residency, self proclaimed because my husband hopped on a jet for the east coast to visit his nieces and I had eight days to myself. I often hem and haw, do a little of this, a little of that, throw in a load of laundry, check out Instagram, read emails . . . . before heading to my studio. Last week I still did some of those things, but I made it a priority to get into my studio. It was a little easier last week not because Howard was gone, well, that was part of it, but because of the oppressive heat. My painting studio is upstairs in our 1926 house so the old furnace ducting doesn’t allow the air conditioned air to reach the second floor, making the upstairs pretty unbearable by noon.

So I made it my mission to get up there every morning and do something, anything. I had a productive week, getting a few things out of the way that I needed to do, but more than that, I painted. I painted just for the joy of painting and spreading paint.

On the first morning, I did a warm up using scraps of brown paper bags from my recent #100dayproject. It felt good to revisit being playful and loose while painting on unimportant little bits of paper.

Then I got to work. One of my projects was to simply gesso a stack of boards for a class I’m taking in July.

I spent a little time most days painting with acrylic on a repurposed canvas and recording my progress.

I prepped panels with plaster, which required multiple steps: acrylic, plaster, sanding, sealing . . . .

I wove these steps into my mornings, allowing things to dry overnight, ready to tackle the next day. One morning I did a reset in my studio, moving things around on my collection of rolling carts, causing a traffic jam at one point.

I was finally ready to pull out the oil and cold wax and start painting. Home again.  . . . the smell of the wax, the feel of the materials as I mixed and spread the buttery concoction . . . .

Many layers of oil and cold wax were applied. It was a time of experimentation, to play, to try out different ideas. I finished a few, several are still in process. Some are on boards, some are on Arches oil paper.

I recommend an Artist in Residence . . . at home.


When a Deadline Looms

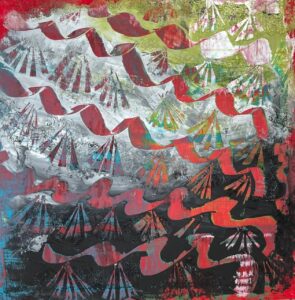
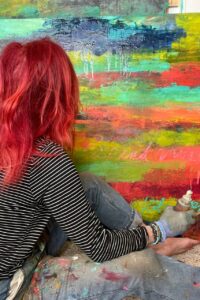
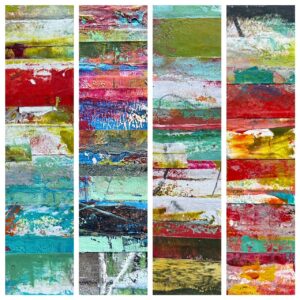
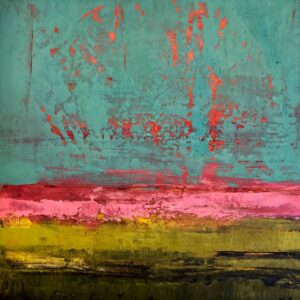
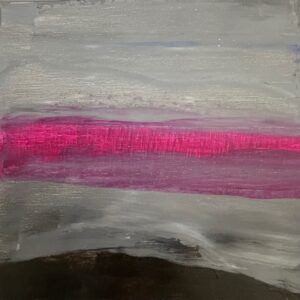
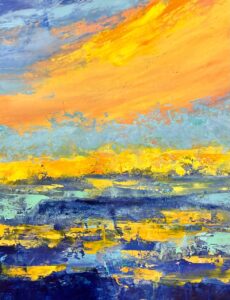
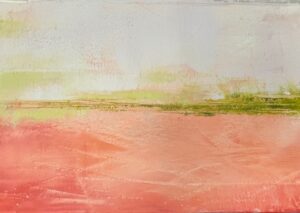
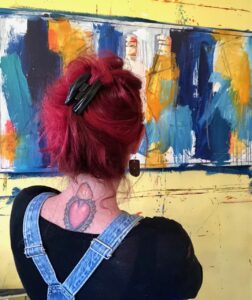
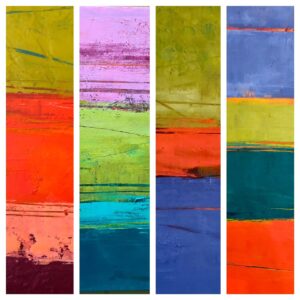
If you read my last post, I shared about my upcoming show at RiverSea Gallery in Astoria and how my initial idea was the theme of waterlines, but somewhere along the way I realized it was no longer a theme I wanted to explore. Instead, I started thinking in bands and swaths of color, a design element I have been smitten with for years. My thoughts went to how I have always been attracted to color field art, so as I painted and worked on my boards, the idea of working in fields of color filled my consciousness. The words Emotional Alignments became the title of my show, and propelled me forward. I knew where I was going and I was excited to get into my studio every day; I had an enthusiasm I hadn’t had in a long time.

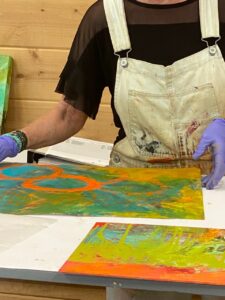
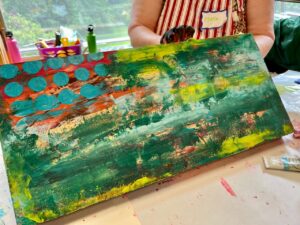
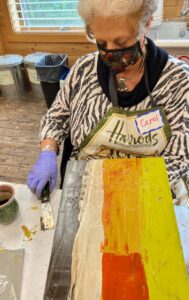
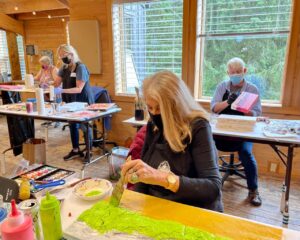
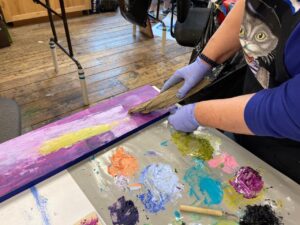
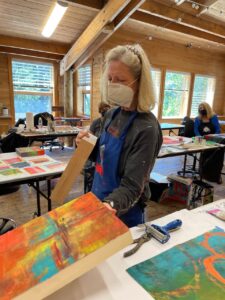
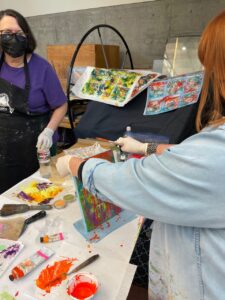
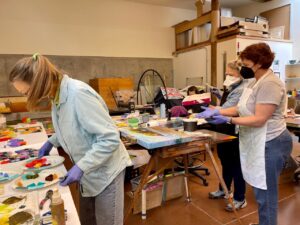
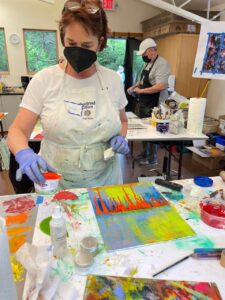
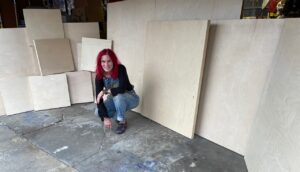
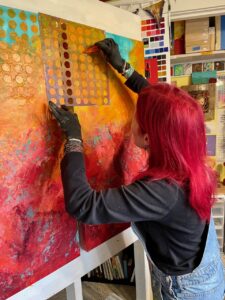
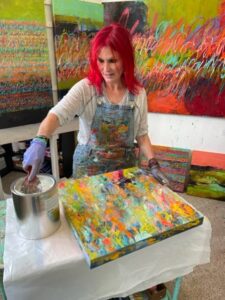
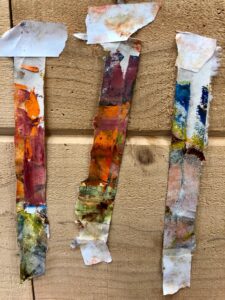
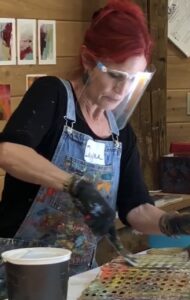
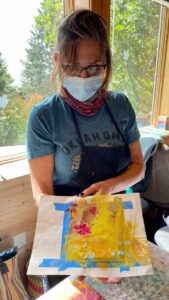
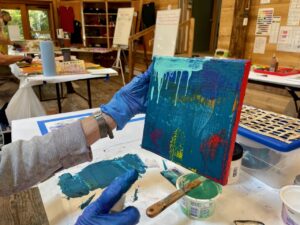
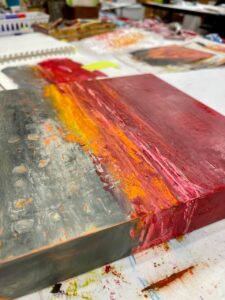
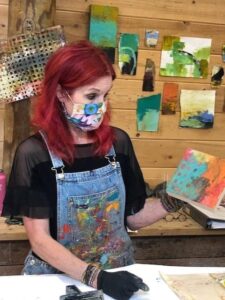
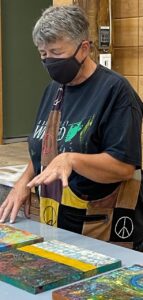
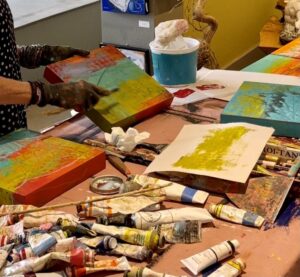
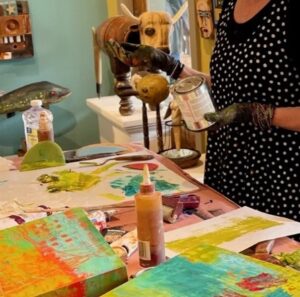
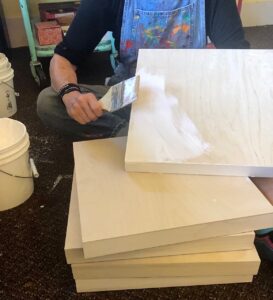
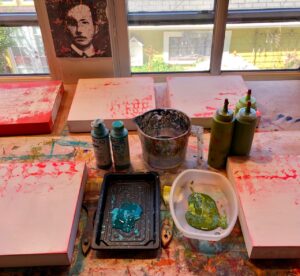
After getting all of my boards prepped, I kicked into full time painting, spending several hours a day in my studio adding layers of oil and cold wax. In my last post, I shared the process of how I prepare my boards with acrylic paint, plaster, and more acrylic paint, and now I’m showing and sharing the process of adding layers of oil paint mixed with cold wax.

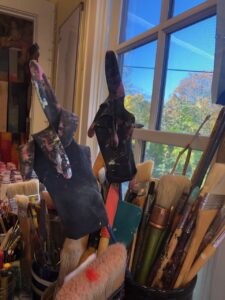
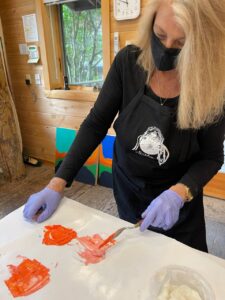
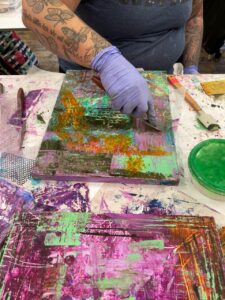
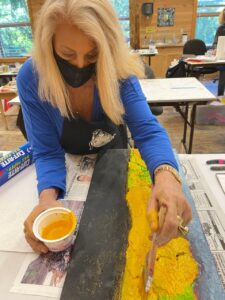
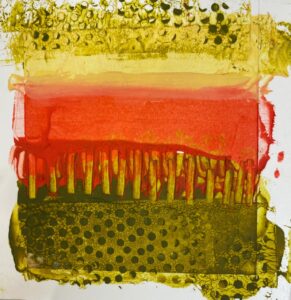
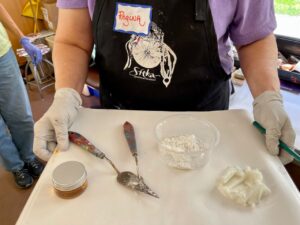
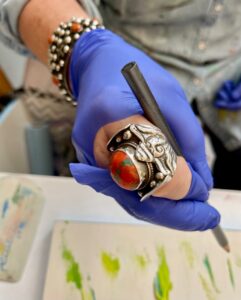
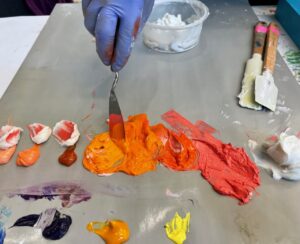
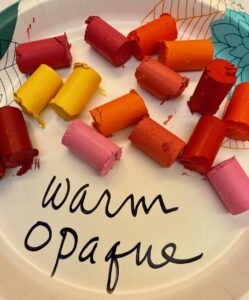
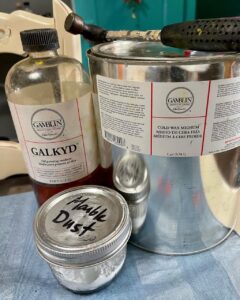
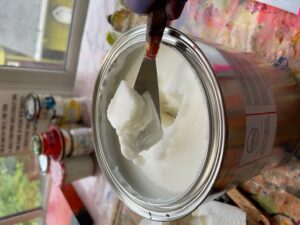
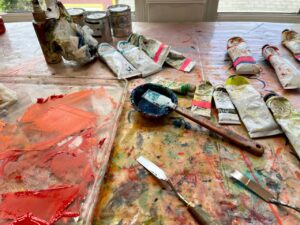
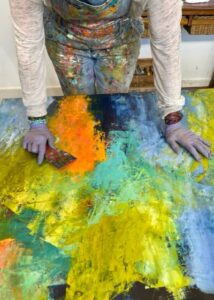
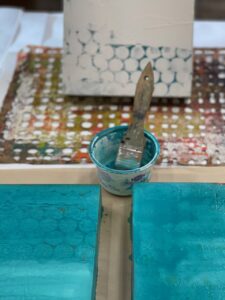
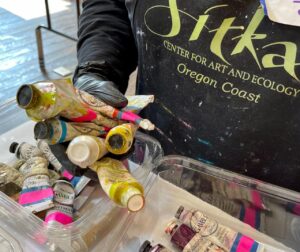
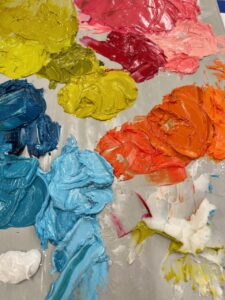
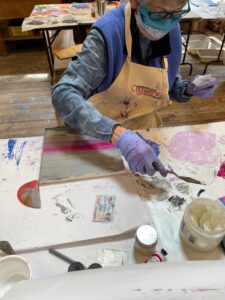
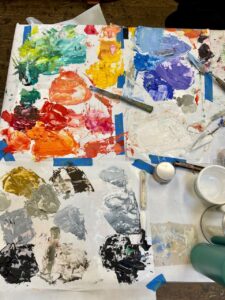
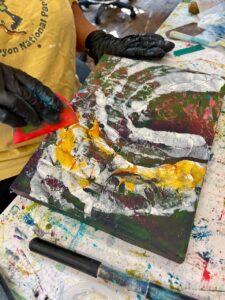
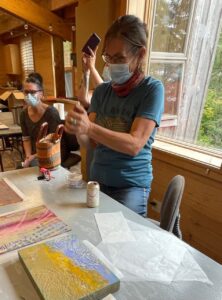
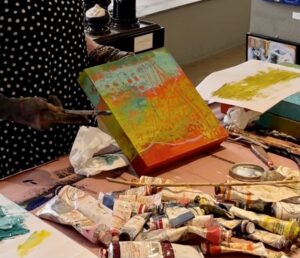
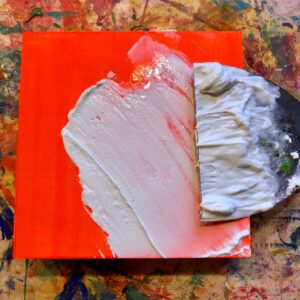
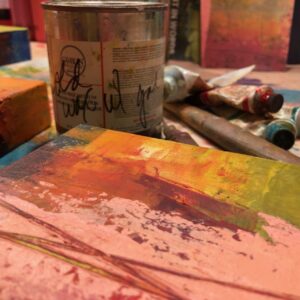
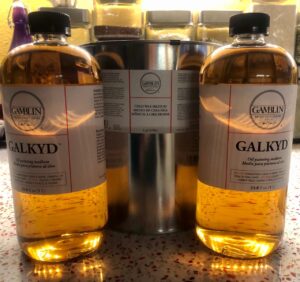
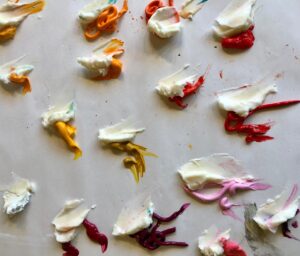
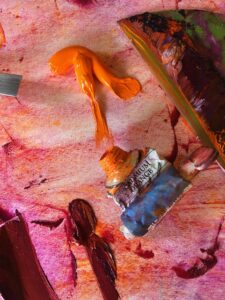
The first order of business is to mix up cold wax with Galkyd (which helps speed the drying time), then mix oil paints with the wax mixture, making it the consistency of whipped butter (or shortening if you are old enough to remember that cooking staple).

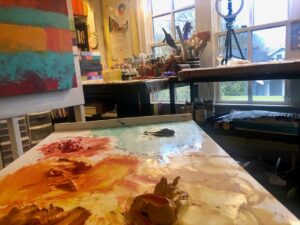
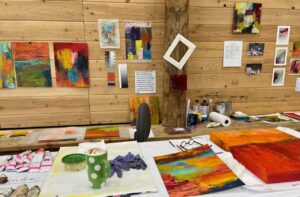
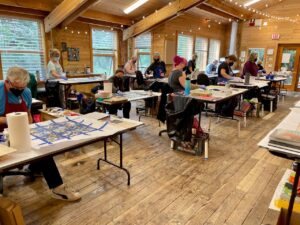
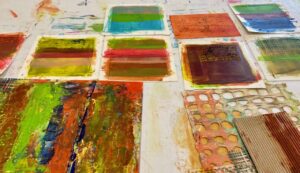
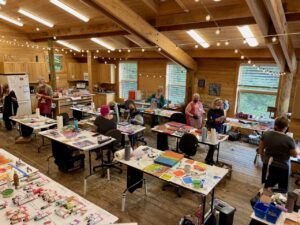
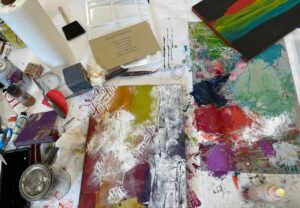
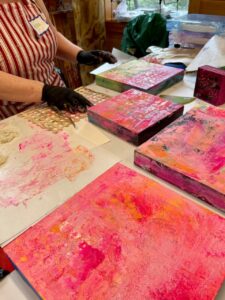
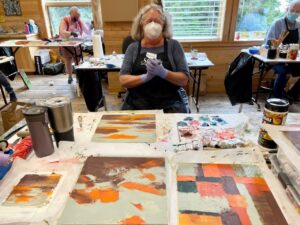
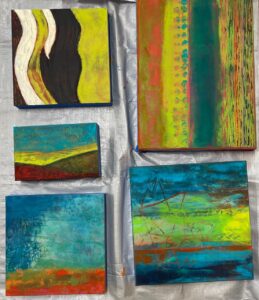
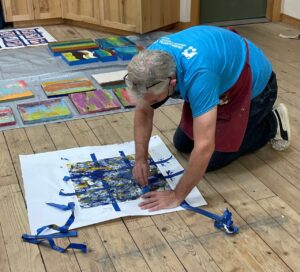
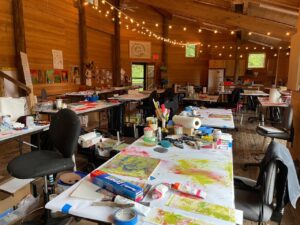
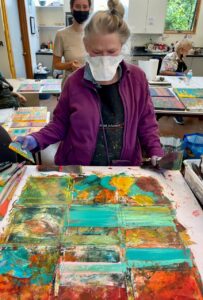
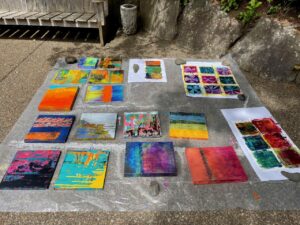
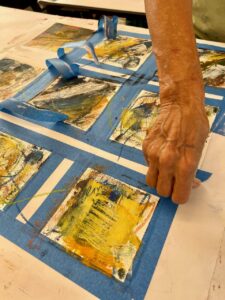
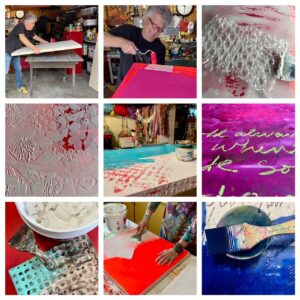
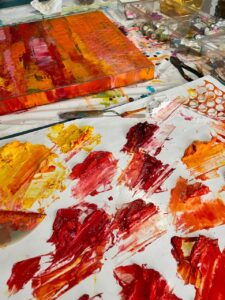
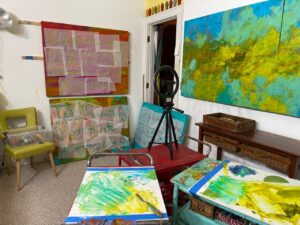
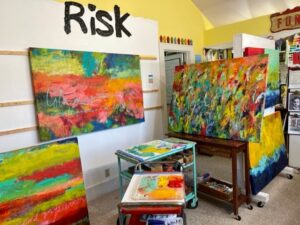
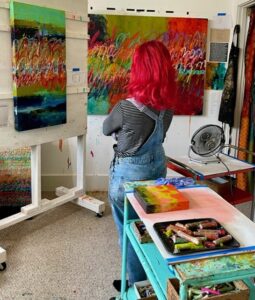
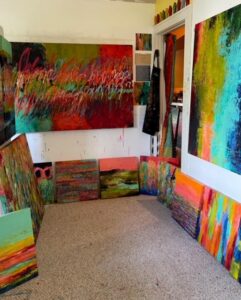
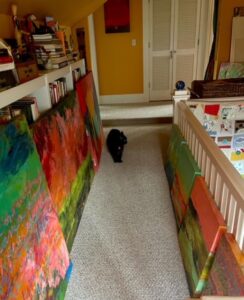
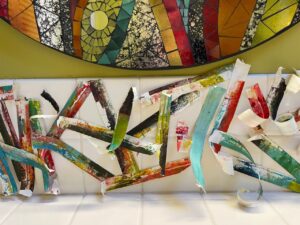
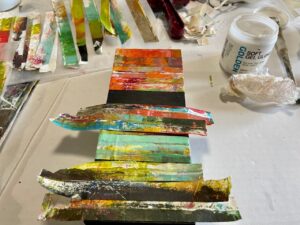
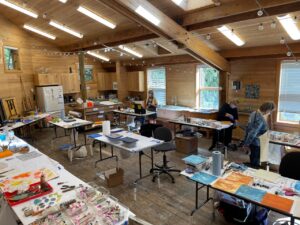
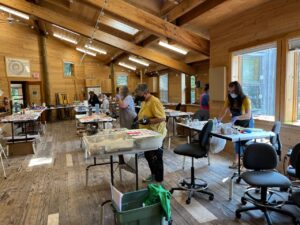
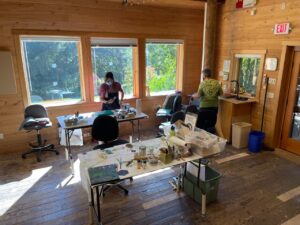
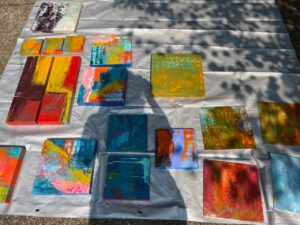
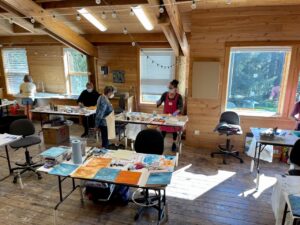
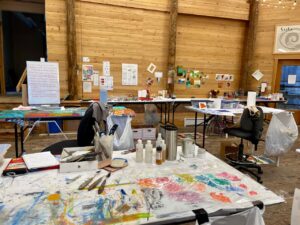
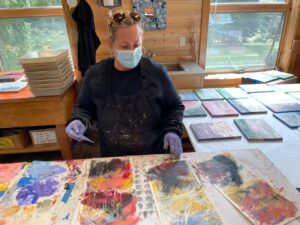
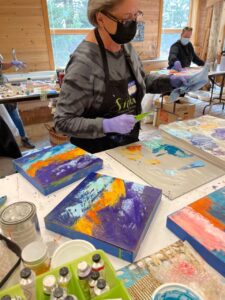
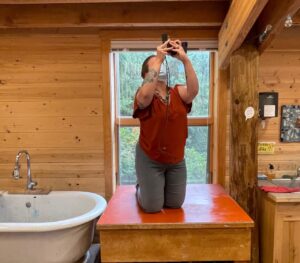
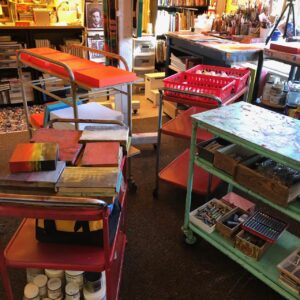
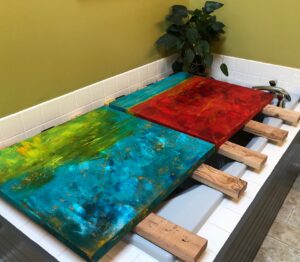
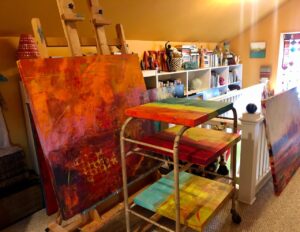
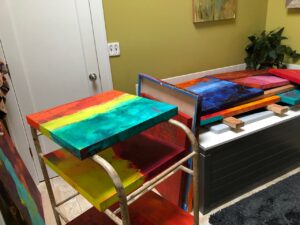
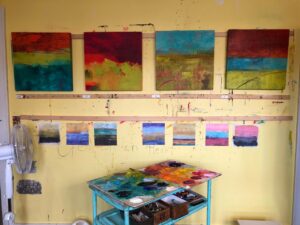
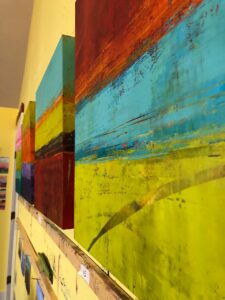
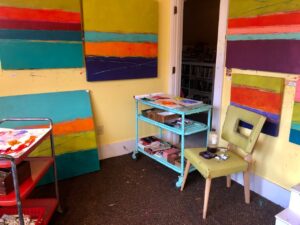
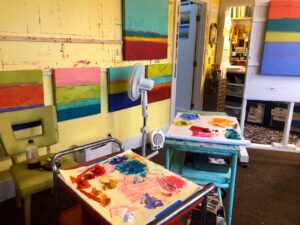
I use the early layers to just get color down so I have something to respond to. I’ve been working on 20 pieces simultaneously, so drying space is at a premium, necessitating spreading out into our bathroom and the upstairs hallway.

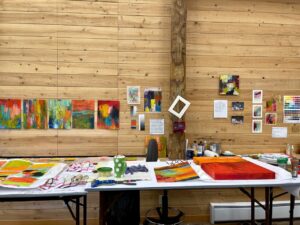
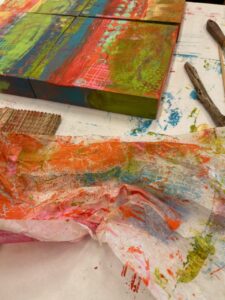
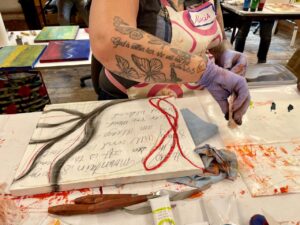
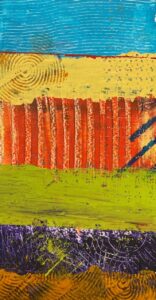
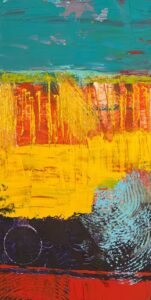
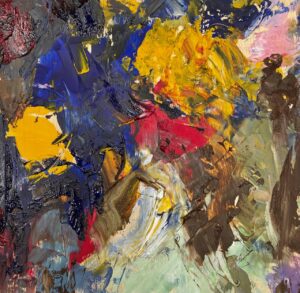
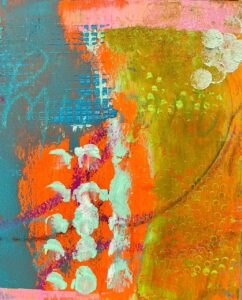
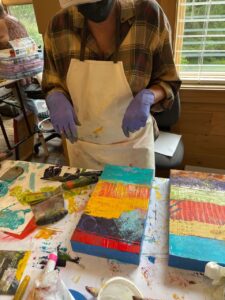
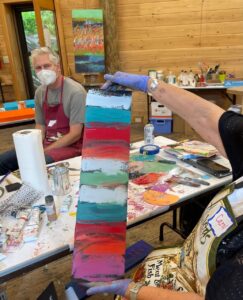
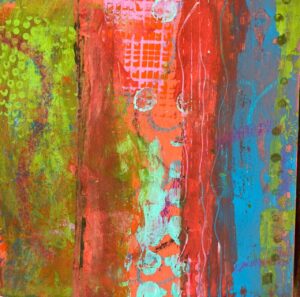
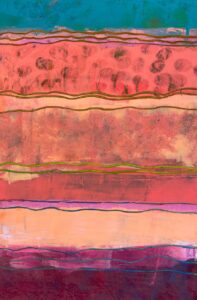
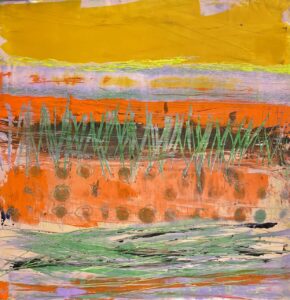
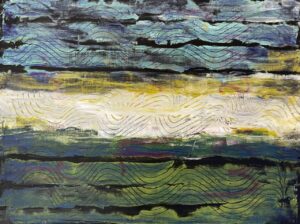
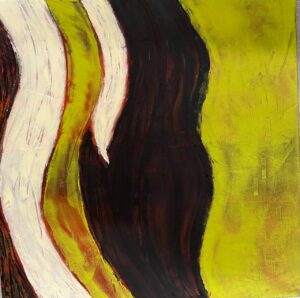
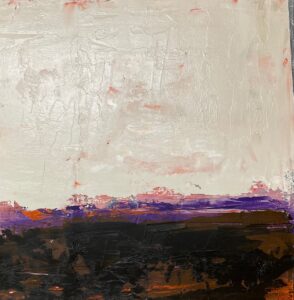
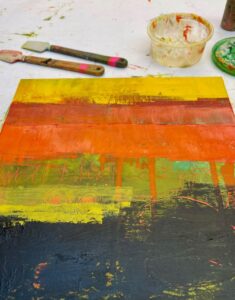
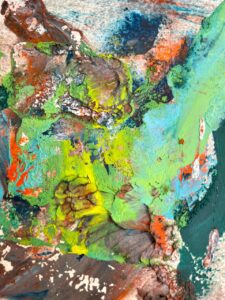
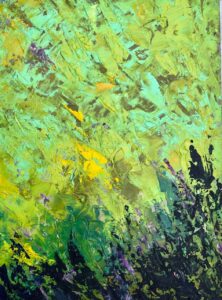
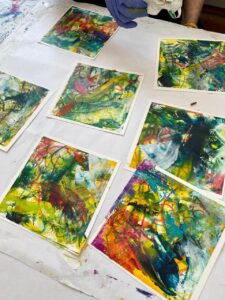
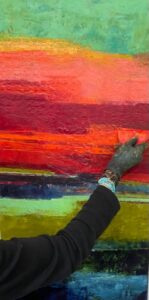
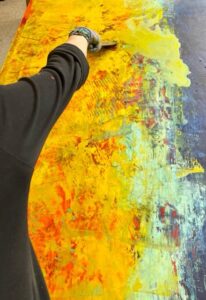
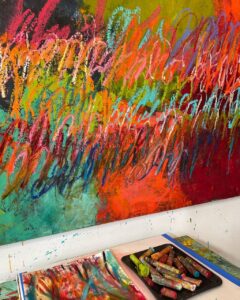
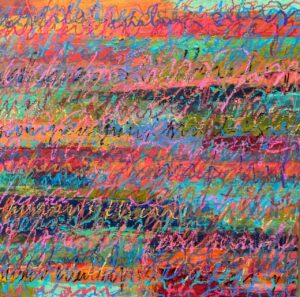
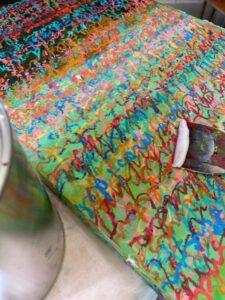
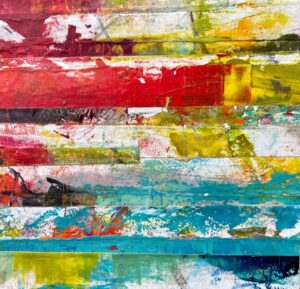
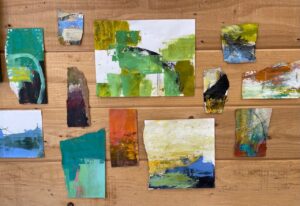
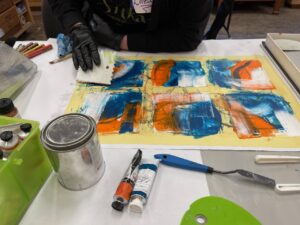
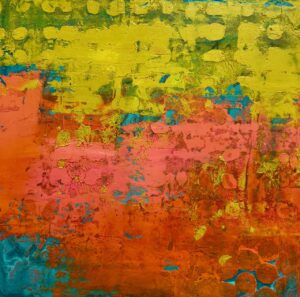
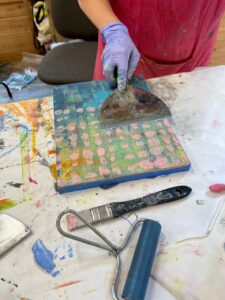
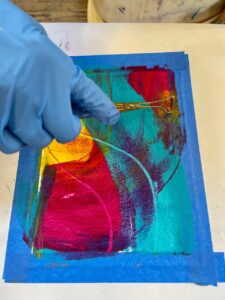
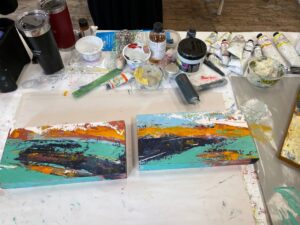
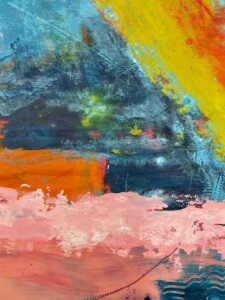
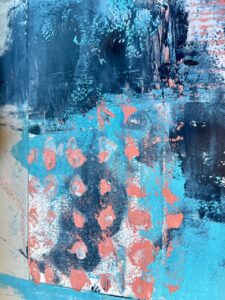
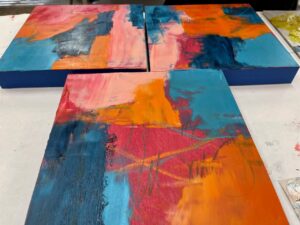
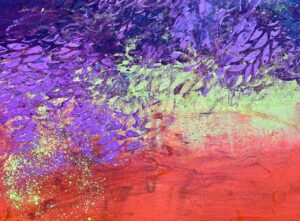
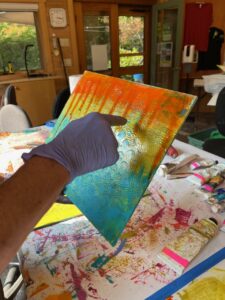
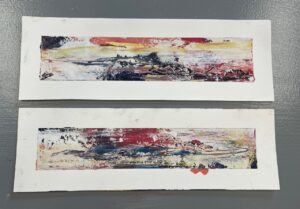
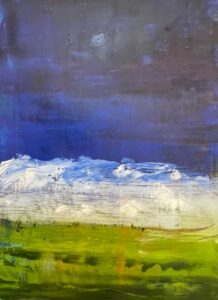
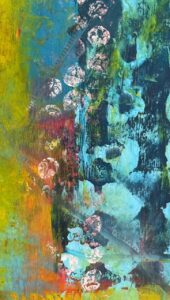
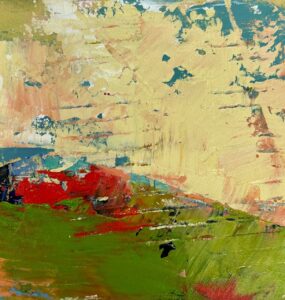
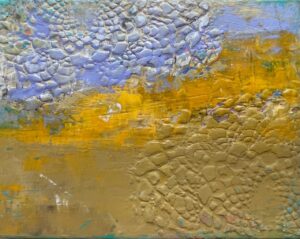
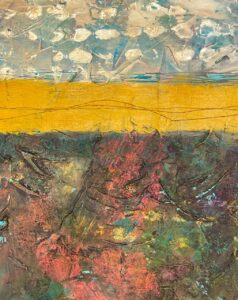
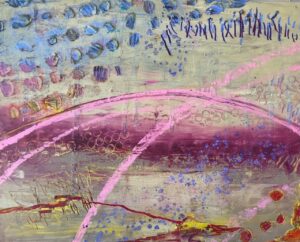
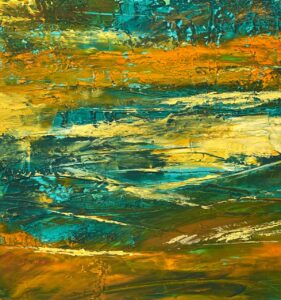
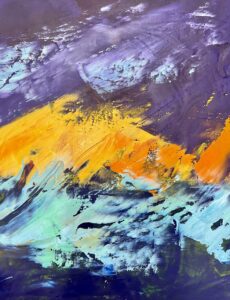
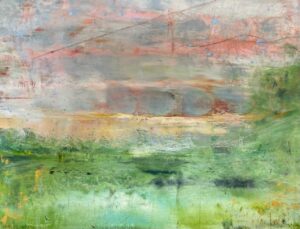
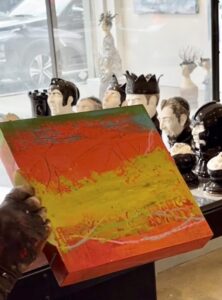
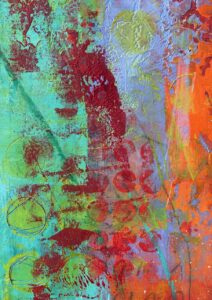
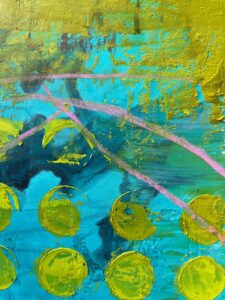
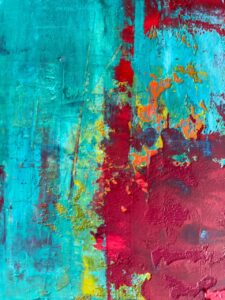
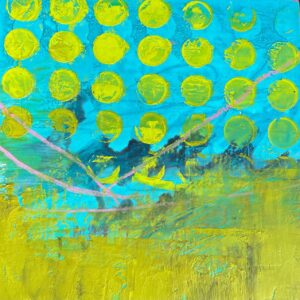
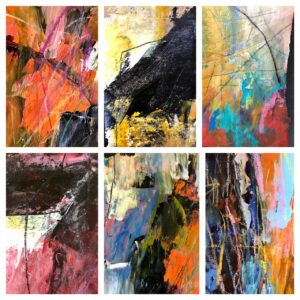
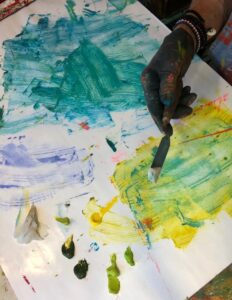
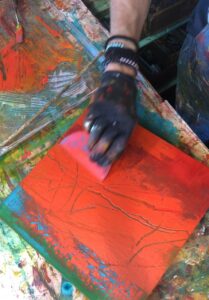
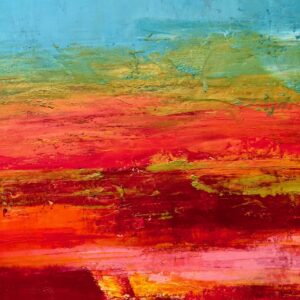
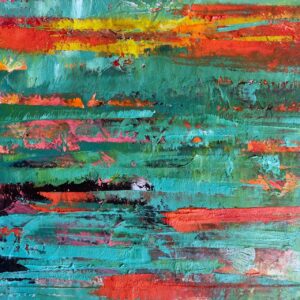
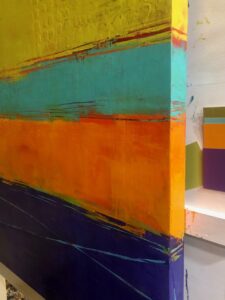
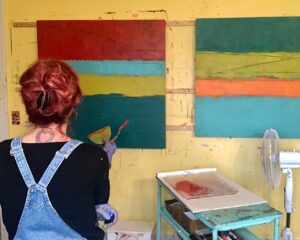
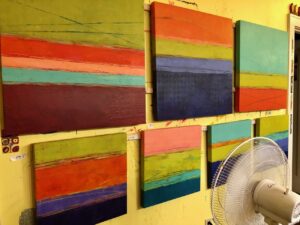
Once I have one or two initial layers of oil and cold wax, often alternating between warm and cool colors so when I’m scratching through the wet paint, the earlier layer is revealed, it is time to begin thinking about a composition. I knew I would be focusing on bands of color, so I just started painting swaths, giving some thought to color, but not too much advance planning at this stage.

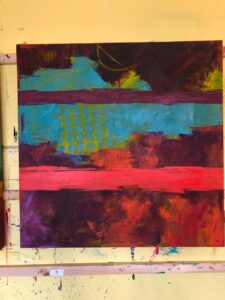
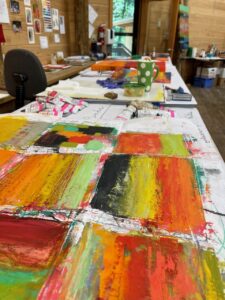
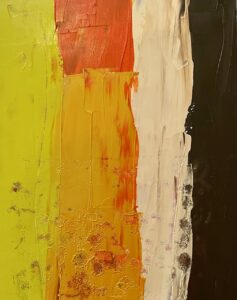
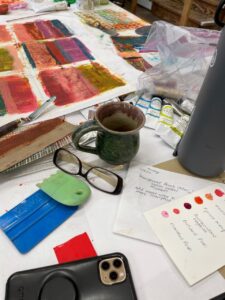
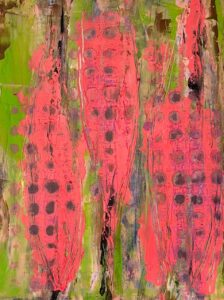
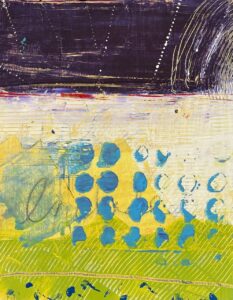
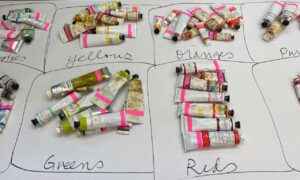
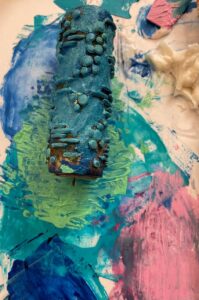
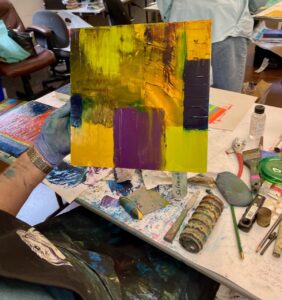
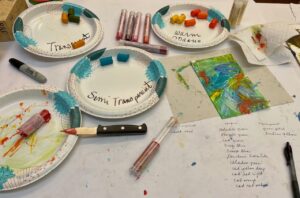
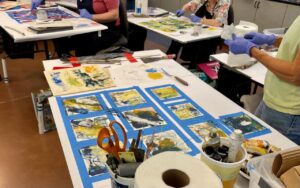
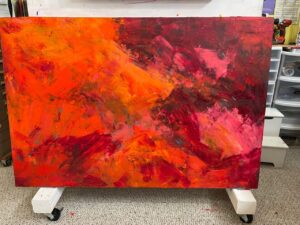
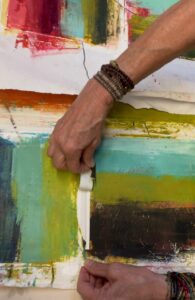
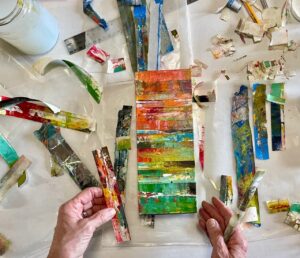
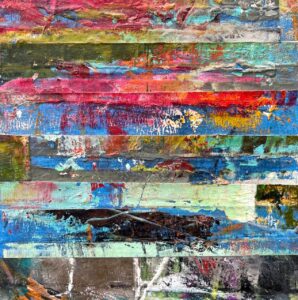
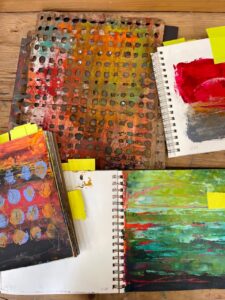
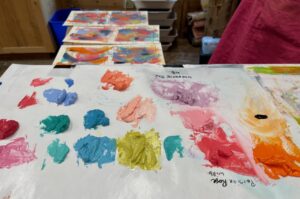
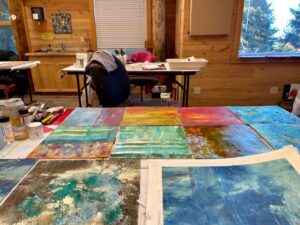
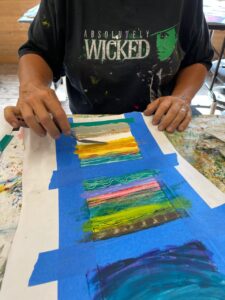
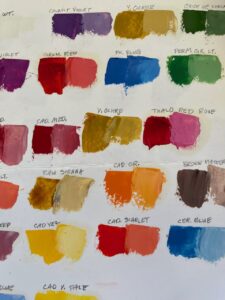
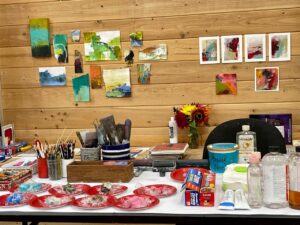
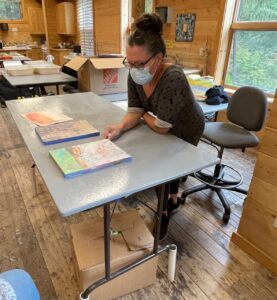
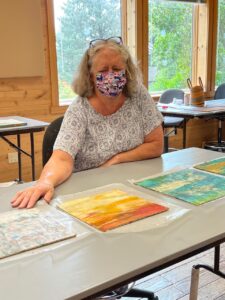
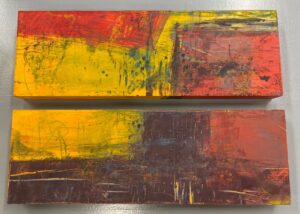
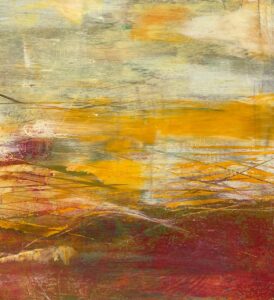
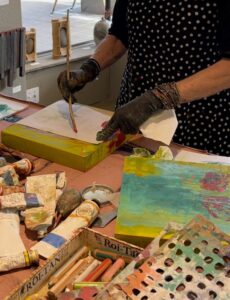
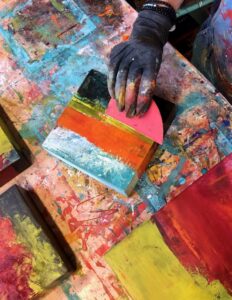
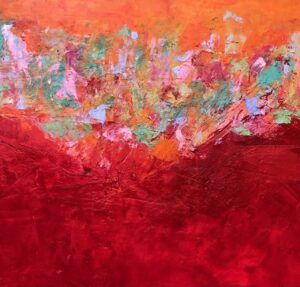
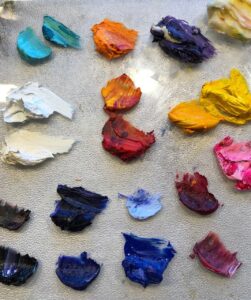
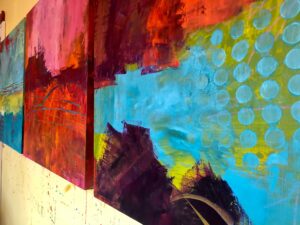
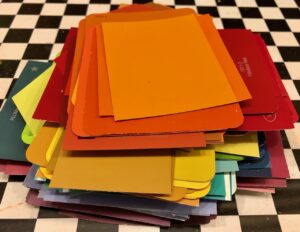
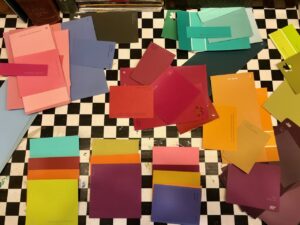
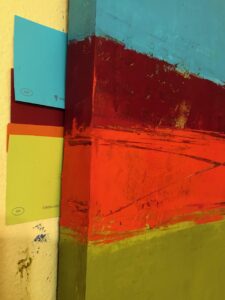
Eventually, I had another layer on the boards and it was time to begin making more informed choices to add variety within the swaths: warm against cool, texture against smooth, bright against dull, light against dark, busy against calm. I had the idea of using paint chips (from the hardware store) to play with color combinations.

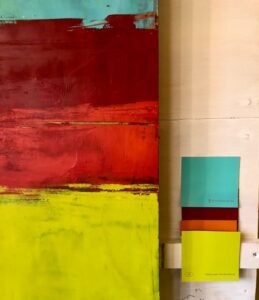
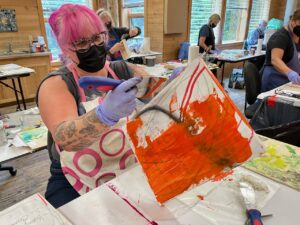
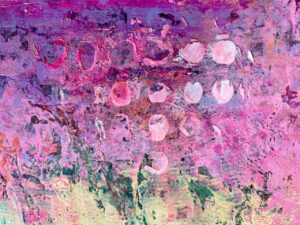
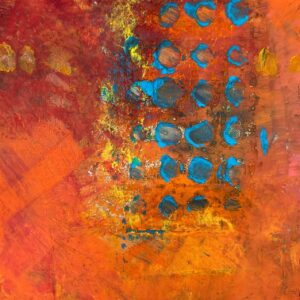
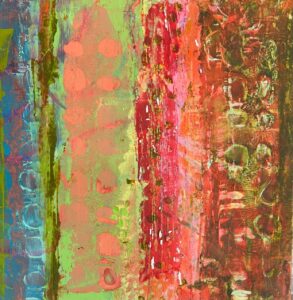
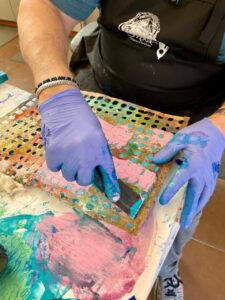
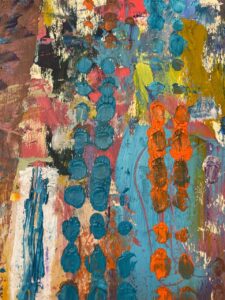
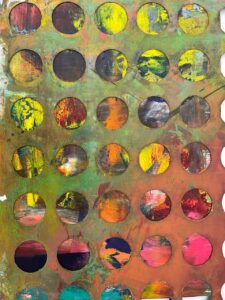
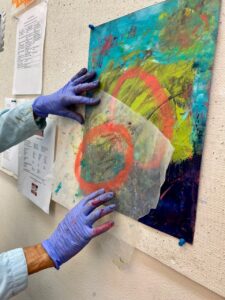
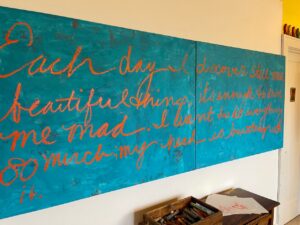
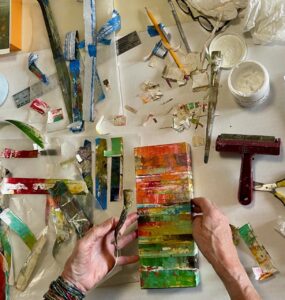
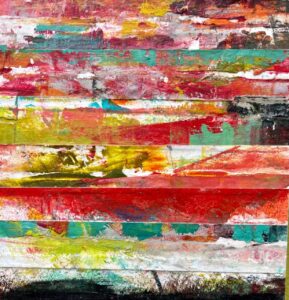
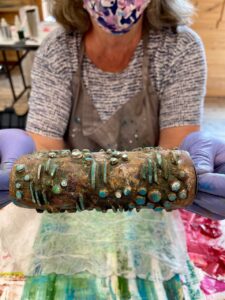
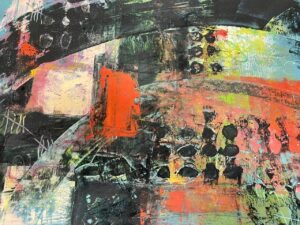
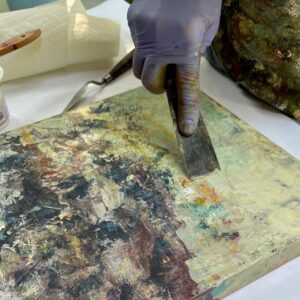
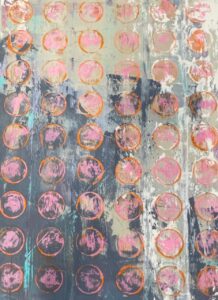
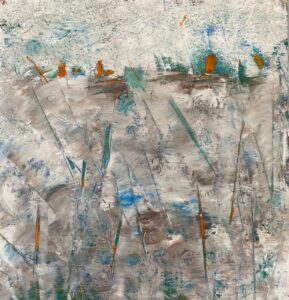
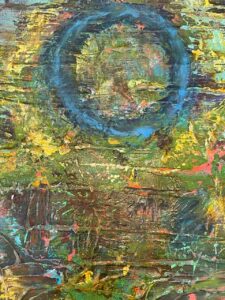
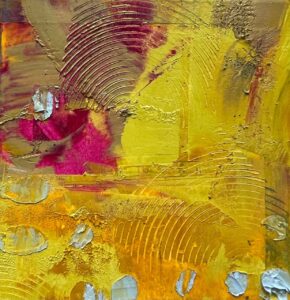
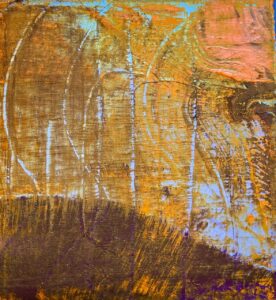
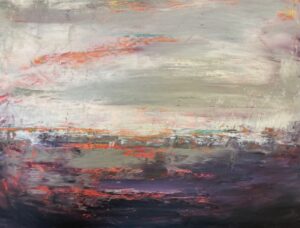
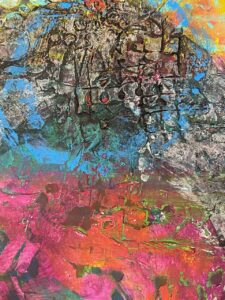
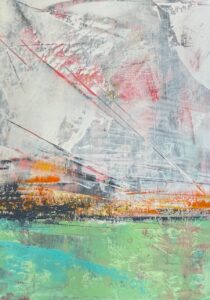
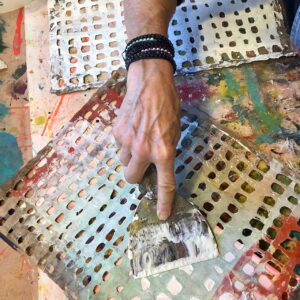
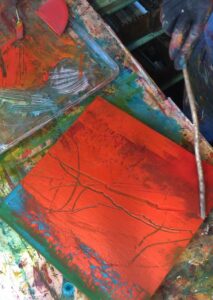
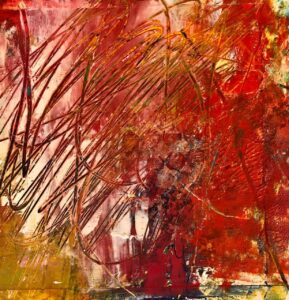
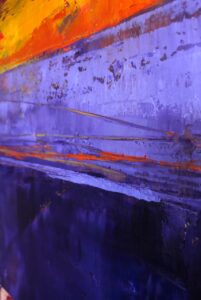
I also gave a great deal of attention to the intersections between the bands of color, the interstices. I have long been fascinated with intersections: drawing into the layers to reveal earlier layers, what colors show through, adding lines of color with the edge of a squeegee, how to create bold interest, how to create quiet interest that invites a viewer to step closer to see the details.


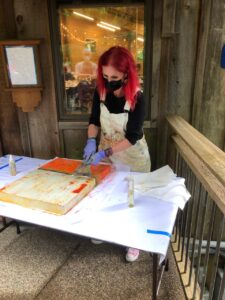
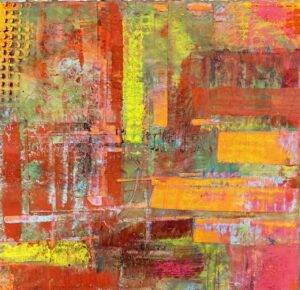
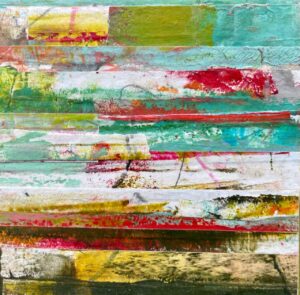
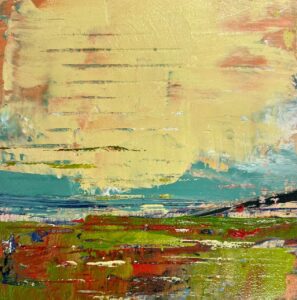
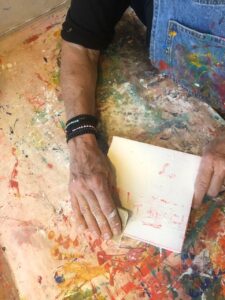
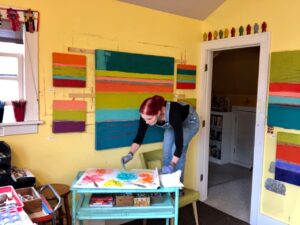
And so it goes. Back and forth, adding, subtracting, standing back, scraping, excavating, laying down more paint. Mental and physical gymnastics.

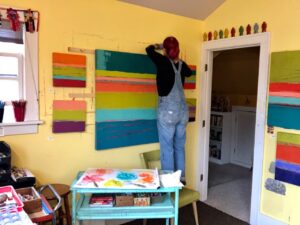
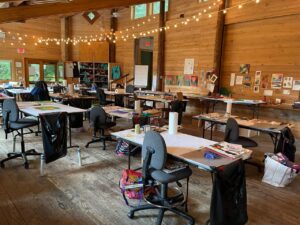
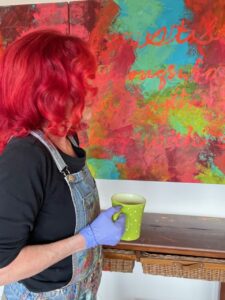
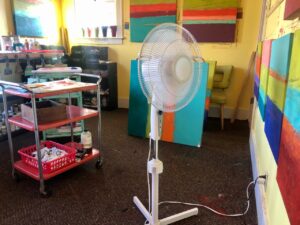
Between painting sessions, is the inbetween, the drying time. I set up a fan and a heater to blow warm, dry air around my studio, a time for the paintings to rest, a time for me to rest. It all seems to help.

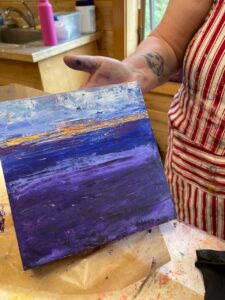
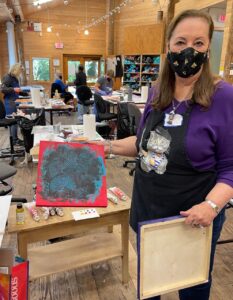
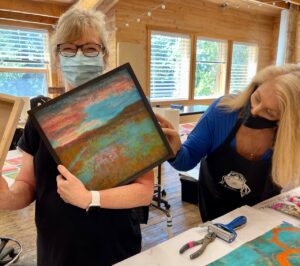
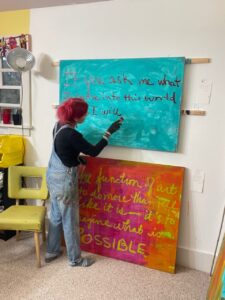
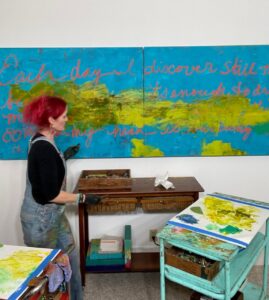
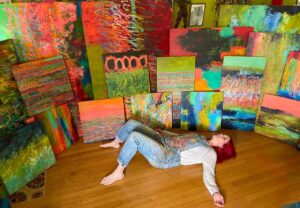
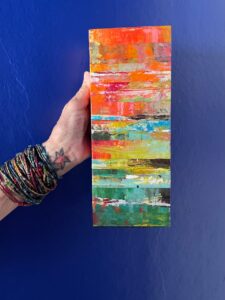
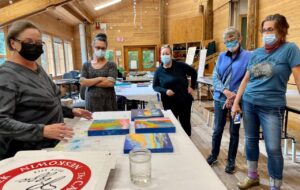
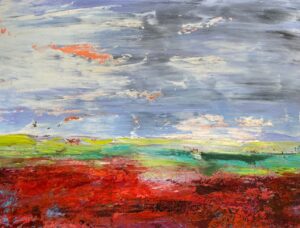
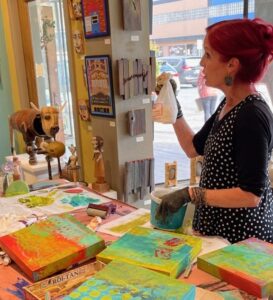
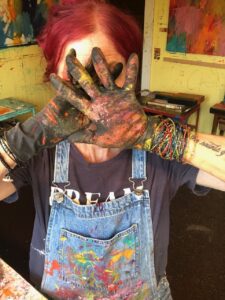
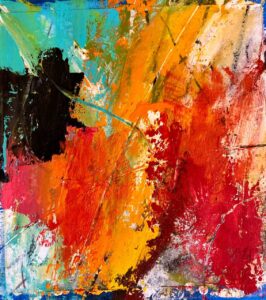
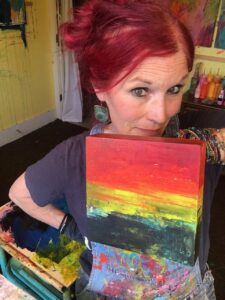
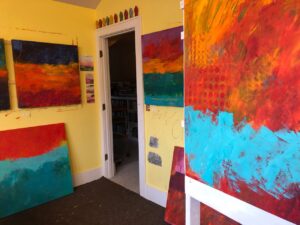
Paintings are being completed and I’m excited about them. They reflect how I have moved through the pandemic, politics, wildfires, and personal traumas this past year. Titling the pieces has been as therapeutic as painting them. I think I might just be okay.

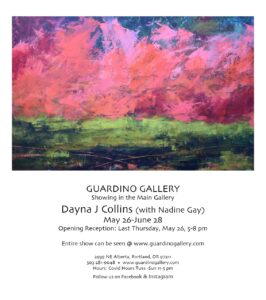
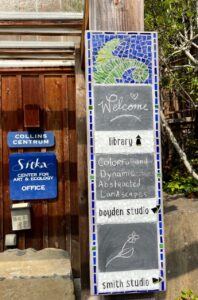
In my next post, I’ll share the completed pieces. The show, Emotional Alignments, opens Saturday, January 9, 2021, at RiverSea Gallery as part of the Astoria monthly Art Walk.