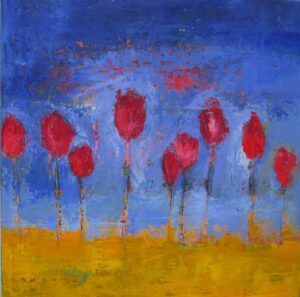
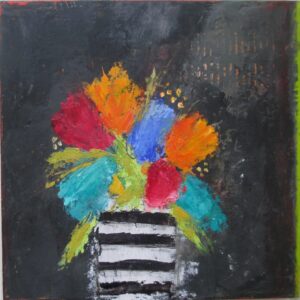
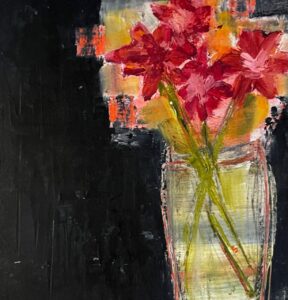
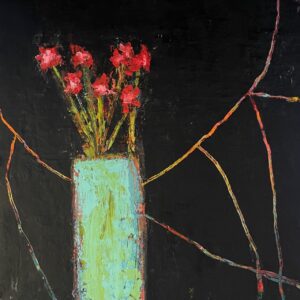
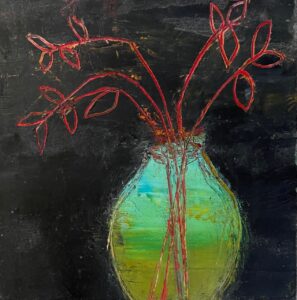
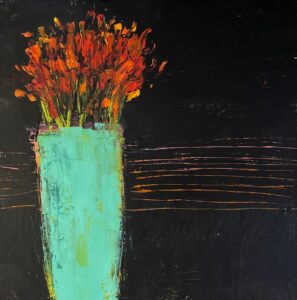
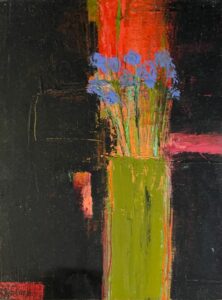
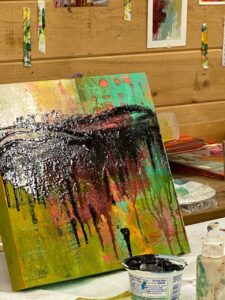
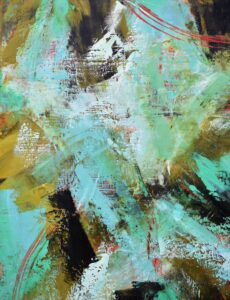
Somewhere during the past couple of months, I decided to revisit painting abstracted flowers. I was prompted to do this series when I was looking at paintings that weren’t working for me. That isn’t unusual, I often cover over paintings and create new compositions. But the idea of painting flowers sprang up when I decided to cover the old paintings primarily with black paint, leaving a hint of the underpainting, and creating a wonky vase of long-stemmed flowers.
I have painted flowers in a variety of iterations, and I always enjoyed what I created. These are some of the older paintings that have long since sold.
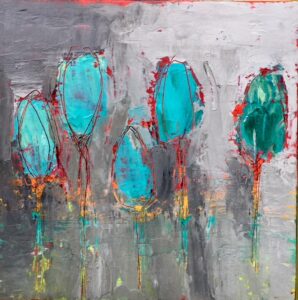
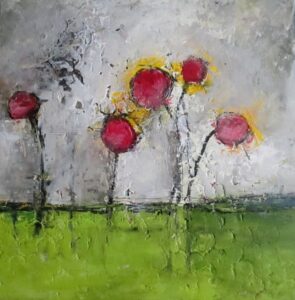
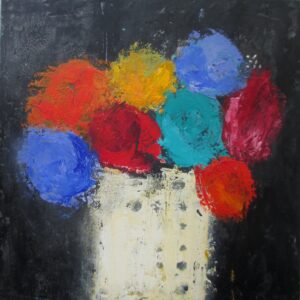
“Stunning Ferocity,” by Dayna Collins“The Absurdity of It,” by Dayna Collins“According to Sylvia Plath, the tulips are too excitable,” by Dayna Collins“Echoes of Summer,” by Dayna Collins“According to Sylvia Plath, the tulips should be behind bars,” by Dayna Collins
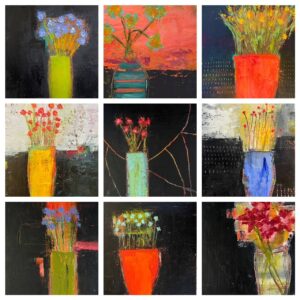
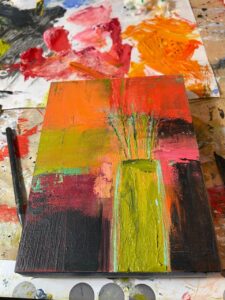
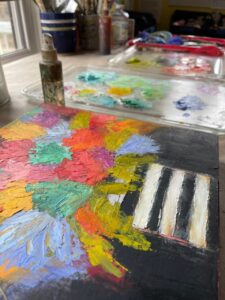
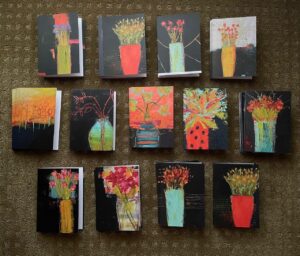
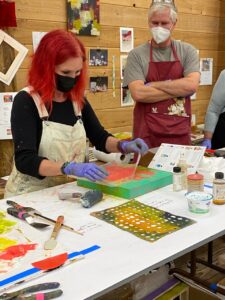
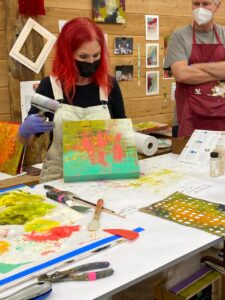
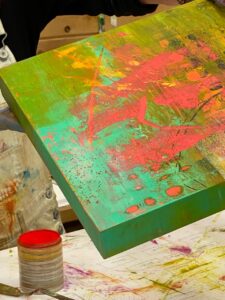
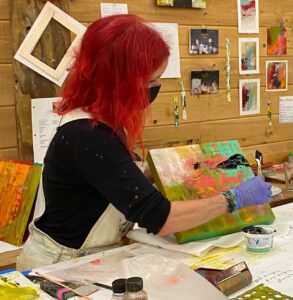
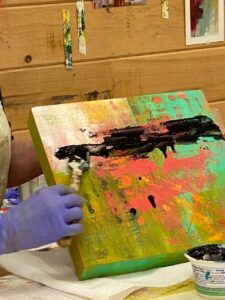
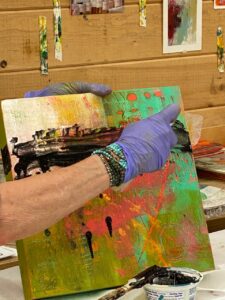
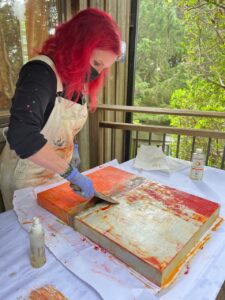
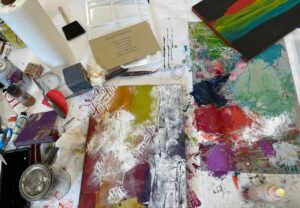
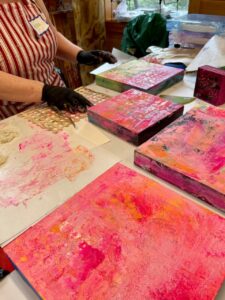
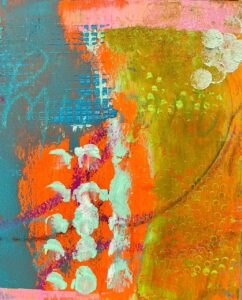
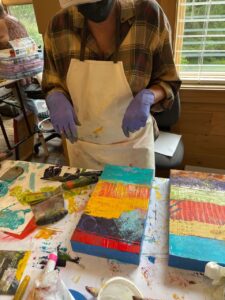
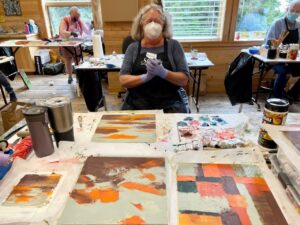
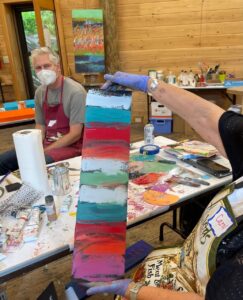
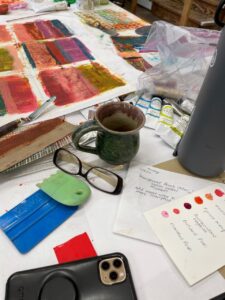
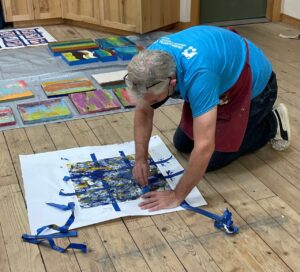
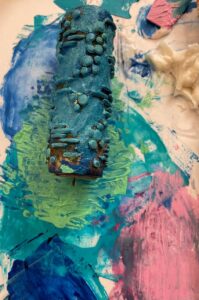
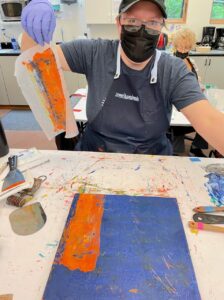
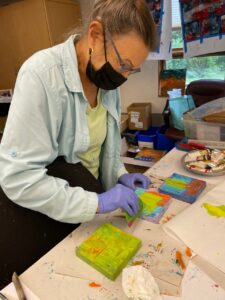
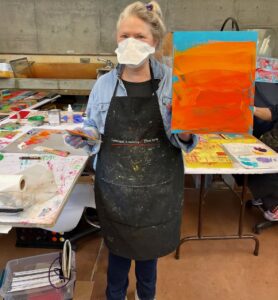
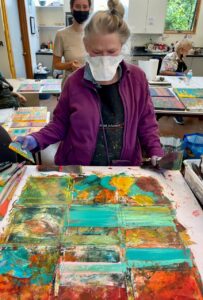
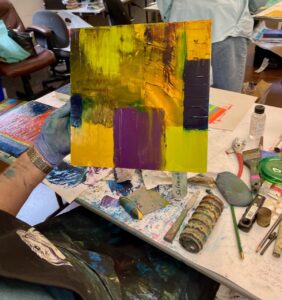
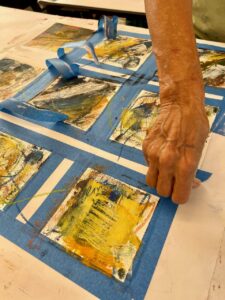
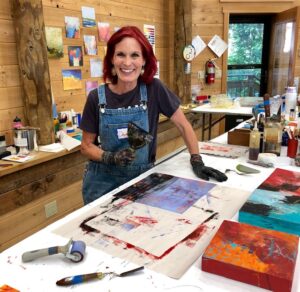
Fast forward to my current series. Many of these new paintings are 6×6 inches and were created for the Small Works show at Salem on the Edge. They proved to be popular, and most of the flower pieces sold within the first few days of the show. It was such a heartwarming affirmation of doing this new body of work. Here is a peek behind the scenes of my process:
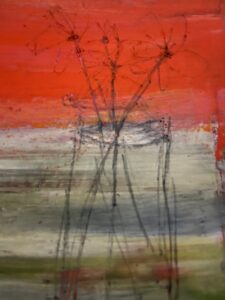
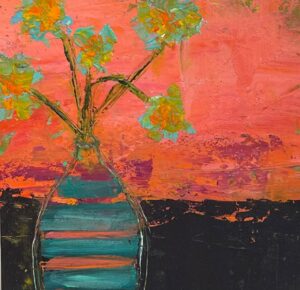
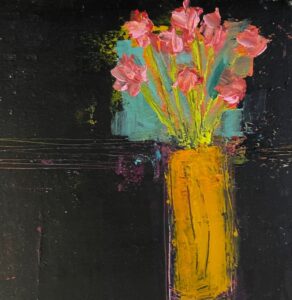
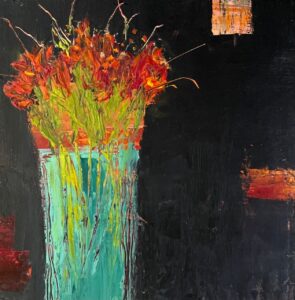
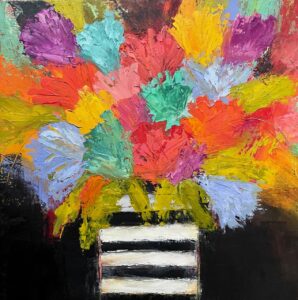
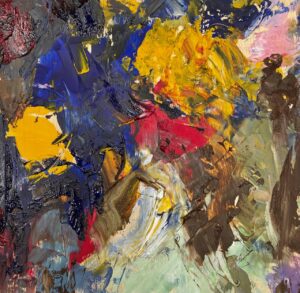
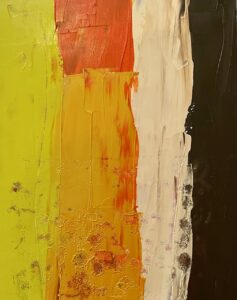
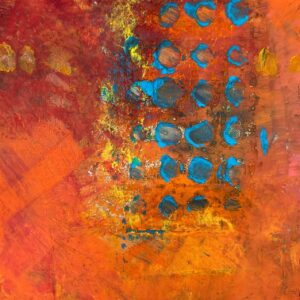
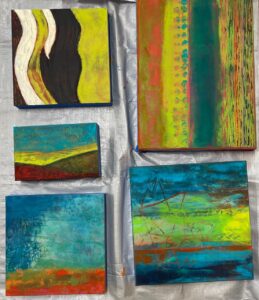
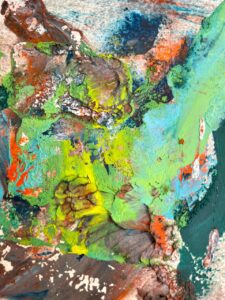
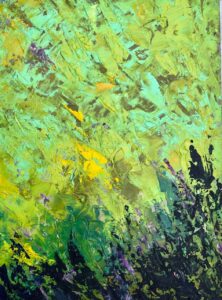
And then photos of some of my new work:
“Hiding Places,” 6×6 inches, oil and cold wax on cradled panel, by Dayna Collins“Ultimate Serenity,” 6×6 inches, oil and cold wax on cradled panel, by Dayna Collins“Faintly Lit Night,” 6×6 inches, oil and cold wax on cradled panel, by Dayna Collins“Avalanche of Thoughts,” 6×6 inches, oil and cold wax on cradled panel, by Dayna Collins“An Oasis of Quiet,” 12×12 inches, oil and cold wax on cradled panel, by Dayna Collins“Wondrous Generosity,” 6×6 inches, oil and cold wax on cradled panel, by Dayna Collins“The Blur of Memories,” 6×6 inches, oil and cold wax on cradled panel, by Dayna Collins“Wild Anticipation,” 12×12 inches, oil and cold wax on cradled panel, by Dayna Collins“Familiar and Comforting,” 6×6 inches, oil and cold wax on cradled panel, by Dayna Collins“Howling Joy,” 6×8 inches, oil and cold wax on cradled panel, by Dayna Collins“Vibrancy and Optimism,” 12×12 inches, oil and cold wax on cradled panel, by Dayna Collins
There are a few abstracted flower paintings on my website, which you can find by clicking this LINK.
Because I loved these flowers so much, I had notecards printed so I can write thank you notes to those who purchase my paintings.
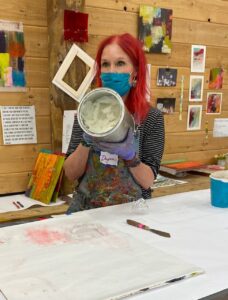
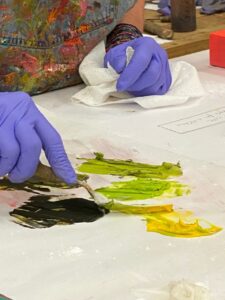
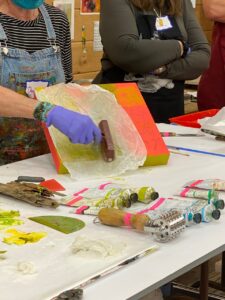
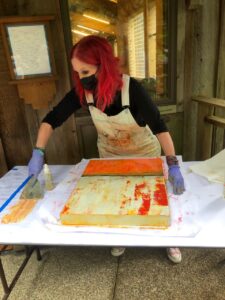
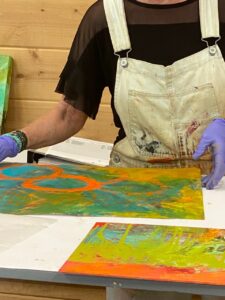
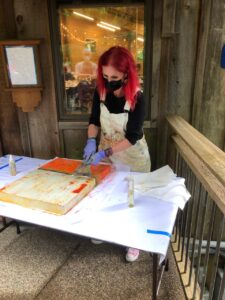
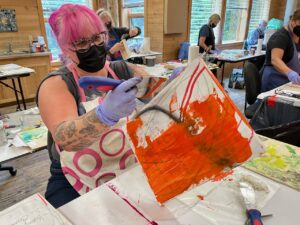
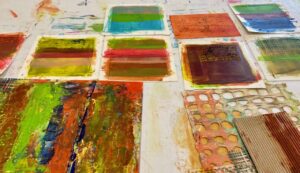
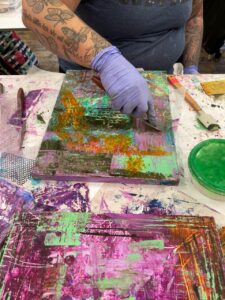
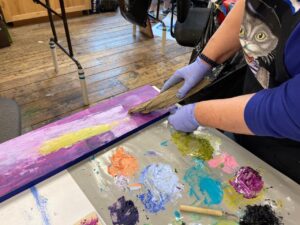
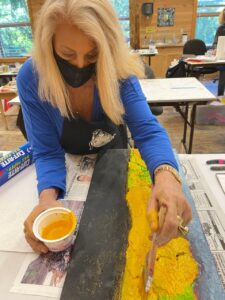
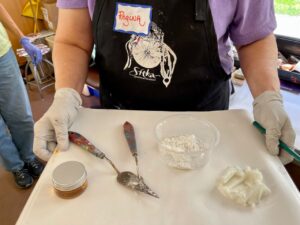
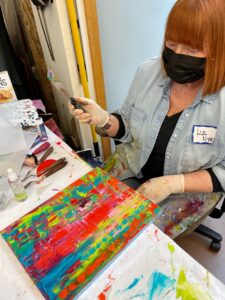
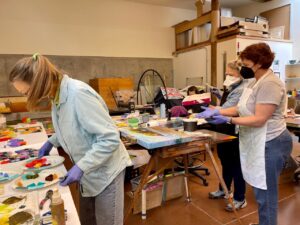
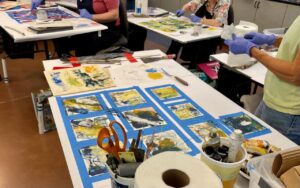
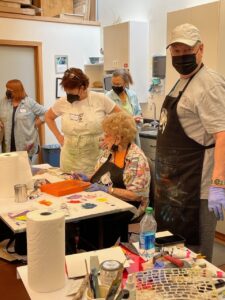
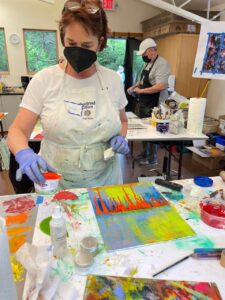
I am frequently asked about how to work with oil paint mixed with cold wax medium, especially on Instagram (you can find my Instagram at DaynaLovesArt). When I post videos of my process, I get a lot of interest and questions. Since I recently taught two four-day workshops in oil and cold wax at Sitka Center for Art and Ecology, I thought I would post a series of photos of the process. Thank you to several of my students for taking photos and generously sharing them with me.
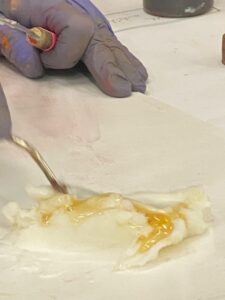
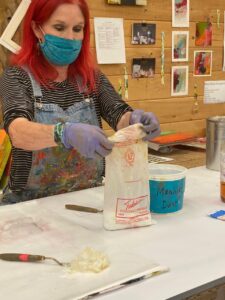
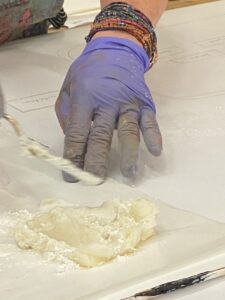
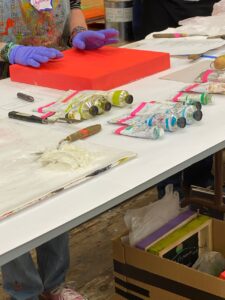
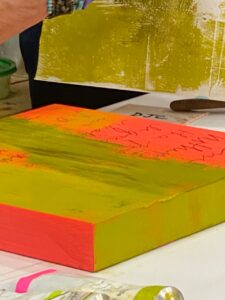
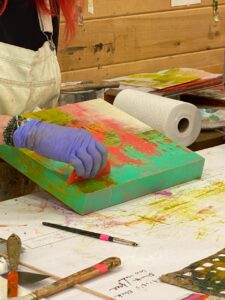
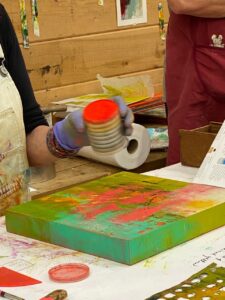
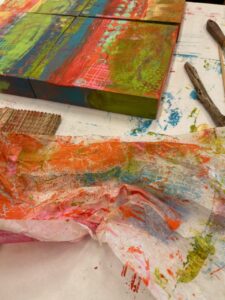
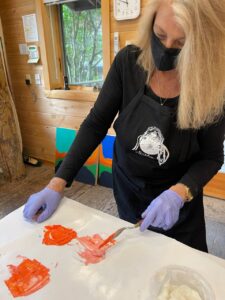
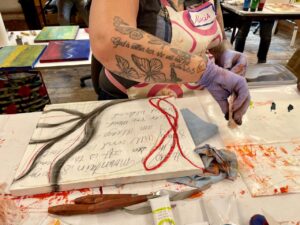
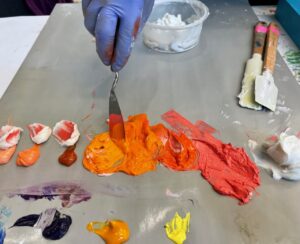
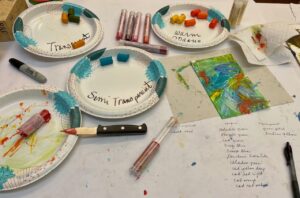
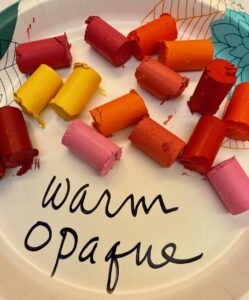
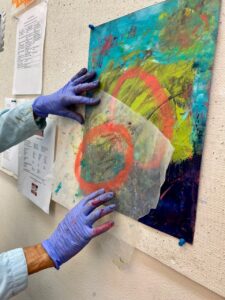
Mixing Gamblin’s Cold Wax Medium with their Galkyd (which helps speed the drying time).Pulling out a bag of Fedrix powdered marble dust.Mixing marble dust into Gamblin’s Cold Wax Medium and Galkyd. The marble dust acts as another agent to speed the drying time. It can also be used to thicken the consistency of the cold wax.Ready to mix paint!Mixing oil paint with the cold wax mixture. I mix 50/50: 50% oil paint with 50% cold wax medium (with the Galkyd & marble dust already added).An early demo of applying oil and cold wax mixture to the painted cradled panel. I am using a flexible metal putty knife from the hardware store.Using a brayer and wax paper, I am “lifting” paint and creating irregular texture on the surface of the board.Applying a nice layer of paint to the painted surface (with words added before the paint). I then lay down a piece of wax paper to lift some of the paint to create interesting texture.Showing the demo board with some of the techniques: applying paint, applying paint with a stencil, removing paint with a stencil, making marks.Using wax paper to “lift” paint (and then that lifted paint will be applied to a different work in progress to move the orange paint around).Using a brayer to apply a thin veil of white oil and cold wax (in the upper right corner) over dry oil and cold wax paint.Applying a thin layer of cold wax in preparation for adding flecks of Pan Pastel.Applying flecks of Pan Pastels using a small palette knife to scrape a tiny bit of the pastel onto the surface; a thin layer of cold wax applied so the flecks of pastel will adhere.Tiny little flecks of red pastel add fun interest. Once the flecks have been added, I use a piece of wax paper over the surface and then brayer over the wax paper to embed the pastel.Applying a layer of thinned out oil and cold wax (thinned with Gamblin’s Gamsol, oderless mineral spirits).Spreading out the oil and cold wax with added Gamsol to thin out the paint mixture.Spraying Gamblin’s Gamsol to thin out the swath of oil and cold wax to create drips.The drips.Scraping off a layer of oil and cold wax using Citra Solv and a metal putty knife.*Wiping paint from putty knife onto paper.Any questions?!?
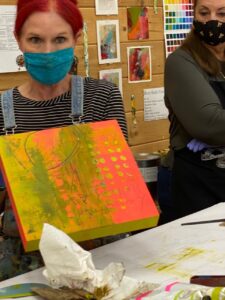
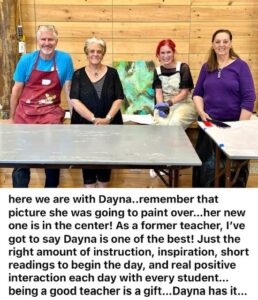
A beautiful comment from Angela, who has taken my class several times:
It was amazing to see you obliterate a piece, reveal fabulous lower layers and ultimately create your incredible composition. Seeing you do this in class was huge? The lesson in itself was the best possible, teaching us more by showing, creating and telling us your thoughts throughout. Angela
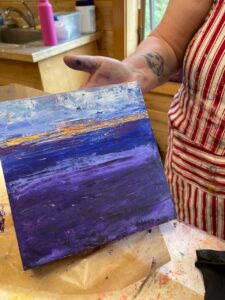
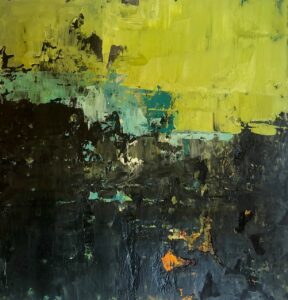
*This demo piece went on to become this painting:
“Storm Mounting,” the piece I created for an upcoming show, which I will be writing about soon.
If you are interested in more information about what I’m doing, books I recommend, techniques, shows, workshops, etc., please subscribe to my monthly newsletter by clicking HERE. In my September newsletter I will be sharing about my recent Personal Art Retreat, all the work that goes into creating art behind the scenes and sharing about the book Creative Authenticity.
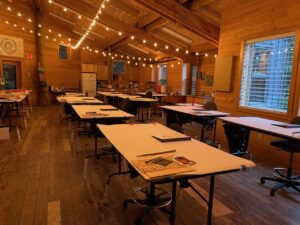
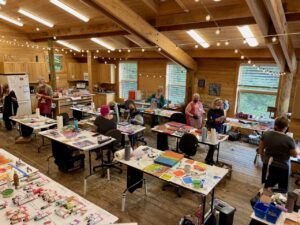
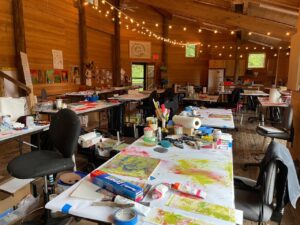
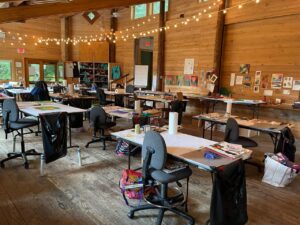
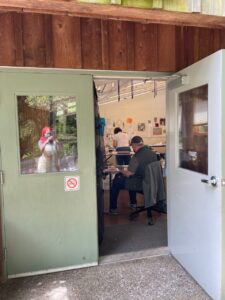
After my first oil and cold wax class at Sitka Center for Art and Ecology concluded on July 3, the staff at Sitka lugged all of my stuff from Smith Studio up to the larger Boyden Studio. I spent the evening getting set up for my second class. I love preparing the studio for teaching.
Evening of July 3: all set up for class to begin on July 5.
I spent July 4th enjoying the quiet of the Sitka campus. The office was closed, and no one was around, so I wandered, rested, and puttered in the studio. On July 5th, I was ready for the artists to arrive.
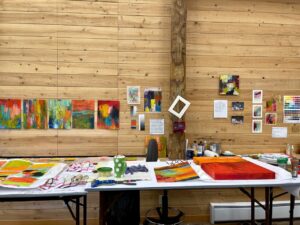
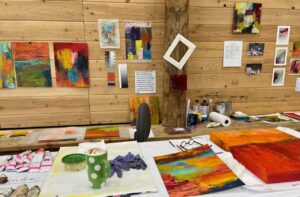
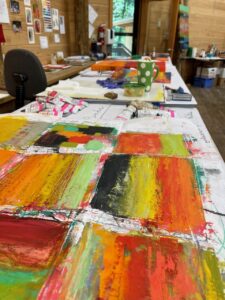
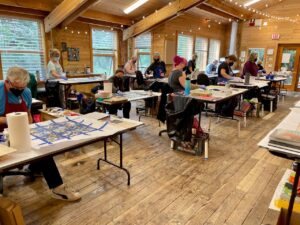
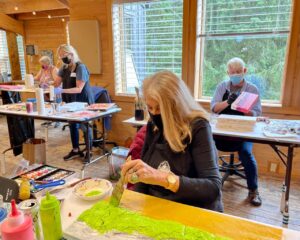
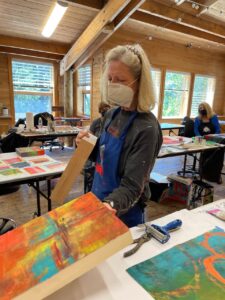
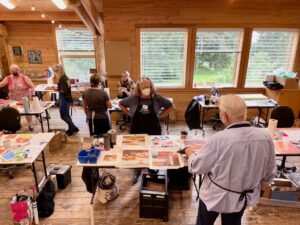
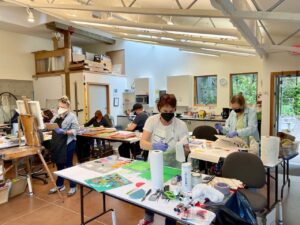
Distance view. I have three big tables to work on.My working and demo space.
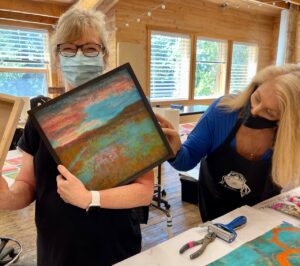
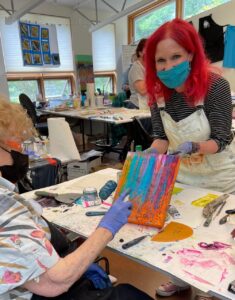
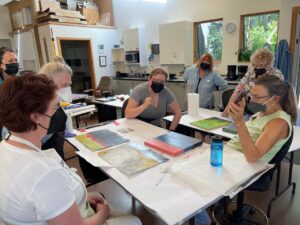
Like my last post, Teaching at Sitka – Part I, I feel that photos tell the story better than any words that I cobble together. I’ve made comments on each of the photos, so it tells a bit more about the week than just sharing the photos. But I will say, this group was hardworking, productive, energetic, talented, and supportive of each other. All the ingredients for a fantastic workshop.
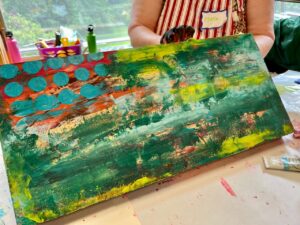
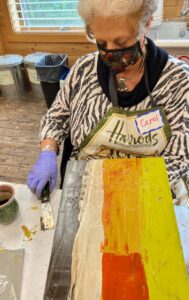
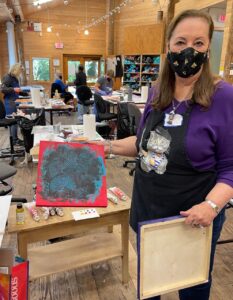
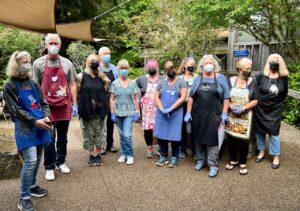
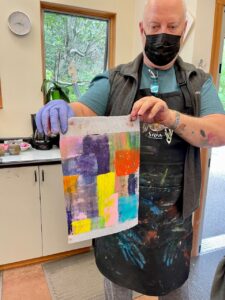
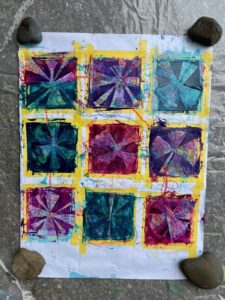
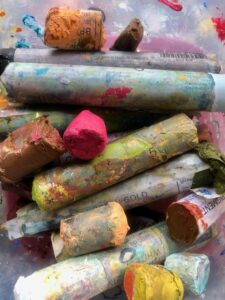
Side view of my space.So many techniques to share.Demo using solvent to scrape off paint.Getting paint on the boards.Everyone deep into the process.Tissue for blotting.Mixing up paint.Words matter.A table of work in progress.Work in progress.From above.Love the swaths of color, interrupted by marks.An active scene.A glorious pile of paint.Work in progress.Spreading swaths of thick, juicy paint.Work in progress. Done? Perhaps.Pink! Work in progress.More pink! Yes, please.Early layers.Work in progress.Hard-working class.A lovely, abstracted landscape.Scraping a grid composition.Using wonky chunks of driftwood to make wonky marks.Lunch in the courtyard.Painting. Layering. Scraping. Contemplating.More dots and such a great example of complementary colors.We all thought this piece would make a fantastic album cover!Framing discussion.Margaret and her beautiful series using a limited palette.I’m crazy for stripes and swaths of color – Carol nailed it.I wanted to call this a “Carnival of Color,” but that’s just me.More bands of color and marks.An active workspace.So many ways to apply paint and make marks.Sharing work.A thematic series of work.Such crazy and unique marks.Work in progress.I love the collegial nature of a class.Applying paint to a very textural and three-dimensional piece.A vibrant series of work.I’m always crazy for dots.An excellent example of a strata composition. And then there’s the color . . .A successful and colorful grid.Work in progress. Done? Hope so.An energetic work in progress.A beautiful series of lines, marks, and colors.Such sexy curves.A lovely and simple abstracted landscape.A thematic series of work.Pulling tape and revealing nine little paintings.I love the solitude at the end of the day.The peace at the end of the day.All but one in this class photo!
I have received such wonderful feedback from the artists in my class and I want to share two of the comments. Reading these inspiring and positive words make my heart swell and it is why I love teaching.
The first one from Carol:
I was so grateful to have had the opportunity to be a student in this class. It was amazing to meet Dayna in person, and to be present in her instruction. She provided a manual, many supplies, demos, readings, and many examples of her work in various stages. She was very engaged and provided such positive suggestions and constant energy. It was truly a great pleasure in an incredible setting. . . . I am still processing all that I learned and felt, and continue to feel so grateful. Thank you, Dayna. Terri
I had the privilege of teaching two classes at Sitka Center for Art and Ecology. The first, June 30-July 3, was in the smaller of the two studios at Sitka, Smith, and with ten students, it was the perfect space.
I taught two classes at Sitka, the first class was in the smaller, lower studio and the second class was in the spectacular upper studio, Boyden.
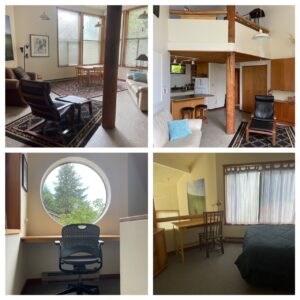
Because I was teaching two classes and they were back-to-back (I had the 4th of July off between the two classes), I got to stay at Morley House, which was a first for me. I loved this space!
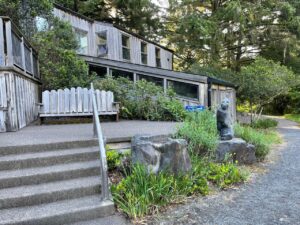
This is where I got to stay for ten days: Morley House.
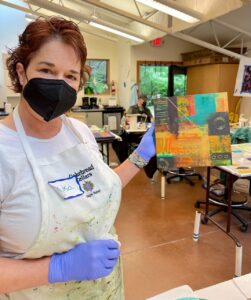
Now to the good stuff. The class. I could babble on about it, but instead I’m going to share photos – a fraction of the photos I took, but it gives a good look into our four days of art making. The group was talented, energetic, spirited, and hard workers — and they wanted to know if they could sign up for my 2023 class on the final day!
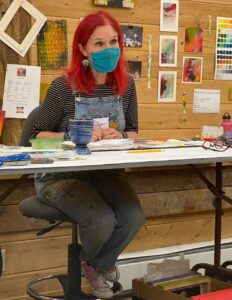
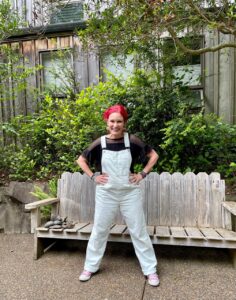
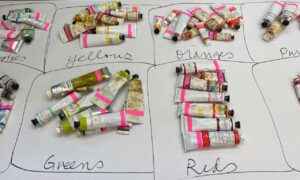
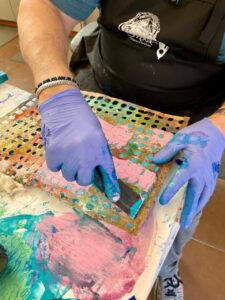
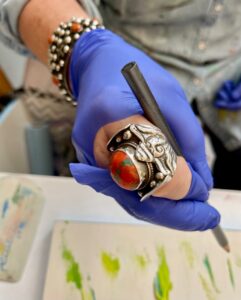
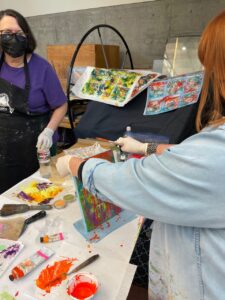
Brand new overalls! Soft fabric . . . and WHITE. I’m ready.How I set up the oil paints I bring for the class to use.A demo board.Picking up supplies.Pink+handmade holey paper = beauty.Making room for a beautiful ring.Just a beautiful blob of paint.An old wallpaper roller I bought at a flea market in Europe years ago was a huge hit.All the colors!Working, working, working.Blotting with tissue paper, lifting paint, and moving paint around.Spreading and scraping paint.Mixing oil paint with cold wax medium.Such a strong use of color!Another lover of color!Carol experimenting with using a solvent to create drips.A lovely example of a grid composition.Regina and Liz confer.Beautiful swaths of color.Jill contemplates her next move.My favorite stencil: circles.Colorful, powerful, and fascinating example of a grid composition.
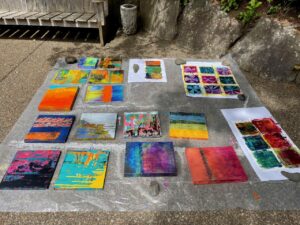
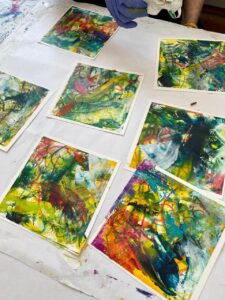
R&F Pigment Sticks – making a monoprint.Selecting pigment sticks to try out.A beautiful, finished painting. Carol started this one in a class with me a few years ago, brought it with her, and brought it to a beautiful finish.Work in progress.Encouraging and supporting each other.Experimenting with drips!I love the variety of color and marks in this series.This is a monoprint of the original oil and cold wax painting (Marc let me have the monoprint and it is hanging in my studio).Looking in . . . .A beautiful series of magical marks.Paintings drying in the courtyard,Mini abstracts.Ripping off tape to reveal small beauties.Final day show and tell.
Frenzy might be an overstatement, but I have been spending more time in my studio and after a fairly long hiatus, I have returned to painting with oil and cold wax.
Since 2016, I have taught a four-day Abstracted Landscape class at Sitka for Art and Ecology on the Oregon Coast. Because of the pandemic, this year’s class, which was sold out and scheduled for August 21-24, was canceled (as were all classes at Sitka).
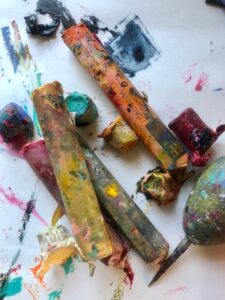
Somehow the idea of not teaching this year inspired me to jump back in to oil and cold wax after several months of painting with acrylics and working on a series of collages. It felt good to crack open the gallon of cold wax and whip up a satisfying mound of wax, begin choosing tubes of oil paint to mix, and dig out my R & F Pigment Sticks.
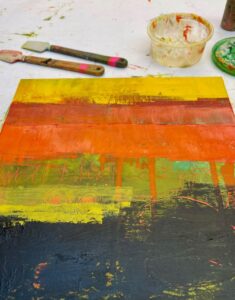
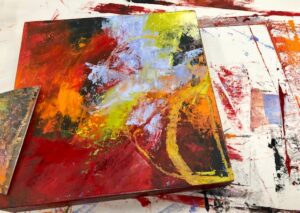
I had one deadline for a painting (so that was a BIG motivator to get into the studio and do some painting and I’ll share about that project when I can), but otherwise, I decided to pull out old boards that I had used for demos in my Sitka class last year. None of the pieces were completed, they just had fits and starts of paint and marks on them, all used to illustrate techniques and then set aside. It was nice to have something to respond to besides a plain, blank, board.
Technique demo board
I also revamped a few boards that had been completed paintings, but something was niggling at me and those pieces got a light sanding to rough up the surface, and then I started over. It was nice to erase an old painting, but know that there was that sense of history lurking below the surface.
the presence or emergence of earlier images, forms, or strokes that have been changed and painted over.
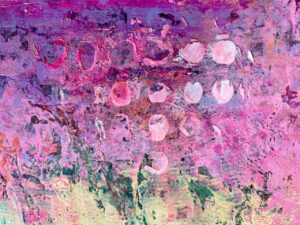
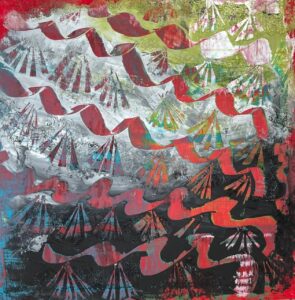
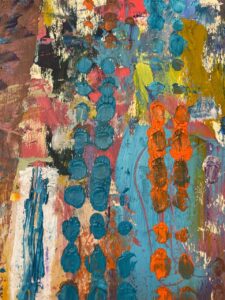
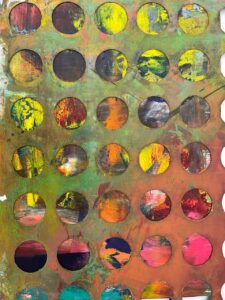
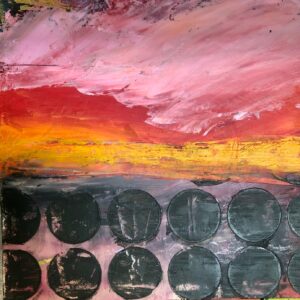
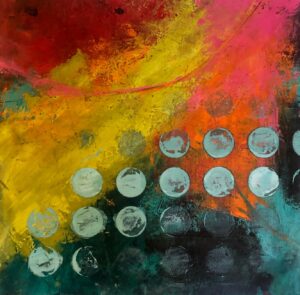
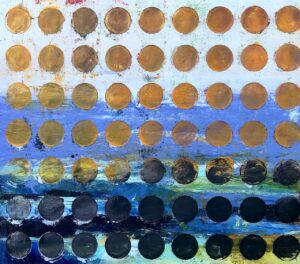
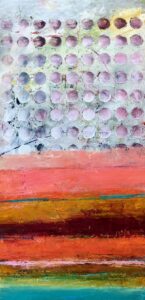
What has emerged during my extended painting sessions is the reoccurring theme of circles. I have always loved polka dots and circles and they have shown up in my work for years, but lately I have tipped over into obsession.
obsession
[/əbˈseSHən/]
noun
the domination of one’s thoughts or feelings by a persistent idea, image, desire, etc.
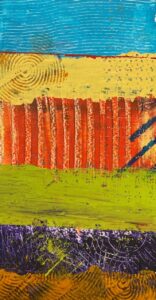
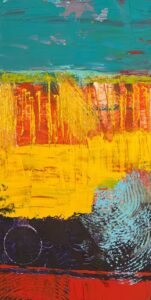
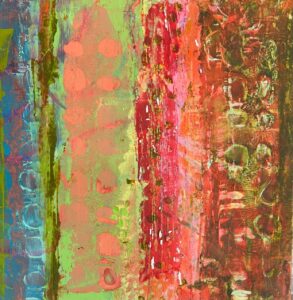
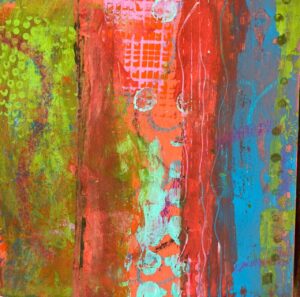
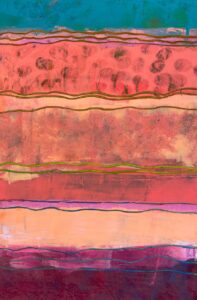
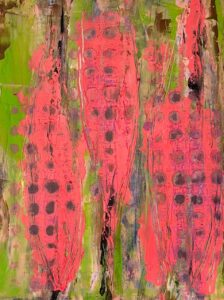
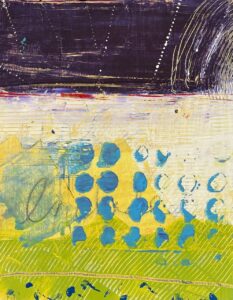
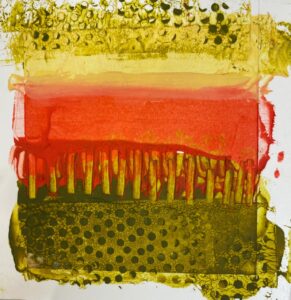
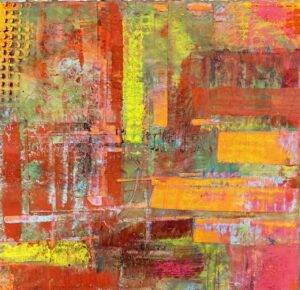
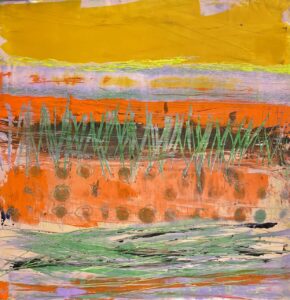
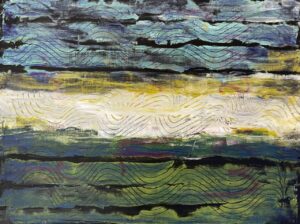
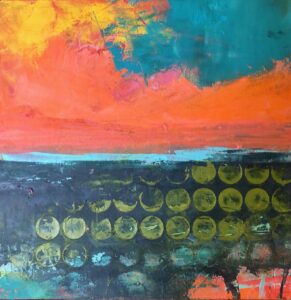
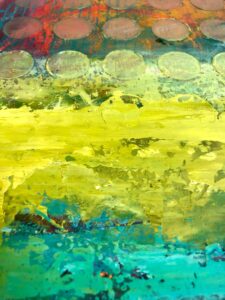
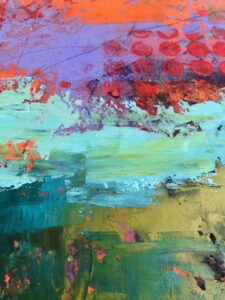
I’m using circles to excess and eventually I’ll reign myself in. Or not. In the meantime, here are several pieces in various stages of completion. All are on cradled wood substrates and they all have either Venetian plaster or limestone clay (the fancy name for joint compound) as an under layer. Other than that, some of the paint is from an earlier completed piece, or is from a demo at Sitka. Almost all of these have circles somewhere as a layer – in the plaster, buried in the paint, added on top of the paint, or some of the paint removed using a stencil to reveal paint, the circles serving as a window into an earlier layer.
“The Journey Home: The Ease of Slumber” Venetian plaster, oil, cold wax
As many of you know, I was first introduced to the use of plaster in my art by Patricia Wheeler, a Maine artist who teaches in Oregon every summer. I have taken Pat’s plaster class five times from her at Oregon College of Art and Craft and over the weeks we’ve spent together,we’ve become friends. Pat was aware that I was teaching my version of working with plaster, but recently I received a message from anartist I have never met, telling me I was “ripping” Pat off and I should be digging deeper to create my own work. I was rocked by her vitriolic words and I immediately contacted Pat to see if she was feeling the same way. Here is a portion of what Pat said:
1. Imitate. Don’t be shy about it. Try to get as close as you can. You’ll never get all the way, and the separation might be truly remarkable. We have only to look to Richard Hamilton and his version of Marcel Duchamp’s large glass to see how rich, discredited, and underused imitation is as a technique. (from Bruce Mau’s An Incomplete Manifesto For Growth)
You are such a joyful and talented addition to any class and, of course, you have reached the place in your work to be teaching your version of the plaster technique. I learned from Fred, one of the best teachers there is, to GIVE IT ALL AWAY, all the secrets, don’t hold back. He has had many people take up and expand his work in found objects. Fred is NEVER INTIMIDATED OR OFFENDED. it expands the field. You will build your own followers. KEEP TEACHING, KEEP BEING THE EXUBERANT painter you are, just wildly creative. Portland is wildly creative and I hear that in your friends response to your teaching, and god there is NOTHING NEW. There is NOTHING, REPEAT NOTHING, about you teaching a class in plaster that offends. As a matter of fact, teach beginners PLEASE and prep them for one of my intensives…KEEP ON, BE STRONG.
Her words bolstered that what I’m doing matters. I teach my version of the plaster class at an introductory level. I teach in two days a portion of what Pat teaches in four or five days. I’ve also taken the plaster process to new levels by using it as an under layer for my oil and cold wax painting, in that case, the plaster is an initial layer of texture, one of a series of processes, techniques, and layers I incorporate into my art.
All of this got me to thinking about teaching art classes. I love Pat’s generosity of spirit with regards to teaching. Michael deMeng wrote about this topic several years ago and with his permission, I share a portion of it:
I have absolutely no fear that someone is going to “steal” my style and run with it. Let them, but it won’t be my art. They may use my techniques but it will never be mine and anything I do will not be their’s. It is probable that other artists using certain techniques of mine will grow in directions that I would have never thought of. In some cases perhaps better. So be it! That is a good thing. If nothing else it keeps me motivated to stay on top of my game.
For a more recent take on this topic by Michael, check out his blog post, The Key to Finding Your Artistic Style, and his use of the martini as a metaphor.
I was introduced to oil and cold wax by my friends Katy and Nancy, who had taken a class from Allan Cox at Sitka Center for Art and Ecology several years ago. I was smitten and signed up for Allan’s workshop at Sitka Center for Art and Ecology. I remember running out of prepped and gessoed boards during the four-day workshop (Allan’s process was to put three layers of gesso on our boards), so I found cut pieces of wood in the woodpile at the cabin where I was staying and prepped them using plaster. An idea was born: oil and cold wax on plaster; I’ve used this process ever since.
“i find” Plaster, oil, cold wax on reclaimed wood from the wood pile
I then took a class on oil and cold wax from Judi Wise, who introduced me to Rebecca Crowell. I remember lingering over Rebecca’s excellent website, Oil and Wax: Resources for Cold Wax Painting, as Rebecca generously shares every single bit of information on painting with oil and cold wax. I decided I would like to share my experience with oil and cold wax and was invited to teach at a Salem studio. Because the art world is small, I contacted Judi Wise and asked if she would mind if I taught my version of oil and cold wax. Her reply: Yes, of course that would be terrific. No problem on my end; after all, I learned it from somebody, too.
When I teach my classes, I fold in techniques I learned from others, as well as techniques I’ve learned through hours and hours of my own experimentation. My trademark is laying down plaster in a way I learned years ago, then adding layers of oil and cold wax, tearing it away, and adding more layers. This is my style, my brand, my way of using the same materials as someone else. When I teach these processes, I share all my secrets, I give it away. And even with that, what others create will be different than what I teach or create.
I’ve been painting with my friend Cynthia Herron over the past year in preparation for a show in January/February, 2015. Our show, Ricochet, is based on us getting together and painting once a month using a different theme each month. We’ve been working in plaster, oil, and cold wax: our work looks nothing alike, even though we are using the exact same materials and painting the same theme.
In the end, it is all a great big web of generosity, sharing, exploration, experimentation, and evolution. I’m on my journey using all the techniques, skills, and inspiration I can gather together to make it my own.
The Journey Home. My three paintings were accepted into Salem Art Association’s annual Radius 25show, a show open to established and emerging adult artists living or working with a 25-mile radius of Salem. The theme for this year’s show is Walkabout: Paths, Journeys & Destinations. I immediately knew that my theme would be The Journey Home, the journey home for my dad, who died May 17.
I decided to use a previous painting (that my mother has hanging in her kitchen) as my inspiration. Here’s a page from my working art journal.
We were asked to write a process statement, describing our process and subject matter. Here is what I submitted:
My three Journey Home pieces were created by painting cradled wood panels with acrylic paint, applying a layer of plaster for texture and interest, sanding, scraping, then staining the plaster with watered down acrylic paint. All of this was in preparation for painting, which I did using a mixture of oil and cold wax applied with a putty knife. The subject matter is a further exploration of working in layers and its relationship to memory, something I began experimenting with over and year ago in response to my father’s descent into dementia. My dad lost his battle with Alzheimer’s just a few weeks ago and these pieces were created in response to his death.
Lots of layers and contemplation went into these three pieces.
The finished pieces.
“The Journey Home: Without a Pang of Remorse,” 18×18 inches, plaster, oil, and cold wax, on cradled panel.“The Journey Home: Caught in an Undertow,” 18×18 inches, plaster, oil, and cold wax, on cradled panel.
“The Journey Home: The Ease of Slumber,” 18×18 inches, plaster, oil, and cold wax, on cradled panel.
The show runs from Friday, July 11 through Friday, August 29, at Bush Barn in Salem, Oregon.
I’ve written this blog post in my head a dozen times over the past couple of days. I’ve titled it (“They Call Me Lefty”), re-titled it (“Brokenhearted”), and settled on something entirely different. I’ve started the post with the events of the past week, then decided to begin with my show at Guardino Gallery last March because that show was inspired by him. Now that I am actually writing this post, I’ve decided to begin somewhere else entirely.
Note: This is a bit more of a personal post than my usual art post, although art is included, it is about my dad’s battle with Alzheimer’s.
My mom and dad soon after moving into a retirement facility at the beginning of the year.
My dad was diagnosed with Alzheimer’s in 2009, and as expected, he has slowly dissolved into the disease. It’s been a painful progression of lost and scrambled words, memory loss, and unfortunately, flares of anger. A couple of years ago when my dad was earlier in his disease, I made a small visual journal as a way to acknowledge the beginning of his long journey home.
Last March I had the privilege of a solo show at Guardino Gallery in Portland. The title, Beneath the Surface: Searching For Memory, was dedicated to my dad and chronicled his fading memory. The pieces were titled to reflect his mental decline. Here are a couple of photos of my dad looking at the old black and white family photos I had scattered in the window display and a few pieces of the art I created for the show.
Creating Memories That Won’t Be RememberedWhat Came BeforeFlashes of ClarityWe Laughed TogetherCollecting ThoughtsGathering Bits of Broken MosaicsTracing the Map of MemorySeeking Refuge
Over the past six months my dad has significantly declined. He lost his driver’s license and my parents moved into a retirement community. I took my dad for drives during the summer and he always smiled and laughed during our country drives or stops for frozen yogurt.
A week ago, everything changed. My dad’s outbursts of rage escalated to the point that my mom became fearful. An event occurred that required that my family intervene. We had a family meeting with my mom and told her it was time we put dad in a memory care unit – it was the only way we could guarantee her safety. She agreed and made arrangements at the retirement community where they lived. Unfortunately, they wouldn’t have a bed in the memory care available for about 30 days. The retirement facility put an emergency alarm bracelet on my mom and said they could do some respite care with my dad – a few hours at a time in the memory care unit. She made arrangements on Friday to give it a try. That’s when it all fell apart. 9-1-1 was called, the police came, an ambulance arrived and my dad was taken to the emergency room. While there, my dad decided he had waited long enough. He unhooked his monitors, got up, put on his shoes, and started to leave. It took four security guards, two nurses, and a tech to put him back in the bed, this time with restraints. During this time, the hospital’s social services located a bed for my dad in a memory care unit across the river where my dad could stay until a bed opens up where my mom lives. On Friday night I rode in the medical transport with my dad as he was taken to memory care. He was silent the whole way. He was reluctant to go in, but he finally did. He pleaded in garbled and disconnected words to go home. I had to say good-bye and leave him. My heart broke. I hate this disease.