An Oil and Cold Wax Technique Pictorial

A gallon can of Gamblin’s Cold Wax Medium.

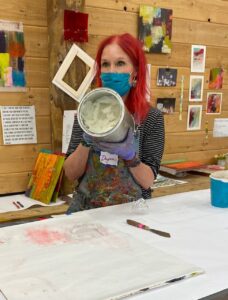
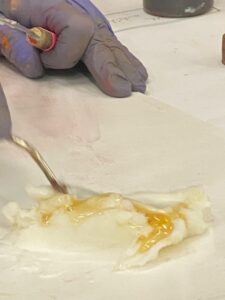
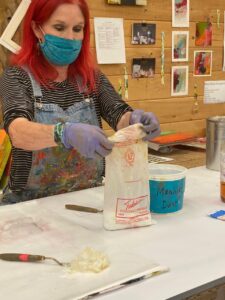
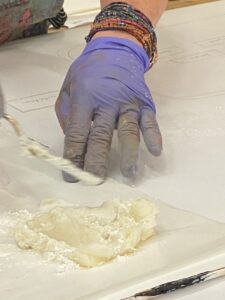
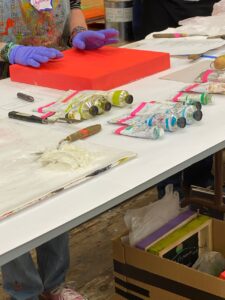
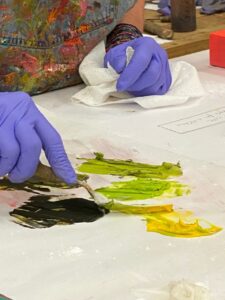
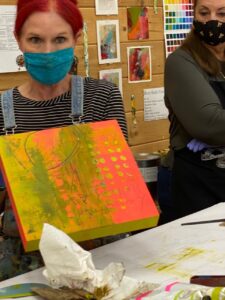
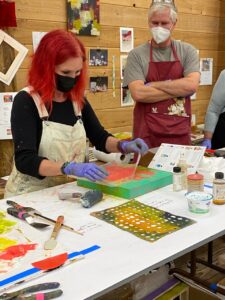
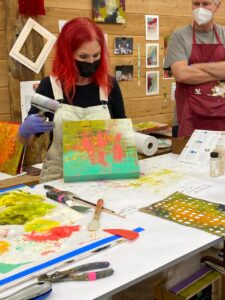
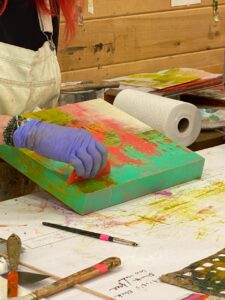
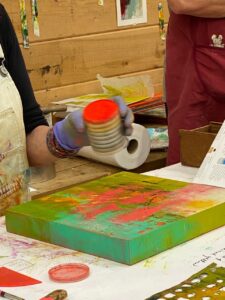
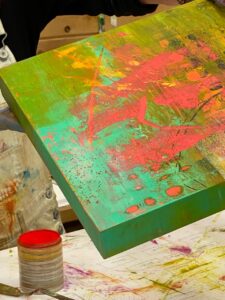
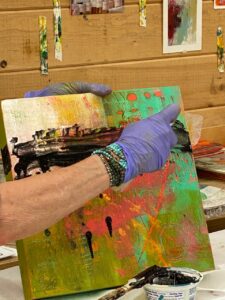
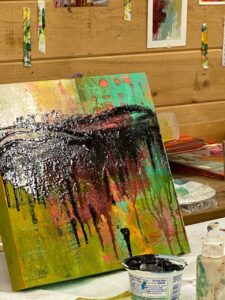
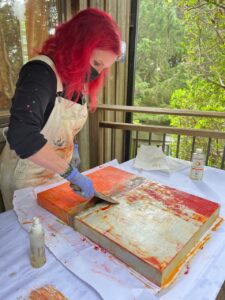
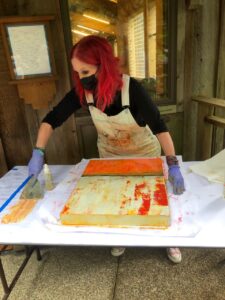
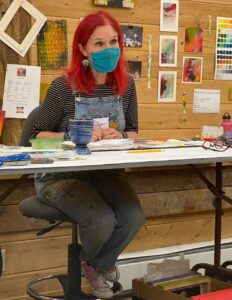
I am frequently asked about how to work with oil paint mixed with cold wax medium, especially on Instagram (you can find my Instagram at DaynaLovesArt). When I post videos of my process, I get a lot of interest and questions. Since I recently taught two four-day workshops in oil and cold wax at Sitka Center for Art and Ecology, I thought I would post a series of photos of the process. Thank you to several of my students for taking photos and generously sharing them with me.

Mixing Gamblin’s Cold Wax Medium with their Galkyd (which helps speed the drying time).
Pulling out a bag of Fedrix powdered marble dust.
Mixing marble dust into Gamblin’s Cold Wax Medium and Galkyd. The marble dust acts as another agent to speed the drying time. It can also be used to thicken the consistency of the cold wax.
Ready to mix paint!
Mixing oil paint with the cold wax mixture. I mix 50/50: 50% oil paint with 50% cold wax medium (with the Galkyd & marble dust already added).
An early demo of applying oil and cold wax mixture to the painted cradled panel. I am using a flexible metal putty knife from the hardware store.
Using a brayer and wax paper, I am “lifting” paint and creating irregular texture on the surface of the board.
Applying a nice layer of paint to the painted surface (with words added before the paint). I then lay down a piece of wax paper to lift some of the paint to create interesting texture.
Showing the demo board with some of the techniques: applying paint, applying paint with a stencil, removing paint with a stencil, making marks.
Using wax paper to “lift” paint (and then that lifted paint will be applied to a different work in progress to move the orange paint around).
Using a brayer to apply a thin veil of white oil and cold wax (in the upper right corner) over dry oil and cold wax paint.
Applying a thin layer of cold wax in preparation for adding flecks of Pan Pastel.
Applying flecks of Pan Pastels using a small palette knife to scrape a tiny bit of the pastel onto the surface; a thin layer of cold wax applied so the flecks of pastel will adhere.
Tiny little flecks of red pastel add fun interest. Once the flecks have been added, I use a piece of wax paper over the surface and then brayer over the wax paper to embed the pastel.
Applying a layer of thinned out oil and cold wax (thinned with Gamblin’s Gamsol, oderless mineral spirits).
Spreading out the oil and cold wax with added Gamsol to thin out the paint mixture.
Spraying Gamblin’s Gamsol to thin out the swath of oil and cold wax to create drips.
The drips.
Scraping off a layer of oil and cold wax using Citra Solv and a metal putty knife.*
Wiping paint from putty knife onto paper.
Any questions?!?

A beautiful comment from Angela, who has taken my class several times:

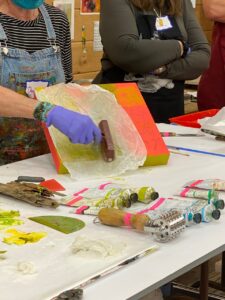
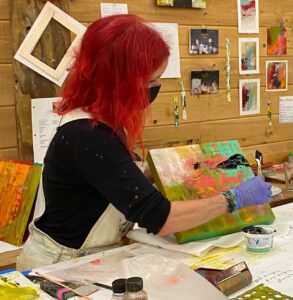
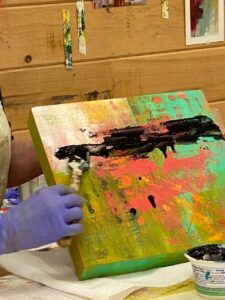
It was amazing to see you obliterate a piece, reveal fabulous lower layers and ultimately create your incredible composition. Seeing you do this in class was huge? The lesson in itself was the best possible, teaching us more by showing, creating and telling us your thoughts throughout.           Angela

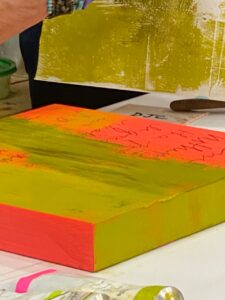
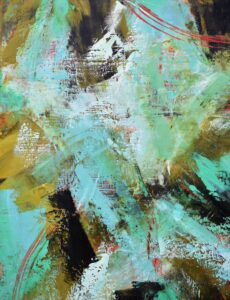
*This demo piece went on to become this painting:

“Storm Mounting,” the piece I created for an upcoming show, which I will be writing about soon.


If you are interested in more information about what I’m doing, books I recommend, techniques, shows, workshops, etc., please subscribe to my monthly newsletter by clicking HERE. In my September newsletter I will be sharing about my recent Personal Art Retreat, all the work that goes into creating art behind the scenes and sharing about the book Creative Authenticity.


Dynamic Composition – Week Six

IMG_5836

Week six was the final week in my on-line course taught by Jane Davies. The theme for our last lesson was creating depth and atmosphere. Jane covered transparency and opacity, and then more specific information on building an interesting composition. All of this requires the use of color, adding paint and removing it, shapes, depth, pattern, veiling, and lines. Since I’ve been on vacation the past couple of weeks, I’ve been working from the table in a condo using the supplies I could easily pack and transport, which means, I was just a tad limited (i.e., in our last lesson, we were to practice building layers using transparent paints, well, I hadn’t brought any transparent paints).

IMG_5803

IMG_5808

So, instead of following Jane’s instructions, I veered a bit to the left and took a sharp twist to the right. I used what I had learned over the past six weeks and applied those techniques along with my own body of knowledge to create a series of 4×6 pieces (going over some of the pieces I had created in earlier lessons). I enjoyed playing with collage, pattern, color, line, and shape – all things I use regularly in my art. I’ve added some new tools to my repertoire, and strengthened some techniques that were weak.

IMG_5815

IMG_5823

IMG_5827

IMG_5822

IMG_5814

IMG_5828

I totally and completely recommend taking a class from Jane – online or in person. She has another composition class beginning in January, Extreme Composition: Breaking All the Rules. You can bet I’ve already signed up for that one!


Dynamic Composition – Week Five

IMG_5417

I’ve done my homework for lesson five of the Jane Davies class I’m taking, Dynamic Composition. Our lesson for this past week dealt with lines and shapes, with the addition of working in grids with lines, and of course, with collage. I lined up my papers along the floor to choose from.

IMG_5402

I’ve been on vacation for the past week, so I’ve worked on this lesson from a hotel and from a condo. Here is where I worked on the first phase of the lesson, on a little desk in a hotel room.

IMG_5406

Here are the underpaintings I did in preparation for the next phase.

IMG_5415

One of our exercises was to experiment with an open grid using only collage papers, no paint, and to add a line.

IMG_5413

IMG_5652

IMG_5651

IMG_5650

We moved to a condo for the balance of our vacation — and where I had a much bigger workspace.

IMG_5648

The next portion of the project was to add a line to a collage  painting. I worked on two.

IMG_5657

IMG_5656

Only one more week to go!

Dynamic Composition – Week One

IMG_4775I’m taking an on-line class, the second time I’ve done this. Although I love the in-person classroom experience, I must admit, these on-line classes are a pretty cool way to: 1) take an art class from anywhere, 2) experiment with new techniques and ideas, 3) connect with new members of the art community, and 4) build a new body of work.

The class I’m currently taking is from Jane Davies, an artist I have followed for a long time and last AprilI had the privilege of taking a class from at Art and Soul in Kansas City, Missouri (here’s a link to the blog post I did about Jane’s class – just click here). I’ve had friends take some of Jane’s on-line classes and they raved about the experience (and how much they learned). So I jumped in and registered for Keys to Dynamic Composition. I’ve completed week 1 (of six).  Take a look at Jane’s website and blog to see her amazing work.

Our first lesson in creating a dynamic composition had to do with using variety of size and repetition with a limited color palette (yikes, that was difficult for me!) and only squares and rectangles. Here is my Pink  Series from our first exercise.

???????????????????????????????

???????????????????????????????

???????????????????????????????

???????????????????????????????For our second exercise, we had to again use a limited color palette, squares and rectangles, but we got to add one shape of our choice. I was much happier with being able to mix it up a bit. I give you my Blue Series.

????????????????????????????????????????????????????????????????????????????????????????????????????????????????????????????I’ve already read Lesson 2 and watched the accompanying videos and I can’t wait to get started with a new series. Stay tuned for my next post about the process and my finished work.