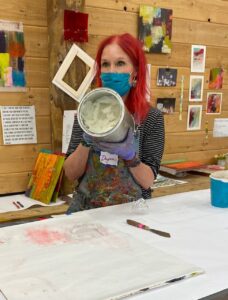
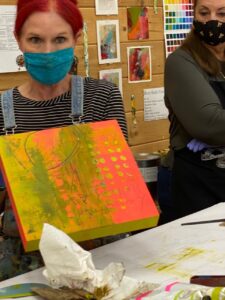
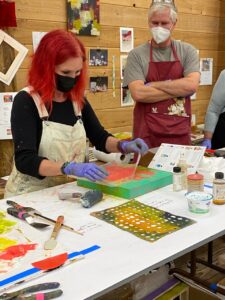
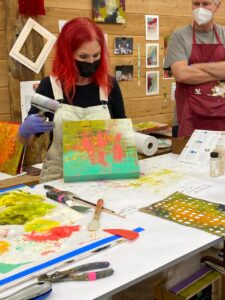
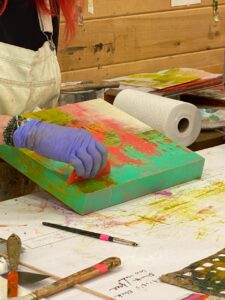
I am frequently asked about how to work with oil paint mixed with cold wax medium, especially on Instagram (you can find my Instagram at DaynaLovesArt). When I post videos of my process, I get a lot of interest and questions. Since I recently taught two four-day workshops in oil and cold wax at Sitka Center for Art and Ecology, I thought I would post a series of photos of the process. Thank you to several of my students for taking photos and generously sharing them with me.
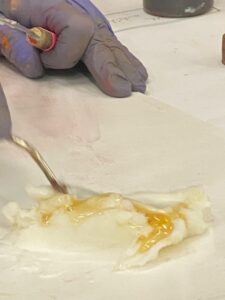
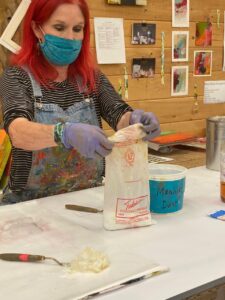
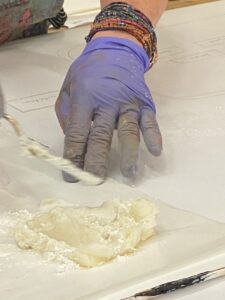
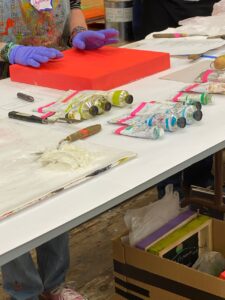
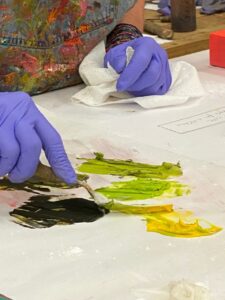
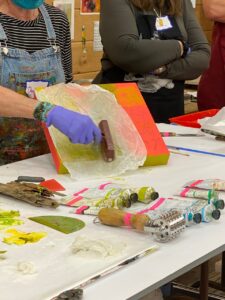
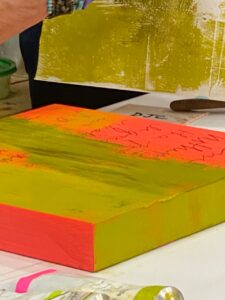
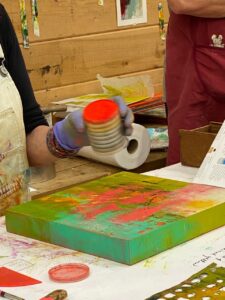
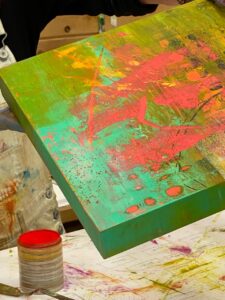
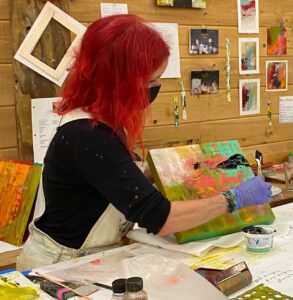
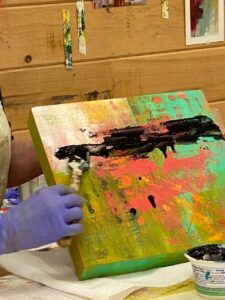
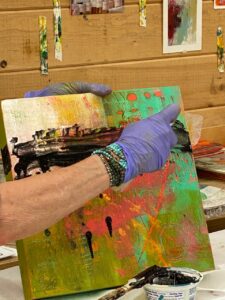
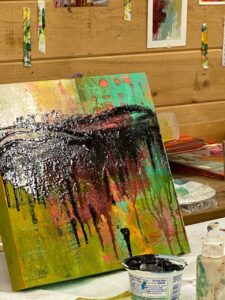
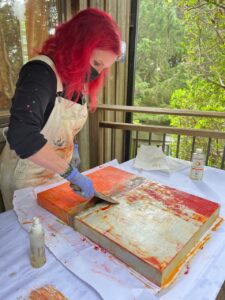
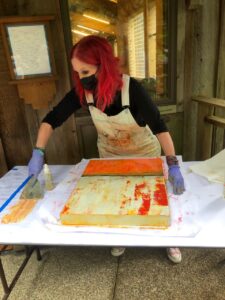
Mixing Gamblin’s Cold Wax Medium with their Galkyd (which helps speed the drying time).Pulling out a bag of Fedrix powdered marble dust.Mixing marble dust into Gamblin’s Cold Wax Medium and Galkyd. The marble dust acts as another agent to speed the drying time. It can also be used to thicken the consistency of the cold wax.Ready to mix paint!Mixing oil paint with the cold wax mixture. I mix 50/50: 50% oil paint with 50% cold wax medium (with the Galkyd & marble dust already added).An early demo of applying oil and cold wax mixture to the painted cradled panel. I am using a flexible metal putty knife from the hardware store.Using a brayer and wax paper, I am “lifting” paint and creating irregular texture on the surface of the board.Applying a nice layer of paint to the painted surface (with words added before the paint). I then lay down a piece of wax paper to lift some of the paint to create interesting texture.Showing the demo board with some of the techniques: applying paint, applying paint with a stencil, removing paint with a stencil, making marks.Using wax paper to “lift” paint (and then that lifted paint will be applied to a different work in progress to move the orange paint around).Using a brayer to apply a thin veil of white oil and cold wax (in the upper right corner) over dry oil and cold wax paint.Applying a thin layer of cold wax in preparation for adding flecks of Pan Pastel.Applying flecks of Pan Pastels using a small palette knife to scrape a tiny bit of the pastel onto the surface; a thin layer of cold wax applied so the flecks of pastel will adhere.Tiny little flecks of red pastel add fun interest. Once the flecks have been added, I use a piece of wax paper over the surface and then brayer over the wax paper to embed the pastel.Applying a layer of thinned out oil and cold wax (thinned with Gamblin’s Gamsol, oderless mineral spirits).Spreading out the oil and cold wax with added Gamsol to thin out the paint mixture.Spraying Gamblin’s Gamsol to thin out the swath of oil and cold wax to create drips.The drips.Scraping off a layer of oil and cold wax using Citra Solv and a metal putty knife.*Wiping paint from putty knife onto paper.Any questions?!?
A beautiful comment from Angela, who has taken my class several times:
It was amazing to see you obliterate a piece, reveal fabulous lower layers and ultimately create your incredible composition. Seeing you do this in class was huge? The lesson in itself was the best possible, teaching us more by showing, creating and telling us your thoughts throughout. Angela
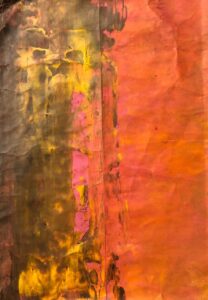
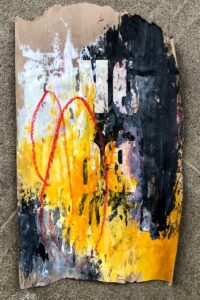
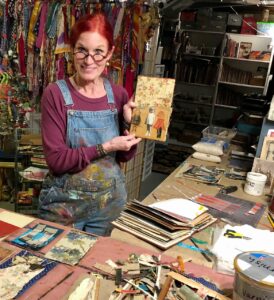
*This demo piece went on to become this painting:
“Storm Mounting,” the piece I created for an upcoming show, which I will be writing about soon.
If you are interested in more information about what I’m doing, books I recommend, techniques, shows, workshops, etc., please subscribe to my monthly newsletter by clicking HERE. In my September newsletter I will be sharing about my recent Personal Art Retreat, all the work that goes into creating art behind the scenes and sharing about the book Creative Authenticity.
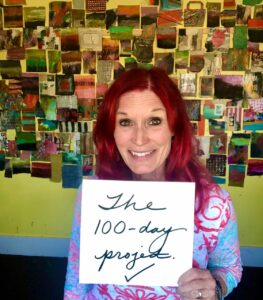
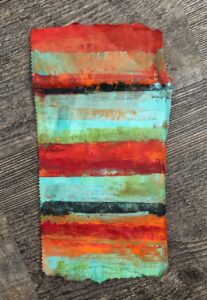
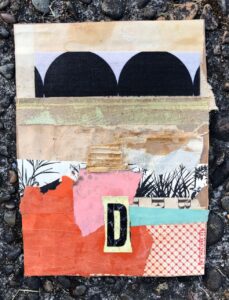
It is hard to believe that 100 days ago I embarked on a project where I committed to make a piece of art every day for 100 days. That’s a lot of days and a lot of art. I wrote about the project on Day 50, so if you want more info just click on the link.
Very first piece for #the100dayproject: acrylic painting on a scrap of brown paper bag.
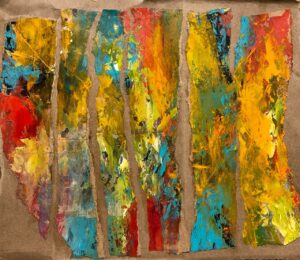
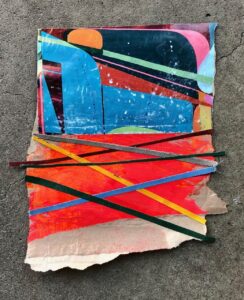
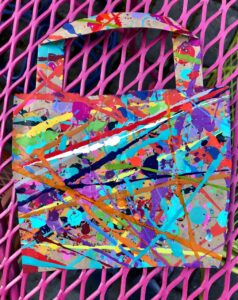
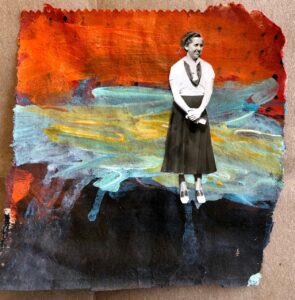
In a nutshell, over the past 100 days I created art using scraps of brown paper bags. The mediums I used included oil and cold wax, acrylic paint, and collage. Some of the materials I used in the pieces: black and white photographs, Stabilo Woody Crayons, pencils, vintage ephemera, book scraps, paper frames, and charcoal. Techniques and designs included splatter painting, drawing, stripes, circles, stencils, scraping, tearing, gluing, squeegees, and mark-making.
Last piece for #the100dayproject: Acrylic painting on a scrap of a brown paper bag, with strips from discarded books, and a B&W photo found at a flea market.
What I learned during the past 100 days:
True art is in the doing and there is no shortcut for that.
I like to work fast to keep the inner critic quiet.
It was freeing to work on such an unimportant substrate as a brown paper bag.
I kept pushing myself to be bolder and to make more startling moves on my daily pieces.
It was amazing to create so many pieces, and although each piece was different, they created a unified body of work.
Some days it was this project that propelled me to go into my studio. Sometimes I stayed.
Several new ideas emerged from this project and I am letting them percolate for future projects.
A very exciting byproduct was how two of the paper pieces I created inspired bigger paintings!
Here is a random assortment of pieces from the second half of the project:
Right now I am celebrating the completion of the project . . . .
. . . . but I have some ideas brewing for moving forward with these pieces.
I have this wacky idea of offering some of these completed pieces for sale and giving first notice to those who are on my mailing list. Haven’t signed up yet? Want to? Here’s a LINK.
On January 31st, I jumped into the #100dayproject. This project is facilitated by Lindsay Jean Thompson and you can learn more about the project by simply clicking right HERE. If you don’t feel like clicking, here is what the project is about:
Pick something you want to do every day for the 100 days of the project. You’ll post each instance of 100 on your Instagram account with the hashtag #The100DayProject. What can you do? Anything at all! Paint, draw, dance, knit, doodle, sing, brush your teeth. Once you have an idea, here are some practical tips: Make sure you can do it in 5-10 minutes a day. More time is nice if you have it, but if it’s a really time-consuming project you probably won’t do it every day. What are you curious about? What do you love to do just because? What do you want to get better at? Brainstorm with a friend or make a list of ideas. What have other people done that you find interesting? Or maybe your project is 100 days of figuring out what to do. That’s cool! Another good place to start is by thinking about what you want to get out of doing the project.
I decided I wanted to explore working on a non precious substrate and what is more non precious than brown paper bags. I carry my own reusable bags with me, but somehow I always seem to accumulate brown paper bags that I don’t throw away (or even recycle). It might be from when I order take out, or when I purchase something that doesn’t fit into the portable cloth bag I carry in my purse. For whatever reason, I decided to tear up an abundant resource and experiment with different kinds of art on a scrap of brown craft paper.
My first post on Instagram (you can find me at DaynaLovesArt) at the beginning of the project:
I’m jumping in to #the100dayproject and the challenge I’ve set up for my 100 day project is to paint a quick abstract painting or make paint marks on a scrap of a brown paper bag every day for 100 days. I needed something quick and easy, portable for my sometimes portable life, and a way to try out new ideas: colors, composition, marks…… and to create collage fodder for my stash…….and imagine the cool jumbo collage I can make with all of the brown paper bag painted scraps. #the100dayswithdayna 1/100
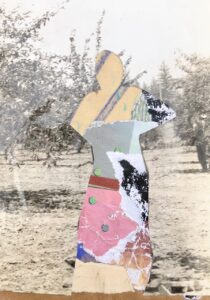
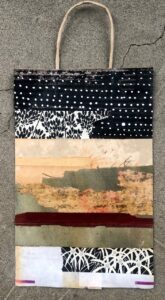
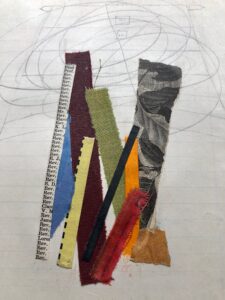
Now here it is 50 days later, the halfway point. Over the past 50 days I have created in my painting studio, in my basement studio, along the Oregon Coast, in Northern California, in Gig Harbor, and in Astoria. I get around. I have also used a multitude of materials, including (disclaimer: but not limited to): acrylic paint, Stabilo pencils, plaster, oil paint, cold wax, collage, black and white photos, book scraps, varnish, charcoal, Woody pencils, acrylic pens, and oil pastels.
I have already incorporated some of the pieces I have created in other projects, Salvage Collage on book boards, and in my 2021 journal.
In no particular order, here is a smattering of the pieces I have created on the lowly brown paper bag.
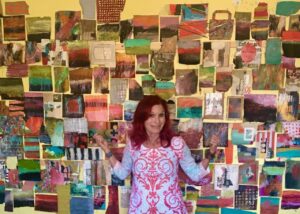
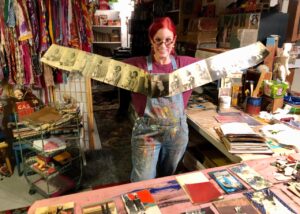
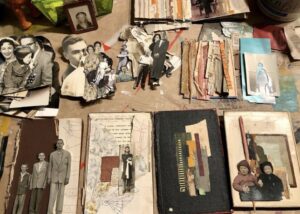
A rare glimpse of me in my basement lair*, where I store all of my scavenged paper, vintage scrapbooks, ephemera, photographs, book scraps, old books, and book boards, and where I work on my Salvage Collages.
Lately, I have been on a Salvage Collage toot, and I work on collages in three ways:
♦ In a vintage scrapbook/journal/notebook devoted to experimenting with collage ideas.
♦ In my 2021 journal, which is a combination of collage, paint, photos, etc. Anything goes.
♦ On discarded book boards to create official Salvage Collages, which are for sale.
So join me for a whirlwind tour of the lady in the basement.
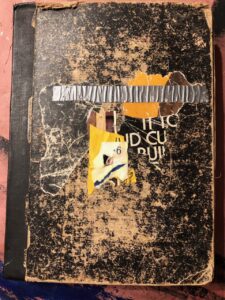
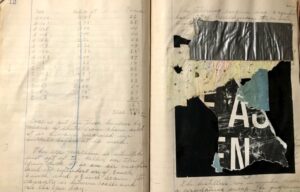
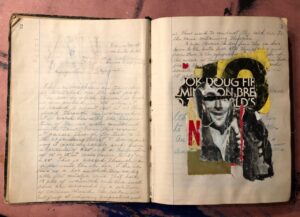
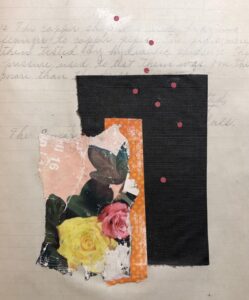
Here are a few photos of my scrapbook journal where I experiment with ideas for collages and create just for me. The journal itself was used as a scrapbook/workbook for someone in the Department of Marine Engineering and Naval Construction (1905) and the pages are filled with notes, drawings, assignments (with corrections and grading), and mimeographed training papers. I pulled out most of the glued in papers, but bits of residue are still present.
Vintage Scrapbook/Journal/Notebook by Dayna J. Collins
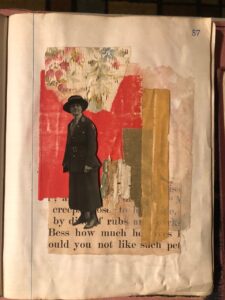
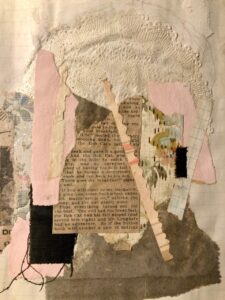
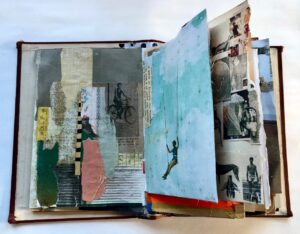
Next up is my 2021 journal. It is usually a paint journal, but this year I decided to create a junk journal, a journal I made using found papers to create three signatures, which I then sewed into a book where I had pulled out all of the book pages. This is a work in progress and I just started adding collage and paint at the beginning of the new year.
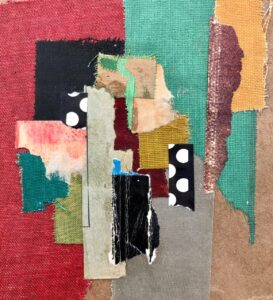
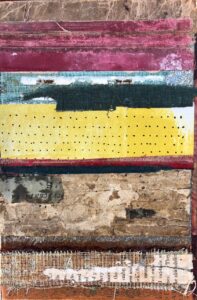
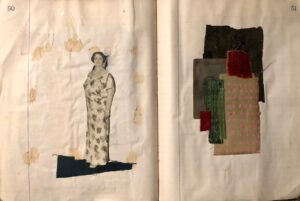
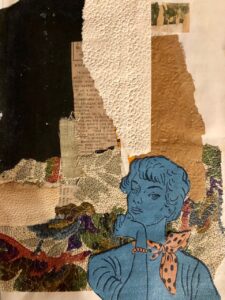
Finally, my ongoing Salvage Collages, always in some level of process, always spread out on the table; my washer and dryer are across from my work tables, making it convenient to throw in a load of laundry, then spin around and start puttering and auditioning scraps of papers, book pieces, or black and white photographs. During these work sessions, I usually find myself working on all three: Salvage Collages on book boards, my 2021 Journal, and my experimental vintage scrapbook/journal.
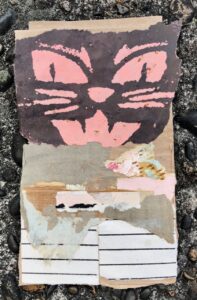
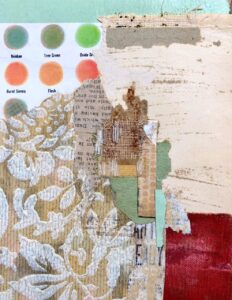
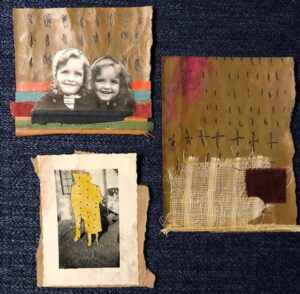
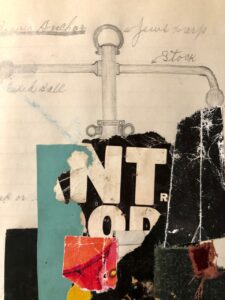
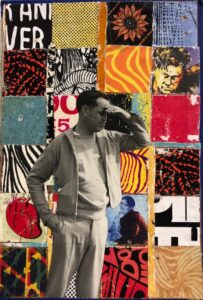
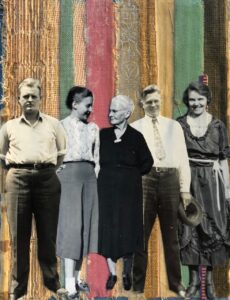
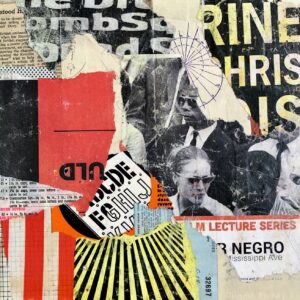
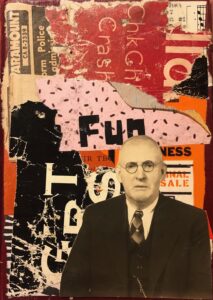
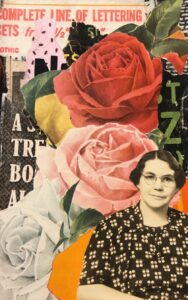
I am always trying to move my Salvage Collages in different directions, pushing what I have already done, finding new ways to use my materials. Recently, four friends gifted me lots of wonderful papers, ephemera, and photographs, and these new materials have been informing my latest work. (A special thank you to Sam, Bonnie, Jami, and Mavis for your generosity and interesting papers and photos.) Here is a selection from my most recent Salvage Collages.
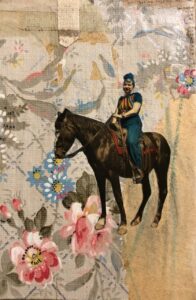
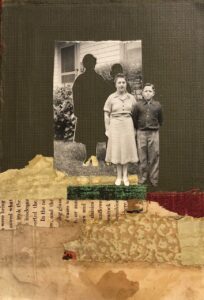
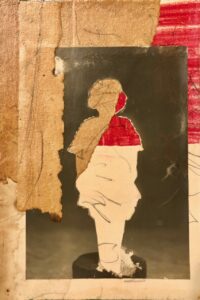
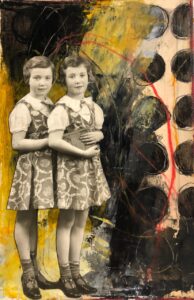
“Bold Adventures,” Salvage Collage on book board by Dayna J. Collins“Constant Equilibrium,” Salvage Collage on book board by Dayna J. Collins“Silent Recognition,” Salvage Collage on book board by Dayna J. Collins“Reciting Poetry by Heart,” Salvage Collage on book board by Dayna J. Collins“Weighing Possibilities,” Salvage Collage on book board by Dayna J. Collins“Mischief Makers,” Salvage Collage on book board by Dayna J. Collins“Beverly,” Salvage Collage on book board by Dayna J. Collins“A Series of Concurrent Events,” Salvage Collage on book board by Dayna J. Collins“A Little Out of Place” Salvage Collage on book board by Dayna J. Collins“Full of Sweet Nostalgia,” Salvage Collage on book board by Dayna J. Collins“A Smoldering Promise,” Salvage Collage on book board by Dayna J. Collins“A Sense of Purpose,” Salvage Collage on book board by Dayna J. Collins“Void of Silence,” Salvage Collage on book board by Dayna J. Collins“Spirit of Cooperation,” Salvage Collage on book board by Dayna J. Collins“Seeking Forgiveness,” Salvage Collage on book board by Dayna J. Collins“Interrupted Story,” Salvage Collage on book board by Dayna J. Collins“The Echoes and Shouts of Memory,” Salvage Collage on book board by Dayna J. Collins
Several of these new pieces are available at Salem on the Edge and others are available directly through me.
*It is also where I store all of my metal, wood, found objects, crazy collections, and miscellaneous stuff that defies classification. But today’s focus is on collage materials.
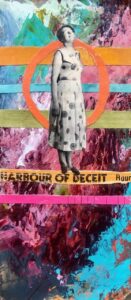
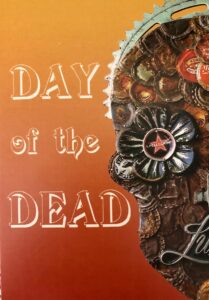
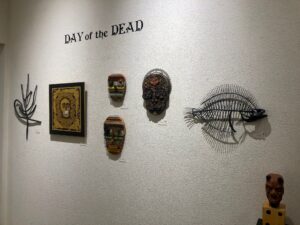
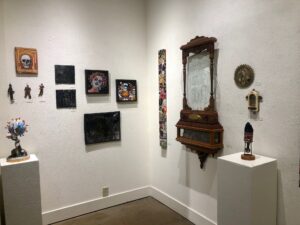
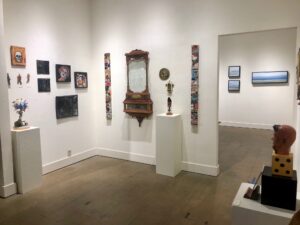
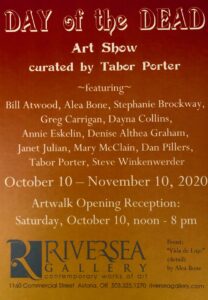
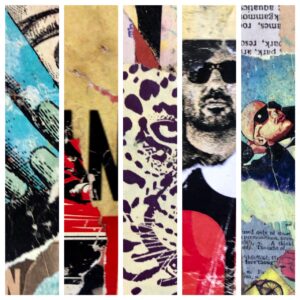
I have two pieces in the current Day of the Dead show at RiverSea Gallery in Astoria (on the Oregon Coast) and I want to share a bit about how the pieces were created. But first, the show. Tabor Porter is the curator and he invited his friends to participate. It is a small and intimate show in the Alcove of the gallery. Here is how Tabor describes the show:
The Day of the Dead reminds us to live our lives to the fullest; because death is always an integral, ever-present part of life. The present day Pandemic poignantly reminds us of that. So as we commemorate the death of our loved ones in celebration, we remind ourselves and others how important their lives were. In doing so we remind ourselves how important ours can be. This group of artists that I consider my friends endeavor to show us their relationship with this day of mourning and celebration.
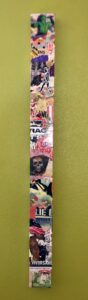
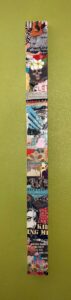
The two pieces I created for the show are 4 inches wide and 48 inches tall, making them difficult to photograph. But here goes:
If you are interested in seeing the Day of the Dead show at RiverSea Gallery, the show will be up through November 10, 2020.
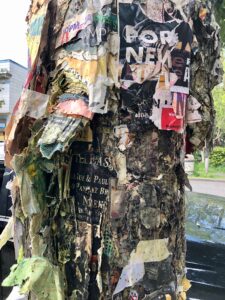
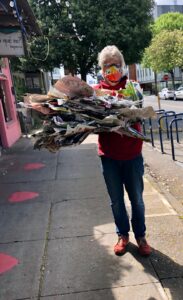
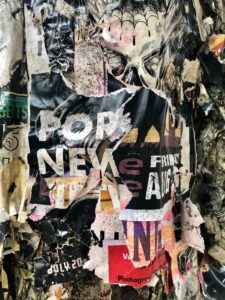
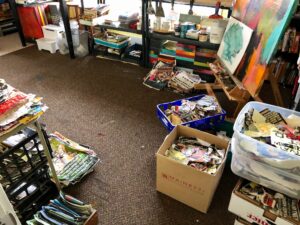
Now for the back story. I’ve been collecting random papers and ephemera for years and in more recent years, I have become an urban scavenger, pulling posters and fliers from telephone phones and buildings. As I was thinking ahead to Day of the Dead, I knew I wanted to incorporate some graffiti posters into my pieces, so as the pandemic put the state in lock down, Howard and I masked up and ventured to Portland in search of old, weathered, beat up, out-of-date fliers. The streets were empty and we were able to scavenge lots of fodder.
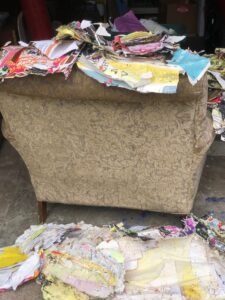
Let me tell you this about being an urban scavenger: you need gloves, tools to pull the bunched up posters from the telephone pole, and even if there isn’t a pandemic, you might want to wear a mask. The material is sometimes wet (don’t pull the posters from the bottom of the pole because sometimes it is a bit yellow, if you know what I mean), stinky with creosote, and buggy. So when we got all of the papers home, I aired them out in the garage and outside for several weeks.
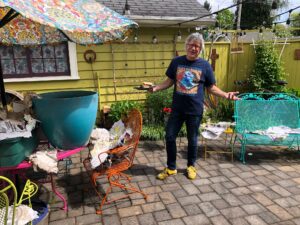
Then once the paper was dryish and aired out, I had to handle every single piece to pull out all of the staples and nails. Again, gloves are a must.
Once the processing was complete, I sorted and loosely organized the materials into bins and boxes.
I used the pieces and scraps to create my two pieces for the DOTD show at RiverSea Gallery.
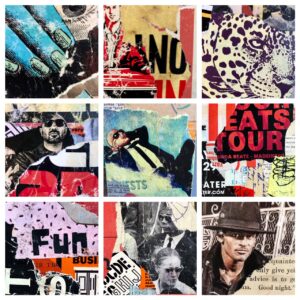
“Revisiting the Past” Dayna J. Collins“Thoughts Reaching Into the Past” Dayna J. Collins
I have also used the scavenged posters and fliers in other ways; both for under layers in mixed media pieces as well as on book boards for my Salvage Collages.
Under layer for mixed media pieceBook board Salvage CollageBook board Salvage Collage
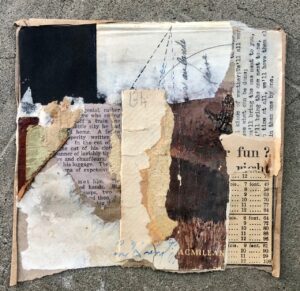
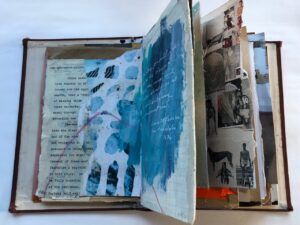
In mid March, all hell started to break loose as the Corona Virus began to consume our lives in one way or another. On Monday, March 23, Governor Brown mandated a statewide stay at home order. March 23 was the day I decided to create a journal where I could record not only what was taking place around the world and in Oregon, but also for me tucked safely inside my home. What was my new life going to look like in the upcoming weeks, or perhaps months.
The first thing I did was to make a journal using an old book and then gathering lots of paper fodder. I used book pages, music, scraps from torn apart books, and pieces of random papers, post cards, and handbills from my collage stash.
Once my papers were gathered, I bound the book using waxed linen thread and began embellishing the pages with scraps and raggedy book bits. Every day I would go through my journal and add interesting pieces to several pages, put wax paper between the pages, weigh it down overnight, and then come back the next day and do it all over again to different pages. I did this process of turning the pages and adding more day after day for three weeks.
Finally, on Monday, April 13, I declared that my journal was ready, the pages prepared.
At the same time, throughout the past three weeks, I have been writing notes to myself and making lists about the pandemic: sleeping in, routines, gift of time, rhythm of the day, tooth pain, sporty sneakers, oral surgery, helpless, daily walks, fake news, megalomaniac, self care, roller coaster . . . . .
I have printed things I have read: a poignant poem, a particularly good article on adjusting to how to live during this strange time, the timeline of how our president has fumbled and mismanaged the entire pandemic since the beginning. All things I feel inspired to record, share on my pages, or use as jumping off points for processing the range of emotions I have been feeling.
For now, I’m sharing a sampling of my pages before I make any entries, do any writing, make any lists, record poems and timelines, letting the beauty of the collages and materials speak for themselves.
Did I mention when I made the first journal that I made two more at the same time!?! What was I thinking?
I’m pleased to share that I currently have an exhibition of my Salvage Collages at Willamette University’s Hatfield Library. My show, Salvage Collage: A Sort of Magic, is on view through January 20, 2020. It is always a thrill to show at the library, where I used to work 20 years ago.
Leading up to my exhibition, I was feverishly creating new work and revamping some old pieces to give them new life.
On the day of hanging, I used book carts to get my boxes and suitcases to the second floor of the Hatfield Library.
Then I spread everything out and began the process of stacking books in the cases and auditioning where to put the assorted Salvage Collages.
After a couple of hours, my work was complete.
The public is welcome to visit the library (and my exhibit) during library hours.The best place to park is on State Street, where there is metered parking (Willamette is located right across the street from the State Capitol). While you are at the library, check out the Pacific Northwest Artists Archives, which is right next to the two cases where my exhibition is. There is also some great art on the first and second floors by regional artists.
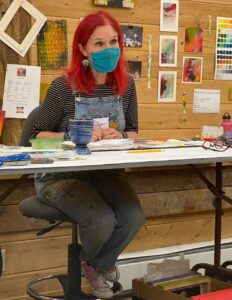
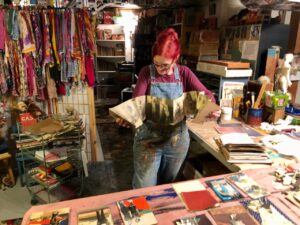
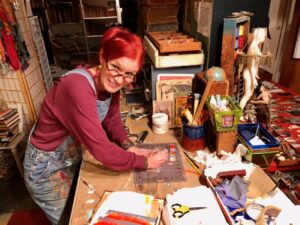
I wrote a blog post on May 8about how I was asked by Pat Wheeler if I would take over teaching her Restorative Painting: The Architecture of Memory class at both the Oregon College of Art and Craft and Sitka Center for Art and Ecology, as she was unable to make her annual trip to Oregon. The OCAC class wasn’t a go, but the Sitka class was and it took place last week. What a week.
I arrived late on Monday, and got settled into McKee House, my cabin in the woods.
I spent Monday evening preparing the classroom, one of my favorite things to do. After getting it ready, I turned off the overhead lights and turned on the party lights. A magical space.
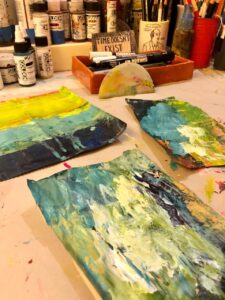
Tuesday morning, my students arrived ready to work. I was loosely following Pat’s syllabus, including the addition of her idea for the class to create small works of art on heavy watercolor paper. These pieces could be used as a warm up, as inspiration for bigger pieces, or just for the pleasure of creating small pieces of art. I decided I would start off with a timed warm up, where I quickly told students what to do on three squares of paper spread out across their table: Draw a line, add a swath of paint, make a mark using a color, using a sharp object, draw into the wet paint, make a mark with your eyes closed, ending with the instruction to do whatever they wanted for five minutes. It was a great ice breaker and got everyone ready to jump in with their big boards.
Samples from Pat’s “Art Box,” which she sent to me in advance of our class.
Pat mentioned that she had a couple of boxes in storage at Sitka, which the Studio Tech had pulled out. It was pretty exciting to see what she had left in anticipation of this year’s class. If only Pat had jumped out and surprised us!
Getting down to business, the first step was painting our boards, which was a great way to get our bodies moving. I bought Pat’s signature paint: Benjamin Moore’s Tomato Red and Carbon Copy, along with a periwinkle blue of my choosing. After all of the boards were painted, outside they went to dry.
It was then time to break open our buckets of mud, technically known as joint compound, but the fancy term for using on show cards, limestone clay.
And then the boards went back outside to dry. Fortunately, the weather cooperated for three of our four days.
On Wednesday morning, we began doing one of the messier steps: sanding.
A signature of Pat’s process is incorporating photo transfers onto plastered and sanded boards. I’ve never been very proficient with this technique and although I practiced at my home studio prior to class, I was less than successful. Todd and Kell to the rescue. Both have worked with transfers with great success and I asked if they would be willing to demonstrate this technique.
After their successful transfer demos, everyone jumped in.
Wednesday afternoon, and it was time to begin sharing painting techniques. How to do washes and stains with paint, add and subtract, push and pull, a little of this, a lot of that, writing, stenciling, scritching and scratching . . . .
Sometimes more plaster was needed either as an eraser, or to add interest.
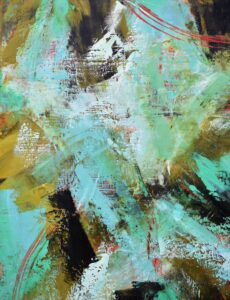
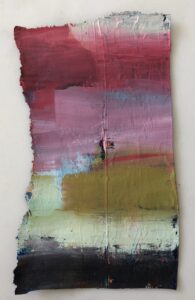
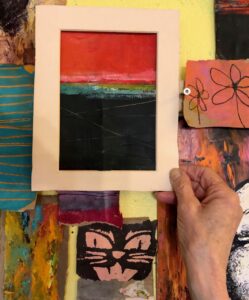
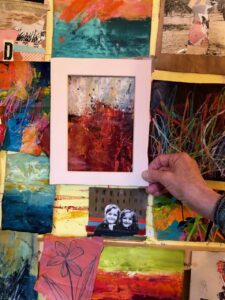
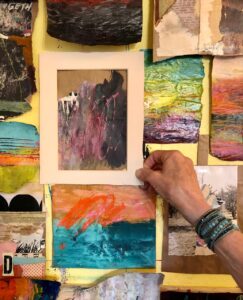
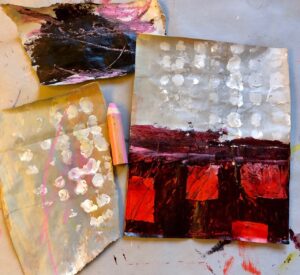
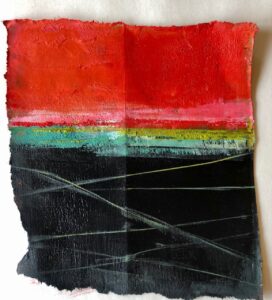
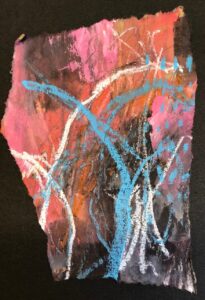
On Friday morning, my final demo was adding a layer of cold wax to seal the layers. Here’s Kira adding cold wax to her beautiful painting.
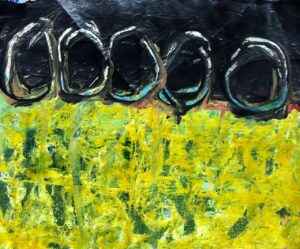
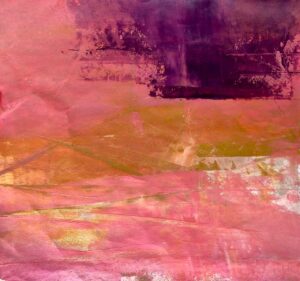
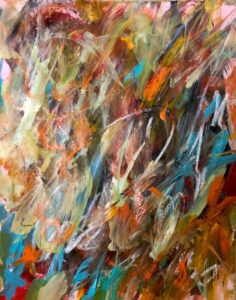
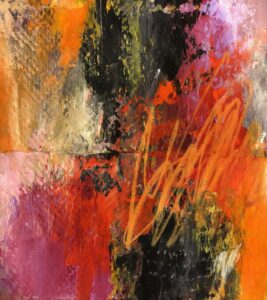
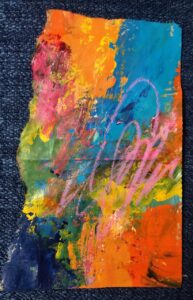
I worked on a demo piece during the week, and on Friday morning I sealed it with cold wax as well. Here are a few of my favorite areas:
During the week, the studio was a hive of activity. I opened the doors an hour early every day, and kept the studio open into the evening so anyone who wanted extra studio time, could take advantage (and almost everyone did).
On our final afternoon, we created time for show and tell, sharing what we enjoyed about the process, as well as what was challenging.
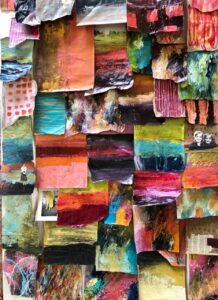
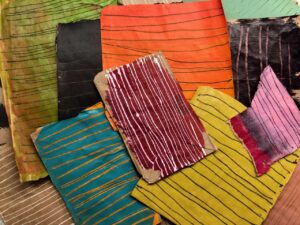
I drove home grateful for a class willing to accept a substitute teacher, who gave their all and worked hard, and left with a beautiful series of art. Because their work was so beautiful, here are photos of the pieces they chose to share with the class.
. . . . I would not have believed them. But it happened last Sunday.
We were on vacation in Los Angles last week to see an uncle, visit museums, art galleries, and just do some general tromping about. The sites we wanted to visit were divided by neighborhoods to minimize the time spent in the car. On a whim, right before we left for the airport, I googled “flea markets.” The Pasadena Rose Bowl Flea Market, of course, popped up. It is held one Sunday of the month. Guess which Sunday it was being held? (Insert gasping and hyperventilating.)
We arrived early (they have different entrance times and prices, we were there by 8:00 am), got our bearings, and set off for the Orange Area: Antiques and Collectibles. This was important because there are 2,500 booths, so we needed to narrow our focus.
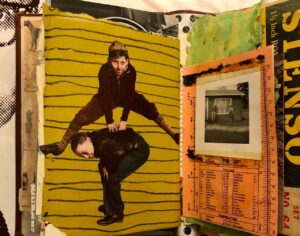
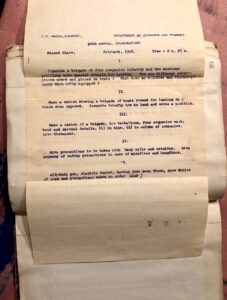
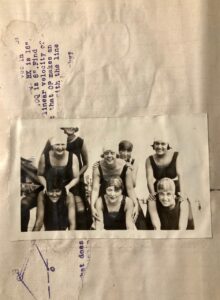
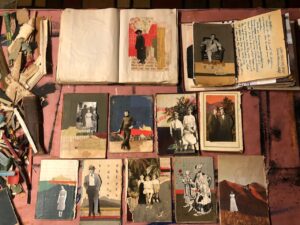
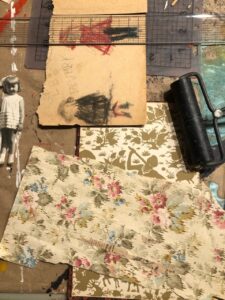
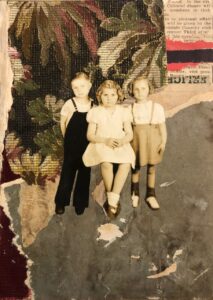
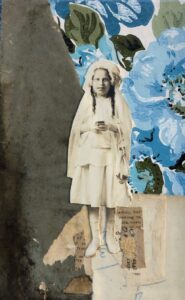
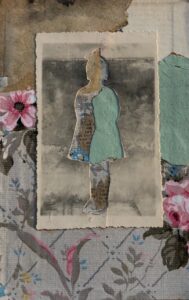
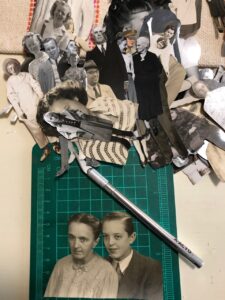
My focus for the market was black and white photos, paper debris, and any sort of ephemera; I rounded up a smattering of everything.But the mother lode was a scrapbook I saw, walked away, then had to go back and purchase.
The scrapbook belonged to Virginia Anita Bugg, and chronicled her early 1930s high school experience on through getting engaged and married. The scrapbook was crammed and crumbly, so when I got home I carefully deconstructed each page into categories: letters, photos, gum wrappers, menus, ticket stubs, dance cards . . . . I even discovered a smashed celluloid doll toward the back. Take a look:
The deconstruction:
I’ve already integrated the pieces into my studio and I’m looking forward to creating new lives with the remnants of Virginia’s life.
Back to the Flea Market, some photos of roaming about.
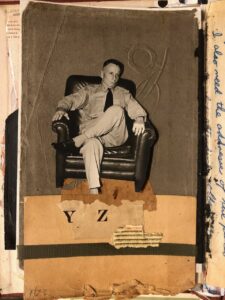
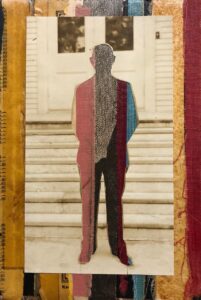
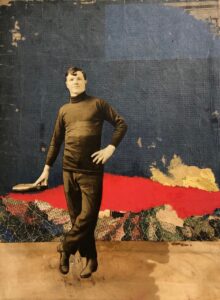
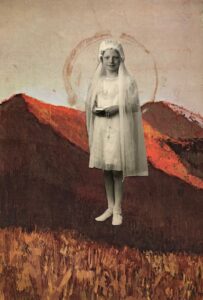
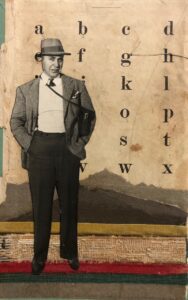
For the past year, I’ve been working on a special project titled What’s Your Story, Real or Imagined: Telling Stories Through Black and White Photos. You can read more about it here and here. My vision has led to a month long artist-in-residence this fall at the Salem Art Association’s ART ANNEX, a panel discussion in October (more on this later), and a one-day workshop (read on). I’m happy to announce that registration is now open for the workshop.
The workshop will be held on Saturday, October 28, from 9:30 am – 4:30 pm. The cost is $75 plus a $25 materials fee. I’ll be supplying you with black and white photos of strangers and everything you need to create a series of collages. Of course, if you want to showcase family members or friends, you are welcome to bring your own black and white photographs as well as personal letters and ephemera. Here is a description of the class:
Ancestors. We all have them, but do we know their stories. In this class, we’ll build a story based on a black and white photo — real relatives or “adopted” ones. We will create aged backgrounds using paint and stains, then build a collaged vignette using old letters, ephemera, envelopes, lace, tape, trim, string, and a variety of lightweight found objects. Working in a grid, everyone will create a patchwork quilt of stories, which we’ll put together in honor of those who came before us.
All materials are provided including watercolor paper, photographs, ephemera, lightweight found objects, embellishments, and everything needed to create a series of collages.
However, students may bring any of the following if they wish to personalize their pieces:
Black and white photographs of family/friends; the smaller the photos the better
Anecdotes and stories if the person in the photos is known
Ephemera, i.e., letters, envelopes, tickets, tags, brochures, programs, etc., any kind of paper trail
Lightweight personal found objects, i.e., feathers, buttons, pieces of lace or fabric, vintage trims, postage stamps, etc., personal to the person being featured.
In the meantime, I’ll continue to gather and collect old photographs and the detritus of lives well lived. And a huge thank you to those friends who have gifted me with old family photo albums, bundles of letters, and so many wonderful found objects and ephemera, that I’ve been moved to tears.
We’ll be taking all of these wonderful treasures and assembling them into a series of collages that tell personal stories. Real or imagined.
The other exciting news is that in conjunction with my month-long artist in residence, a group show, Symbols, will be taking place in The Annex. I’ve included a link to the Call for Artists. Proposals are due September 1, so act quickly.